Follow the steps below to set up your PIXMA G4210 on a Wi-Fi® network from a Windows computer.
These instructions are for a Windows computer. Refer to this article if you need setup instructions for a Mac®.
There are two parts to the setup process:
-
Start the setup on your printer.
-
Download and run the setup file on your computer.
1. Start the setup on your printer
-
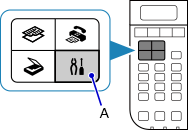
Press the Setup button (A) on your printer.
-
Use the right / left arrow buttons (B) to select Wireless LAN setup, then press the OK button.

-
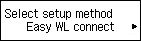
Select Easy WL connect, and press OK.
-
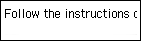
When the printer preparation is complete, the screen below will appear. Return to the application screen to continue the setup.
 It may take a few minutes for the printer to detect the screen changes.
2. Download and run the setup file on your computer
-
Download the most recent setup file.
Setup can also be performed by using the Setup CD.
-
Read the information carefully taking note how to run the setup file if it doesn't start automatically. Then select Download.
-
Select Start Setup.
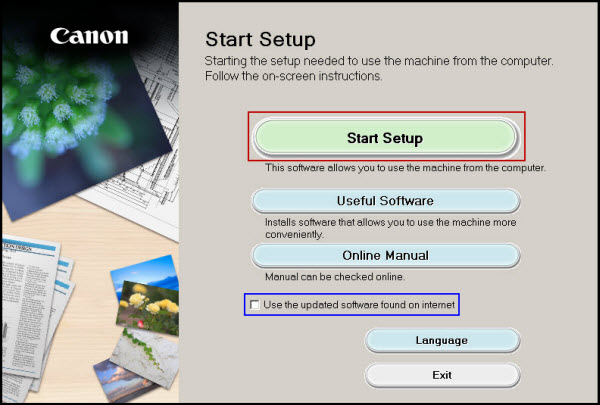
Use the updated software found on internet only appears when using the Setup CD to install the drivers and software. Select this option to have the setup program obtain the latest drivers and software from the internet. If this option is not selected, the setup program will install the drivers and software contained on the CD.
-
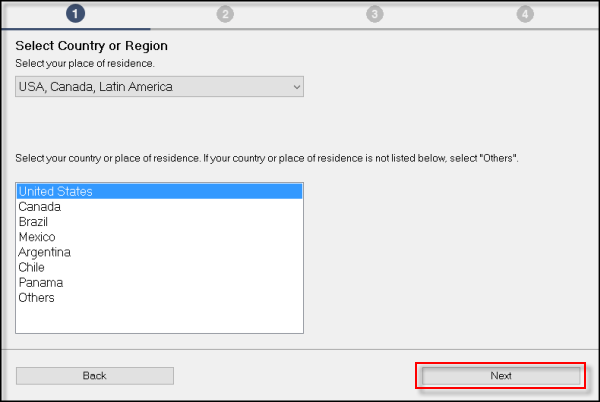
Select the appropriate region, then select Next.
-
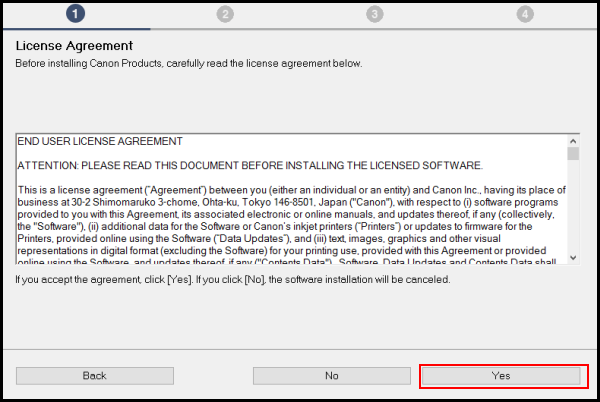
Select Yes on the License Agreement screen to continue.
-
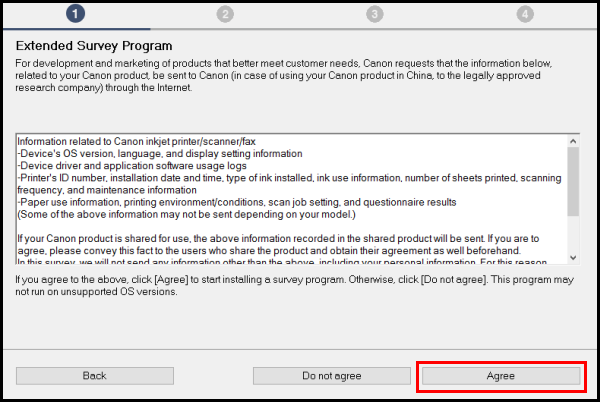
Select Agree or Do Not Agree to the Extended Survey.
-
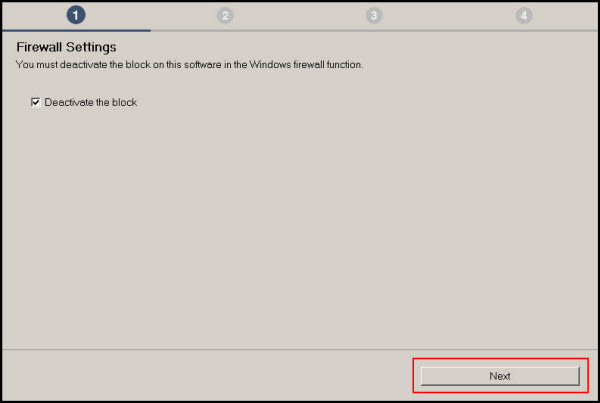
Select Next on the Firewall Settings screen.
-
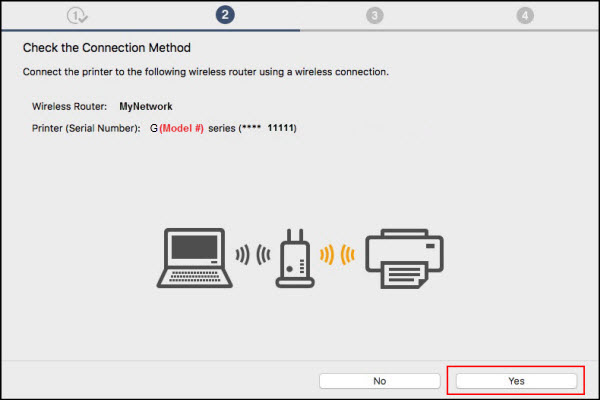
Select Yes on the Connection Method screen.
(Model #) is used as an example. Your model series number will appear in the setup program.
-
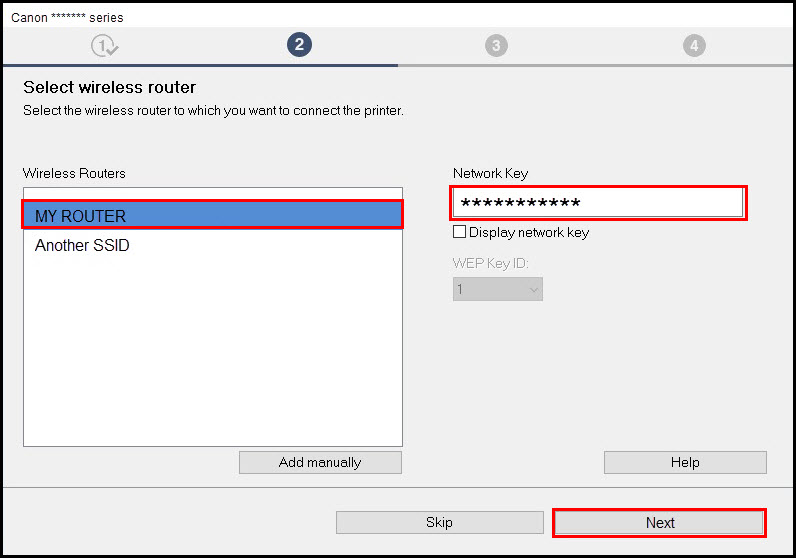
Setup continues. If the Select wireless router screen (below) appears, select the wireless router to connect to the printer, enter the Network Key (password) and select Next.
This screen may not appear, depending on your router and connection settings.
-
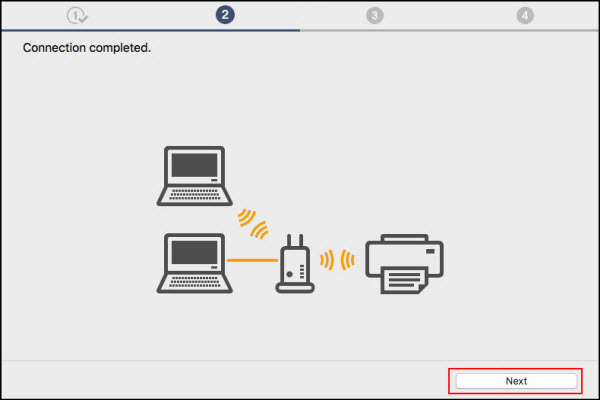
Setup continues. Wait for the process to finish.

-
On the Connection completed screen, select Next. You are almost finished.
-
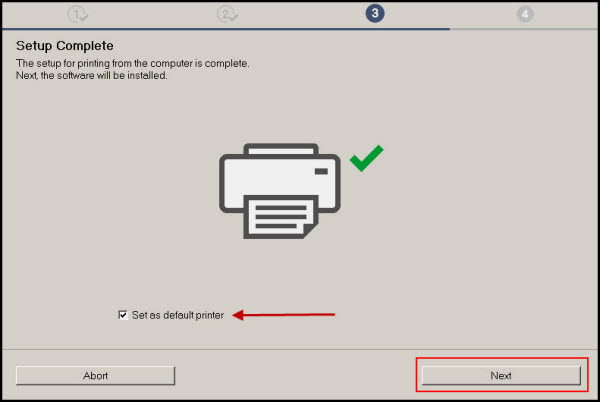
On the Setup Complete screen, select Next.
-
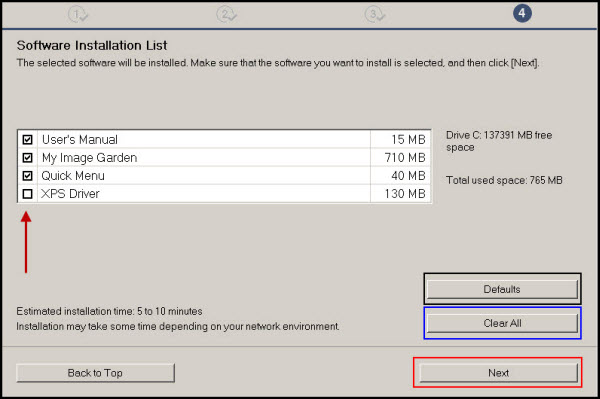
Select any optional application software you want to add (click on a checkbox to select or de-select an option), and select Next.
-
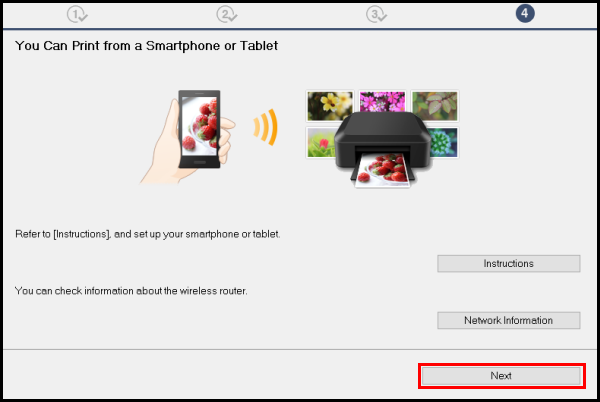
On the You Can Print.... screen, select Next.
-
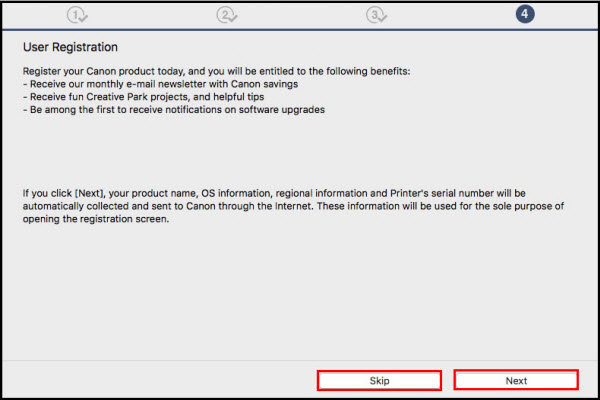
Select Next or Skip on the User Registration screen.
-
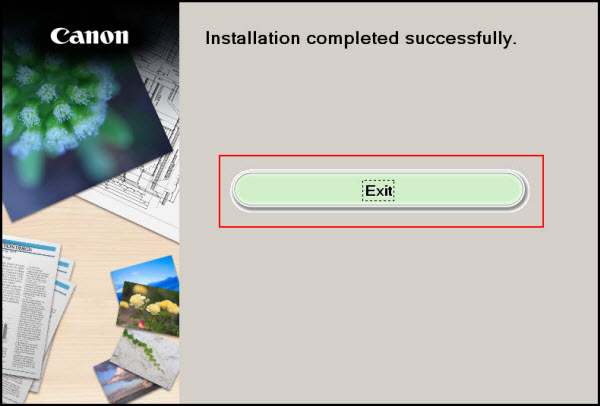
Select Exit. You are now connected and ready to print wirelessly.
If your product issue was not resolved after following the steps above, or if you require additional help, please create or log in to your Canon Account to see your technical support options.
Or if you still need help, visit our Canon Community by clicking the button below to get answers:

____________________________________________________________________________________________
