Replacing the Maintenance Cartridge
When the maintenance cartridge becomes full of collected ink, the Maintenance Cartridge lamp lights up and a message “Maintenance cartridge full” appears on the status monitor. The procedures for replacing the maintenance cartridge and checking the status of the maintenance cartridge are described below.
 CAUTION
- For safety, keep the used maintenance cartridge out of the reach of children.
- If a child licks or swallows ink, consult a physician immediately
 IMPORTANT
- Do not leave the printer for a long time with the maintenance cartridge removed.
- Do not insert or remove the maintenance cartridge except when replacing it.
- Put the used maintenance cartridge in the attached plastic bag, zip the plastic bag closed completely, and then dispose it.
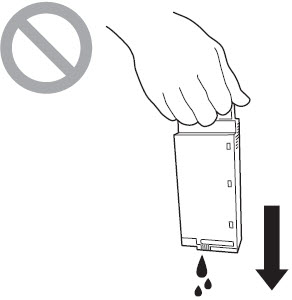
- Do not shake or strongly press on the maintenance cartridge or hold it with the ink inlet down. Ink leaking from the ink inlet could stain your clothes or the area around you
- Take out a new maintenance cartridge from the box.
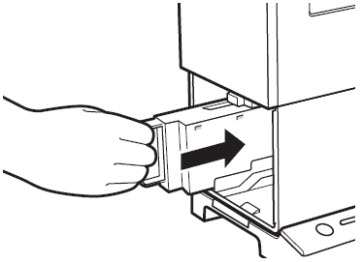
- Pull out the transport unit from the printer.
- Remove the stacker if it is used.
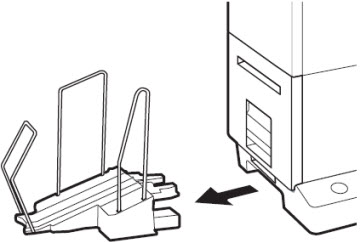
- Raise the transport unit lever, and pull the transport unit out
- Pull out the transport unit with both hands as shown in the figure.
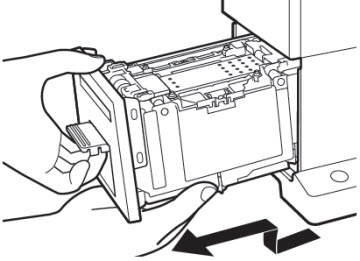
- When pulling the transport unit out of the printer, hold it firmly with both hands so that it does not fall.
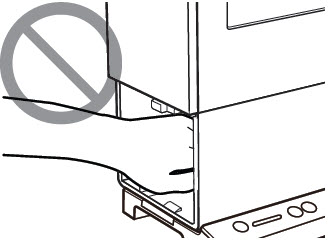
- Do not put your hands into inside of the printer. Failures or physical injury could result. Further, your hands or clothing may get dirty with ink adhered inside of the printer.
IMPORTANT
- When pulling the transport unit out of the printer or inserting it in the printer, be careful not to hit it strongly against the table or shelf. The surface of the table or shelf could be damaged
-
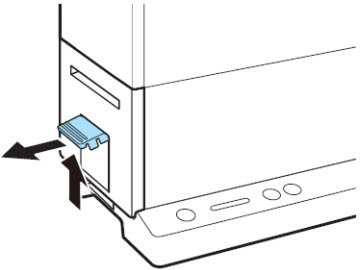
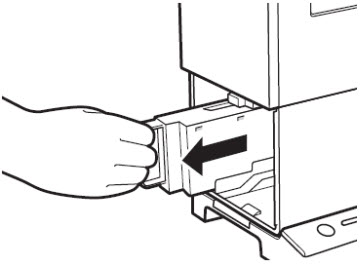
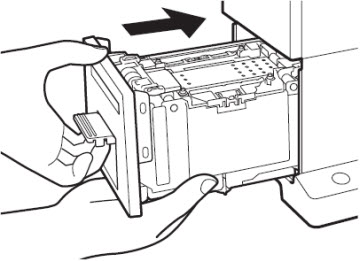
- Pull out the maintenance cartridge filled with ink.
- Slowly pull out the maintenance cartridge.
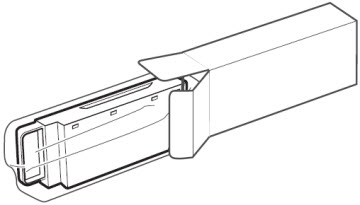
- Put the used maintenance cartridge in the plastic bag.
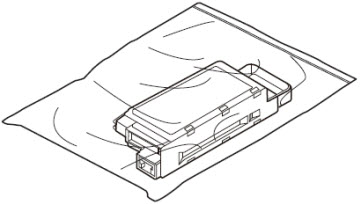
- A new maintenance cartridge comes with a plastic bag for putting a used maintenance cartridge in it
- Zip the plastic bag closed completely.
IMPORTANT
- Do not shake or strongly press on the maintenance cartridge or hold it with the ink inlet down. Ink leaking from the ink inlet could stain your clothes or the area around you.
- Install the new maintenance cartridge.
- Insert the maintenance cartridge as far as it will go.
- Set the transport unit in the printer.
- Slowly insert the transport unit as far as it will go.
- As you do this, be careful not to touch the paper guides causing their positions to be changed.
CAUTION
- When inserting the transport unit, be careful not to get your fingers caught between the transport unit and the main body of the printer.
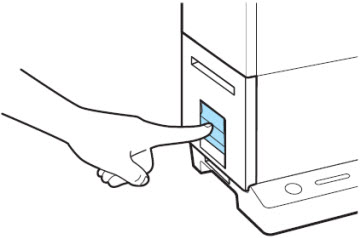
- Push the transport unit lever until it clicks.
- When using the stacker, install it back to the correct position.
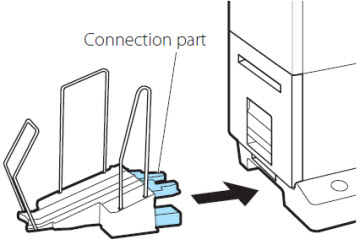
- Insert the connection part of the stacker straight into the slot of the printer.
IMPORTANT
- Do not store the used maintenance cartridge with the ink inlet down. Ink leaking from the ink inlet could stain your closes or the area around you.
- Dispose the used maintenance cartridge according to the local laws and regulations.
