 These instructions are for a Mac®. Refer to this article to download the software for Windows.
Follow the steps below to set up your PIXMA MX922 on a Wi-Fi® network.
There are two parts to the setup:
-
Start the setup process on your printer.
-
Download and run the setup file on your computer.
1. Start the setup process on your printer
-
Press the Menu button on the printer.
-
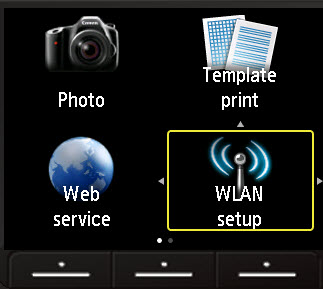
Use the arrow keys to highlight WLAN setup, then, press OK.
-
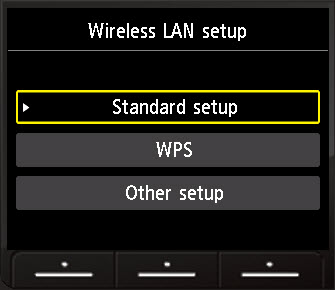
The printer searches for nearby networks. A screen appears with Standard setup highlighted. Press OK.
If a WPS-enabled wireless router is nearby, a message asks you to press the WPS button on the router, then the OK button on the printer. Press the Stop button on the printer if you don't wish to connect to this router.
-
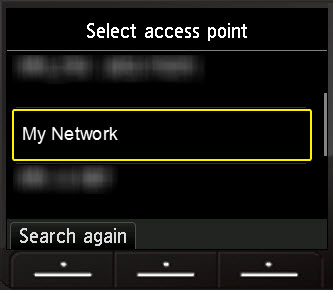
The printer searches for nearby networks. Use the up / down arrow keys to select your network, then press OK.
-
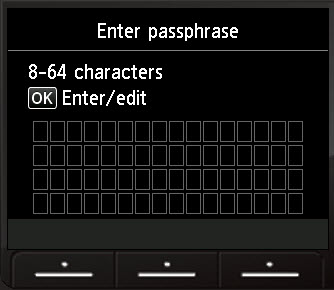
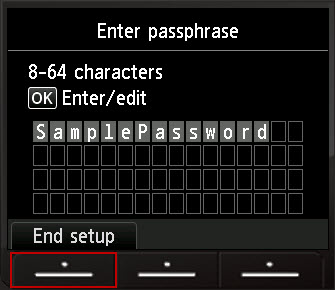
If your wireless router has a password, the Enter passphrase screen displays. Press OK to move to the character entry screen.
If your wireless network doesn't have a password, the printer tries to connects to the network automatically. When it connects, press OK.
-
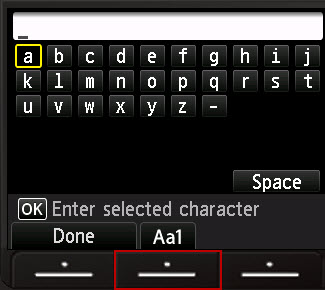
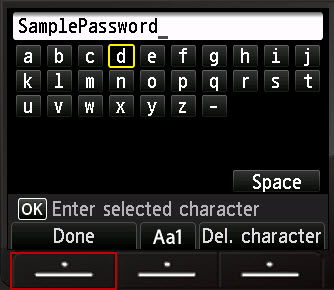
Use the arrows and the OK button to enter your wireless network password.
-
Press the middle Function button (below Aa1) once to switch the character from lower to upper case.
-
Press the middle Function button twice to switch to numbers and symbols.
-
If you make a mistake, press the right Function button to delete the characters.
-
Refer to Understand entering numbers, letters, and symbols for more information.
-
After you enter the password, press the left Function button (under Done).
-
Your password displays. Press OK to make any corrections, or press the left Function key (under End setup).
-
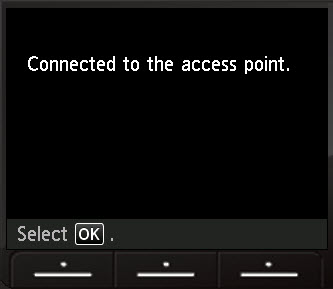
The printer attempts to connect to the network. When the printer connects, press OK.
If the printer fails to connect to the wireless network:
-
Press OK and verify that the password is correct. Make changes if necessary.
-
If the password is correct, unplug the router for 15 seconds, then plug it back in and try to reconnect the printer to the network.
2. Download and run the setup file on your computer
After your printer connects to the network, you need to download the drivers and software for your Mac.
-
Go to the PIXMA MX922 support page. The system detects the version of macOS® on your computer. If the website doesn't detect your version, select it from the Operating System drop-down.
-
Under Software & Drivers, select the Download button to the right of the CUPS printer driver, the MX920 series scanner driver (this includes the Canon IJ Scan Utility).

-
After the drivers download, choose Download to the right of the Canon IJ Network Tool.

-
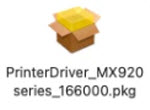
Go to the location where you store downloads. Double-click on each package file to open it. Follow the on-screen instructions for each file you download.
If you get a message that you can't open the file because it wasn't downloaded from the App Store, you can bypass the message. Control-click or right-click on the package file, then choose Open.
-
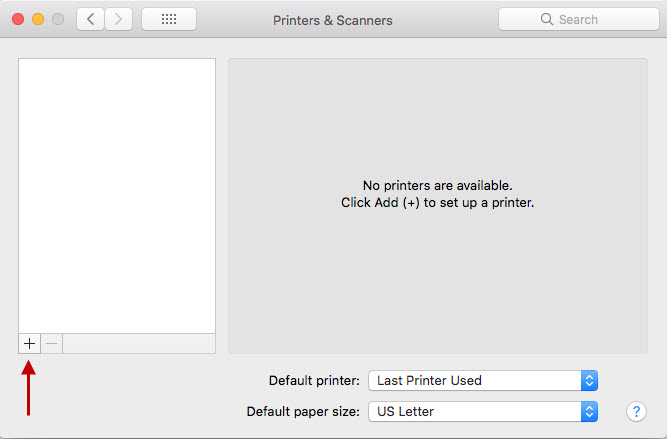
Select the Apple menu, then System Preferences. Then select Print & Fax, Print & Scan or Printers & Scanners (the name varies according to your Mac OS®).
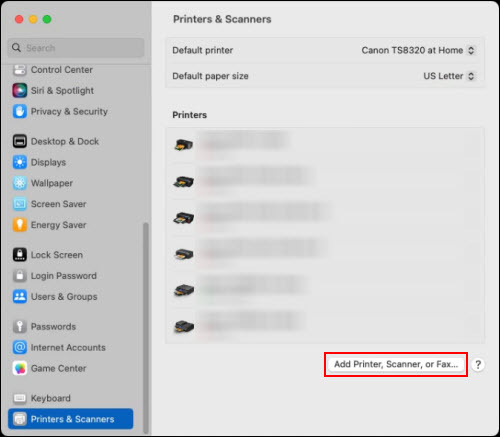
 If you are using macOS 13, select System Settings from the Apple menu. Select Printers & Scanners from the bottom of the list on the left side of the window.
-
Select the + (plus sign) at the lower-left of the window. If a list of printers appears under the +, select Add printer or scanner...
If you are using macOS 13, select Add Printer, Scanner, or Fax...
-
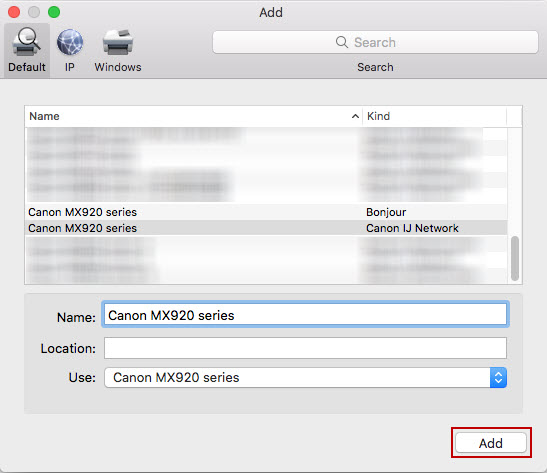
Wait until MX922 appears in the Add window, then select it. Make sure Canon MX920 series is selected in the Use: drop-down, then select Add. The printer is now ready for use from your Mac.
If your product issue was not resolved after following the steps above, or if you require additional help, please create or log in to your Canon Account to see your technical support options.
Or if you still need help, visit our Canon Community by clicking the button below to get answers:

____________________________________________________________________________________________
