Canon My Printer is an application that provides quick access to basic maintenance functions and troubleshooting for your printer.
To launch My Printer, select My Printer in the appropriate location.
-
Windows 11 / 10: From the Start menu, select All Apps > Canon Utilities > My Printer. If you do not see this, type My Printer in the search bar.
-
Windows 8: Select My Printer on the Start screen. (If My Printer is not displayed on the Start screen, select the Search charm, then search for "My Printer".)
-
Windows 7 / Windows Vista / Windows XP: From the Start menu, select All Programs > Canon Utilities > My Printer > My Printer to start My Printer.
When My Printer is launched, the main menu will appear.
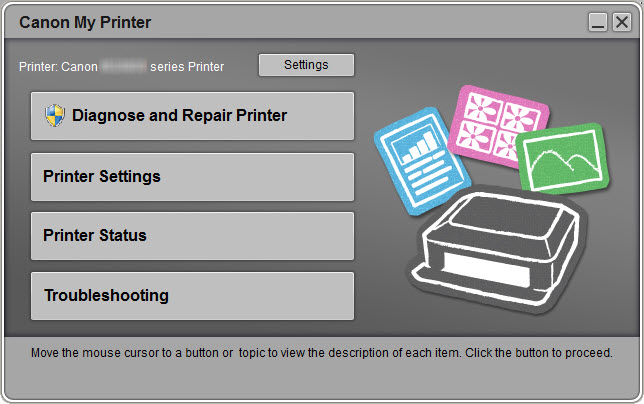
The following options are available:
Settings
Printer Settings
Printer Status
Troubleshooting
Clicking the Settings button will open the Settings window.
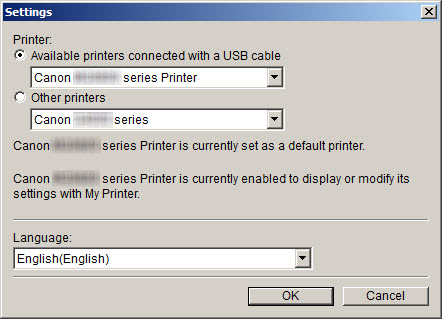
In here, you can choose which printer you want to use in conjunction with this program. If you have more than one Canon printer connected to your PC via USB, you can select the printer whose settings you want to display or modify.
You can also choose other Canon printers if they are installed but not connected via USB. However, if the printer in question is not connected via USB, you will not be able to perform any troubleshooting on that printer.
You can also specify the language used by Canon My Printer by selecting it in the Language drop down menu.
Click OK to confirm your printer selection, or Cancel to cancel any changes made.
If you change the language used by My Printer, you will need to close and re-launch My Printer for the change to take effect.
Return to top
Clicking Printer Settings will open the Printer Properties window. Here, you can specify what settings you would like to use when printing from your PC.
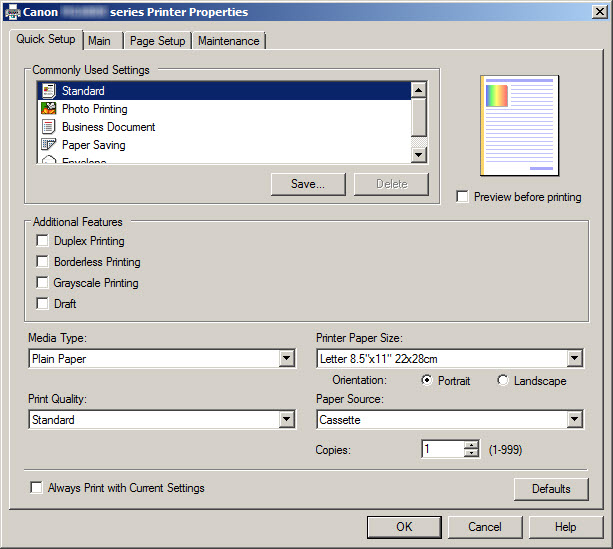
Change the settings as desired, then click OK.
Return to top
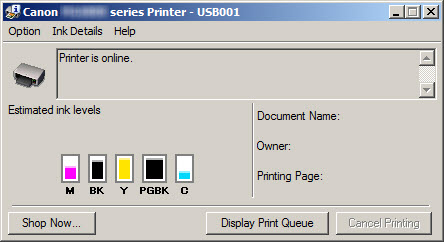
Clicking Printer Status will open the status monitor for your printer. This will show the amount of ink remaining in your printer, as well as any errors that the printer may be experiencing.
Return to top
Clicking Troubleshooting will open a window where you can diagnose and repair communication issues, troubleshoot print quality issues, and more.
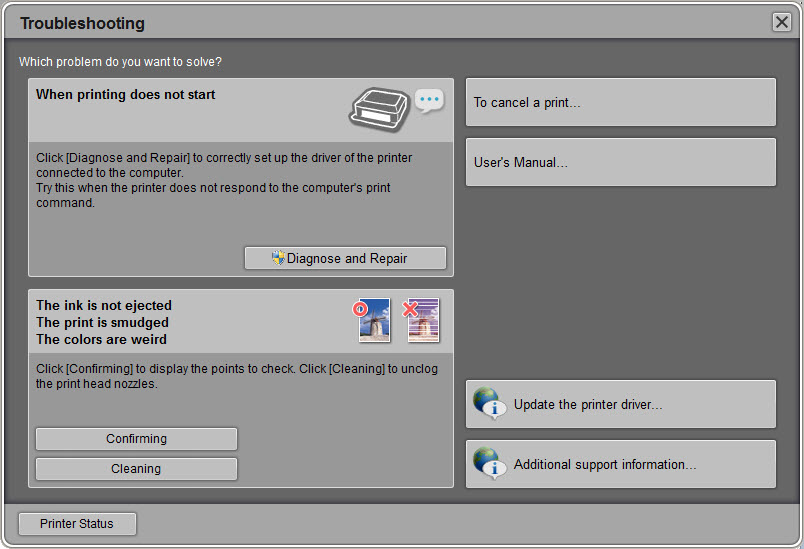
For information on troubleshooting print quality issues in this section, please click here.
For information on canceling a print, please click here.
Clicking Update the printer driver... or Additional support information... will take you to the Canon USA support page.
Clicking Diagnose and Repair will examine the driver settings for a printer connected to your PC via USB. If the computer is set up to work with the printer across a network, you will not be able to use this option.
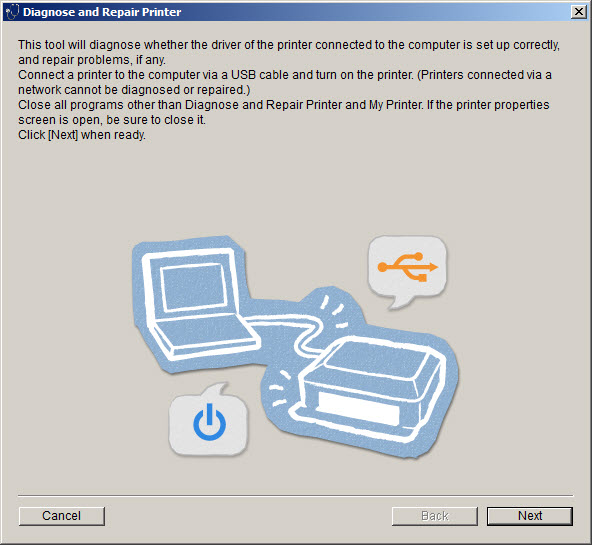
Click Next to proceed. The program will attempt to communicate with the printer via USB. If the printer is not detected, an error message will appear.
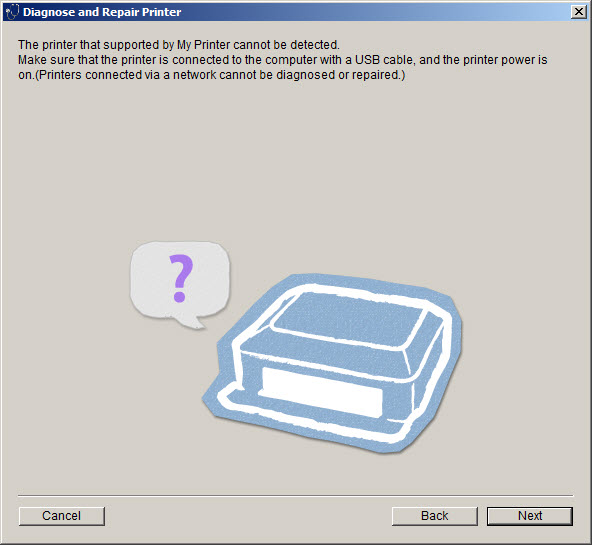
Make sure that the printer is powered on and connected via USB, then click next.
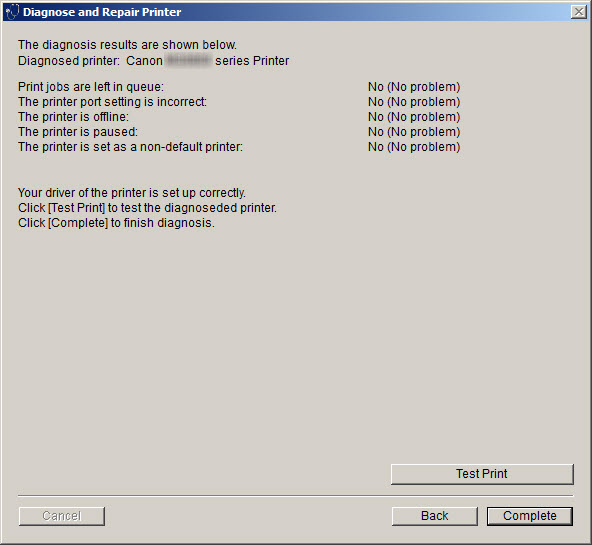
When the printer is found, the driver settings will be examined. If no problems are found, the following screen will appear:
If any issues are found, they will be displayed:
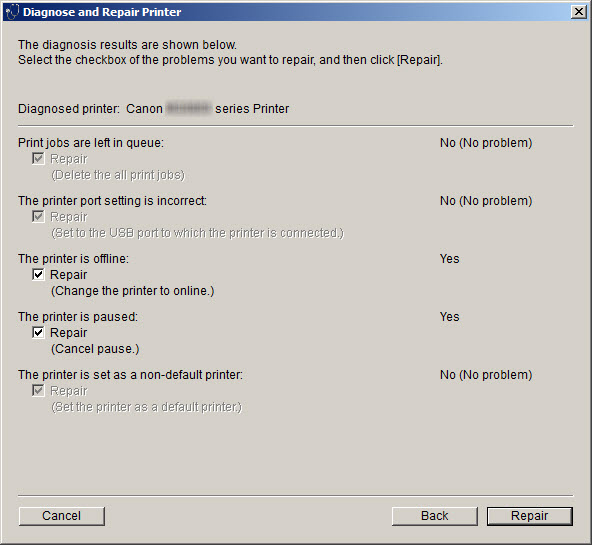
Place checks in the boxes for the problems you want to fix, then click Repair.
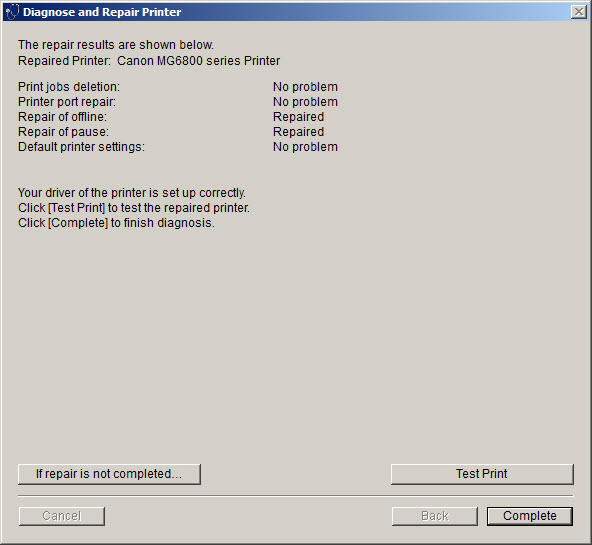
A results screen will be shown:
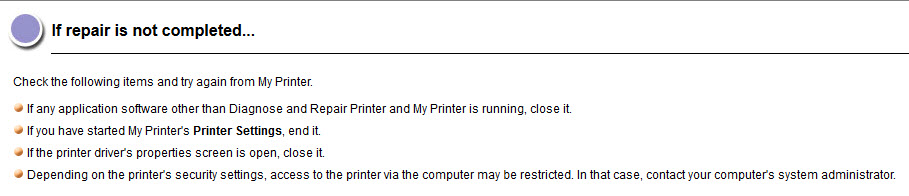
Clicking If repair is not completed... will open a window showing some suggestions on what to check:
Clicking Test Print will bring up the following screen:

Click Start to print a test page. An example of the test print is shown here:
Click Complete to close the Diagnose and Repair Printer window.
Return to top
If you are experience poor print quality (no ink appearing on the page, smudged prints, incorrect colors), click Confirming in the Troubleshooting window. This will display information on some items to check before attempting any print head cleanings.
Clicking Cleaning will execute a print head cleaning for your printer.
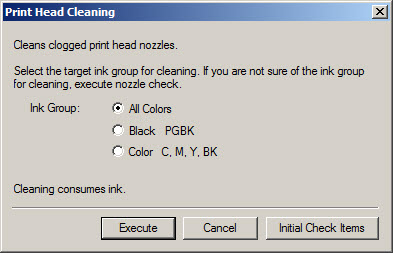
Select the colors you want to clean, then click Execute.
 The options shown for Print Head Cleaning may vary depending on your model.
Return to top
If you want to cancel a print job that is queued, click To cancel a print....

This window shows how you can cancel a print using the operation panel of your printer. If using the buttons on the printer itself does not work, click Reset to delete unwanted print jobs.
Return to top
If your product issue was not resolved after following the steps above, or if you require additional help, please create or log in to your Canon Account to see your technical support options.
Or if you still need help, visit our Canon Community by clicking the button below to get answers:

____________________________________________________________________________________________
