 Important notes:
-
Using ink that is not genuine could result in reduction of print quality or a printer failure.
-
Fixing a printer failure resulting from use of an ink tank which is not genuine should be paid for even within the maintenance contract period or warranty period.
-
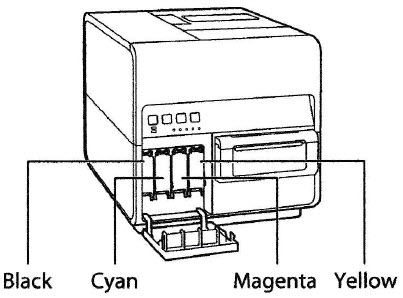
The ink tank positions are shown below. The printer is designed so that ink tanks cannot be inserted in wrong ink tank slots. Do not attempt to force ink tanks into the wrong slots.
-
Inks other than black ink may be used when characters represented only in black are printed or black-and-white prints are made. Cleaning performed to maintain the printer consumes all color inks. When a tank is out of ink, replace it with a new one as soon as possible.
-
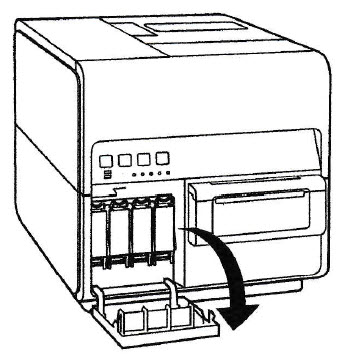
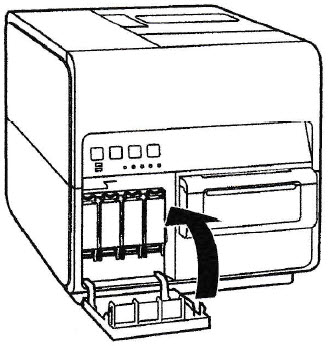
Open the ink tank door.
-
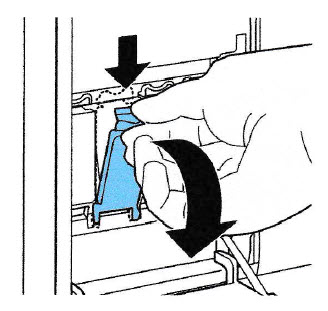
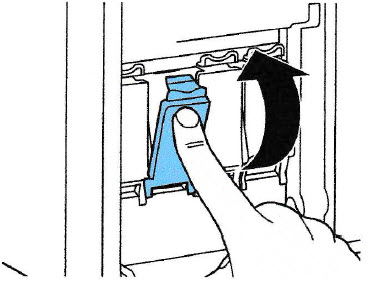
Open the ink tank cover.
-
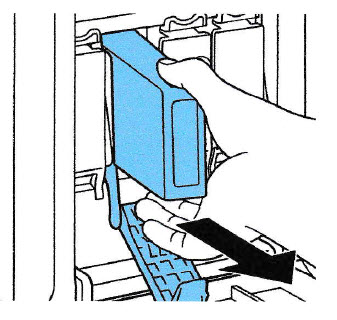
Slowly remove the ink tank.
-
Remove the new ink tank from the box.
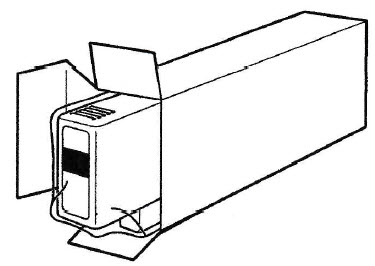
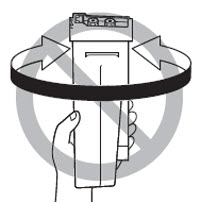
 Never drop or apply excessive force to an ink tank. Ink can stain clothing and the work area.
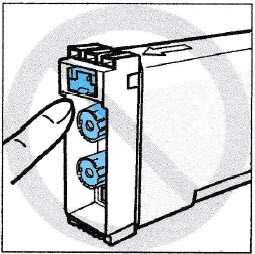
To prevent soiling of the surrounding area, damage to the ink tank and poor printing, do not touch the ink outlet and terminal.
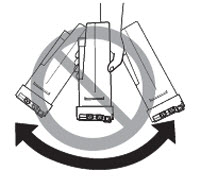
Do not shake the ink tank. If you do, the error message "xxx ink empty" may appear immediately after replacing the ink tank. If this happens, remove the ink tank and insert it again.
-
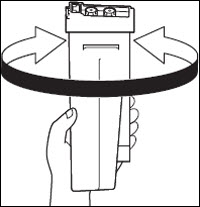
(For LX-P5510 only)
Shake the ink tank 2-3 times slowly with the ink supply port facing upward before installing it to the printer.
Because the components of the pigment ink are likely to settle.
Even for a used ink tank for water-based pigment ink, be sure to similarly shake it before installing to printer.
|
Because ink may leak from the ink supply port and get on clothing or blemish the surrounding area, do not shake the ink tank with the port facing down.
|
|
|
For the LX-D5500
|
|
-
Insert the ink tank into the ink tank slot with the correct side up.
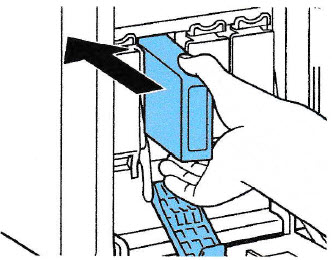
There are sharp pins in the ink tank slots. To avoid injury, never put your fingers into this area.
-
Close the ink tank cover securely.
-
Close the ink tank door.
Dispose the used ink tank according local laws and regulations.
If your product issue was not resolved after following the steps above, or if you require additional help, please create or log in to your Canon Account to see your technical support options.
Or if you still need help, visit our Canon Community by clicking the button below to get answers:

____________________________________________________________________________________________
