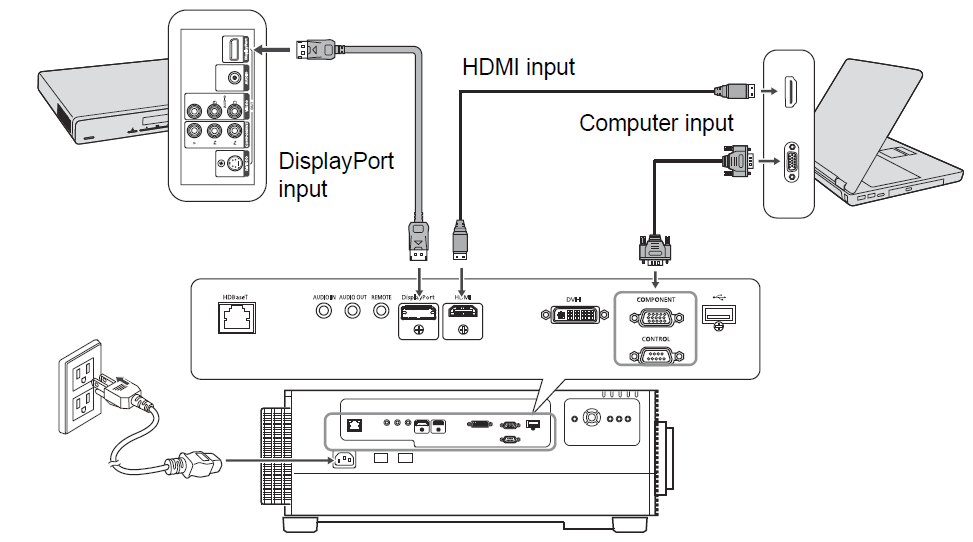
Step 1 Connect Other Equipment
When you connect to the network, you will need to complete the IP address settings. For details, see"Configuring the Computer's Network Settings"
Step 2 Turn the Projector On
1 Press the POWER button.

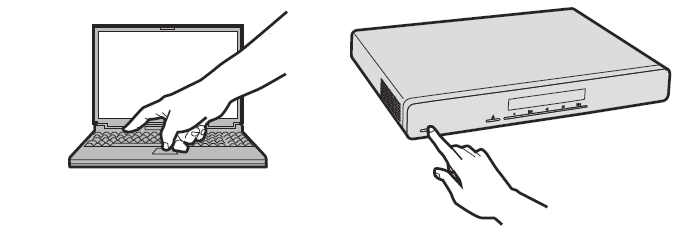
2 Turn on the computer or other equipment.
• If a window is projected for menu language selection, use the pointer buttons to choose a language, and then press the OK button.
• If you have set a password, the password input screen appears. Enter your password
• When “No signal” appears, press the INPUT button to select the input signal.
• If a computer screen is not projected, adjust the display settings on the computer. For details about how to switch display output, refer to the manual for your computer.
Step 3 Select an Input Signal
To switch between signals from connected devices, select an input signal in the [Input] menu.
The selected signal changes each time you press the INPUT button, or each time you press the

buttons when the [Input] window is shown.
The currently active input signal is marked with a green circle and enclosed by a orange border.
Names of input signals available for projection are displayed in white, and unavailable signal names are grayed out.

• [Digital PC] and [Analog PC-1] may be grayed out even when available.
• Screens of computers connected to the projector over a network can be projected when you have selected [LAN] as the input signal. For details, refer to the NMPJ user’s manual.
• Images on USB flash drives can be projected when you have selected [USB] as the input signal. For details, see “Projecting Images on a USB Flash Drive”
• In split-screen mode, the side without control rights is identified by a white circle.
• Input signals can also be selected by using the INPUT A-C buttons on the remote control, depending on settings. For details, see “[INPUT A-C] button settings”
Step 4 Adjust the Image
■ Adjusting the Computer’s Output Resolution
The projector’s maximum resolution is 1920x1200
For details on adjusting your computer’s output resolution, refer to the manual for your computer.
■ Focusing / Resizing the Image
Press the ZOOM button on the remote control to adjust the image size, and press the FOCUS button to adjust the focus. You can also press the LENS button on the projector once to adjust focus and twice to adjust image size.

• Use the Auto PC function to adjust shift in computer image or the flickering of the screen
• Correct any keystone distortion by pressing the KEYSTONE button
• Select the screen aspect or projection aspect according to the aspect ratio of the screen, type of input image signal etc.
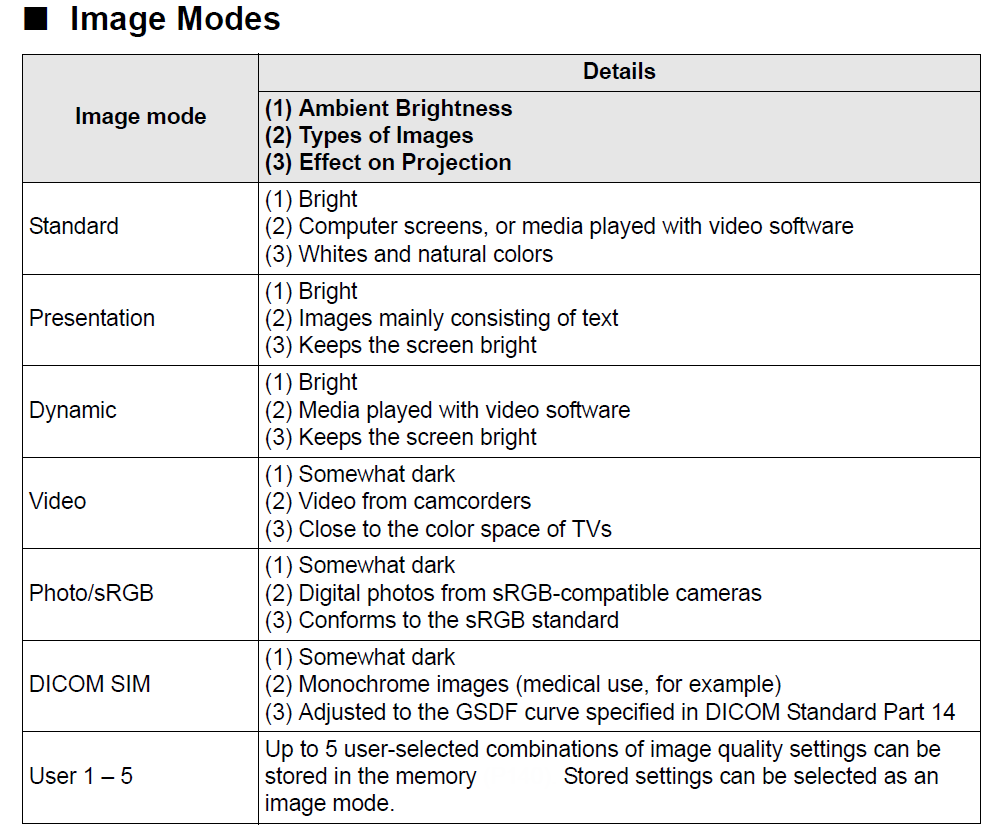
• Select an image mode depending on the projected image.
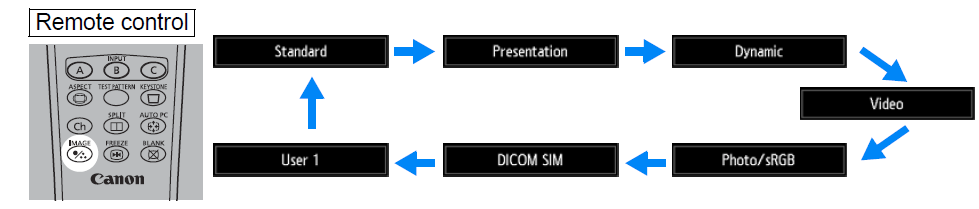
Step 5 Select the Image Quality (Image Mode)
Pressing the IMAGE button on the remote control, you can select an image mode to suit the projected image.
In each image mode, you can further adjust the brightness, contrast, sharpness, gamma, HDR range, color adjustment, advanced adjustment, light source mode and brightness level