Replacing the Ink Tank
- Replace the ink tank indicated by the ink lamp.
The Ink lamp lights up when the corresponding ink tank ineeds to be replaced.
(Indication by Ink lamp)

An error message “XXXX ink empty” appears on the status monitor.

(Indication on the status monitor)
(XXXX: Black, Cyan, Magenta, or Yellow)
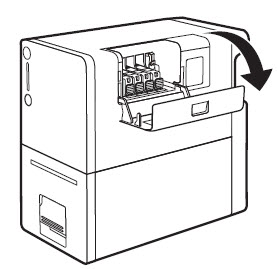
- Open the ink tank cover.
- Remove the ink tank.
Push the ink tank lock knob (A) and raise the ink tank to remove it.

Do not remove two or more ink tanks at the same time. When replacing two or more ink tanks, be sure to replace the tanks one by one.
 IMPORTANT:
• Handle the ink tank carefully so that your clothes and the area around the printer are not stained with ink.
• Dispose the used ink tank according to the local regulations.
- Preparing the Ink Tanks.
1. Remove each ink tank from the plastic bag.

When using the LX-P1300, proceed to Step 2.
When using the LX-D1300, proceed to Step 4.
(LX-P1300 only)
2. Hold the ink tank with the orange protective cap up.

Do not remove the orange protective cap at this time.
(For LX-P1300 only)
3. Shake the ink tank (about 10 times) about 5 cm to the left and right respectively.

Shake the ink tank with the orange protective cap attached.
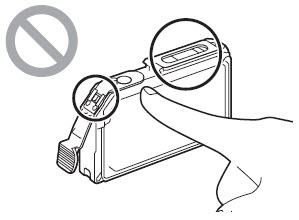
4. Remove the orange protective cap as shown in the figure.
When removing the protective cap, be sure to hold the ink tank as illustrated to avoid getting ink on your fingers.

Dispose the removed protective cap according to local regulations.
IMPORTANT:
• Do not press on the sides of the ink tank as ink could come out.

• Do not touch the ink tank electric contacts. The printer could fail in operation/printing.• Do not touch the ink tank electric contacts. The printer could fail in operation/printing.
• After removing the protective cap, do not touch the ink supply opening. Ink could not be supplied properly.
• After removing the protective cap, do not shake the ink tank with the ink supply opening down. Ink leaking from the ink supply opening could stain your clothes or the area around the printer.

• Be careful to ensure that ink adhered on the removed protective cap does not get on your clothes or the area surrounding the printer.
- Install the ink tank in the printer.
1. Insert the ink tank in the slot in the printer with the ink supply opening down.
Before installing each ink tank, match the ink color with the corresponding label.

2. Press on the top of the ink tank until the ink tank clicks into place.
IMPORTANT:
• Install the ink tank at correct position according to the label. If any ink tank is installed in a wrong position, the printer cannot print. In addition, ink colors could be mixed, resulting in a printing failure.
• If any one of the ink tanks is not installed, the printer cannot print. Be sure to install all ink tanks.
• Once you installed an ink tank, do not remove or reinstall it before the replacement timing or ink refreshing timing is reached.
- Close the ink tank cover.

For support and service options, sign into (or create) your Canon Account from the link below.
My Canon Account
