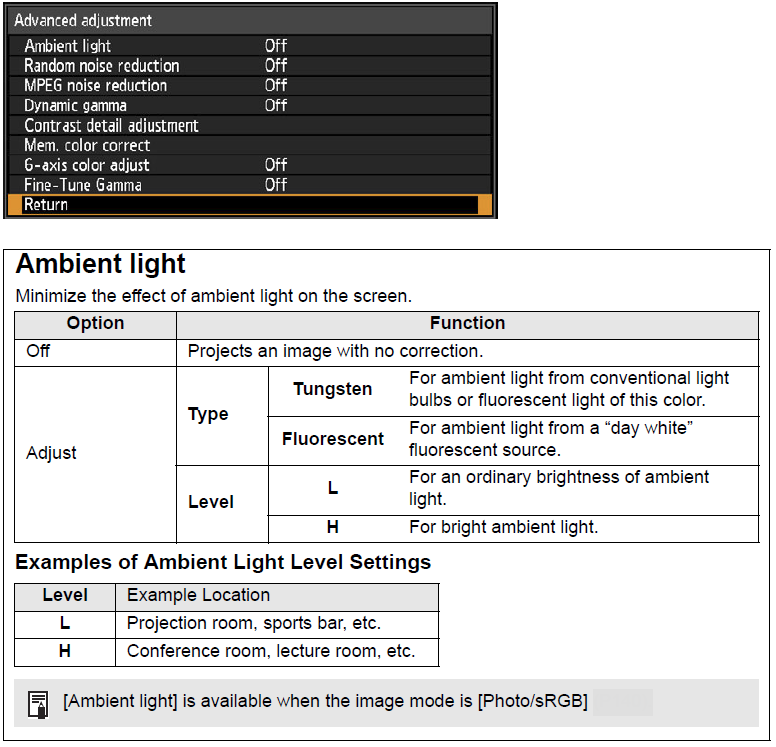
 > [Image adjustment] > [Advanced adjustment]
Fine-tune noise reduction and color tone.
• Select [Low] for fast-moving images or [High] for slow-moving images.
• This setting is not displayed for LAN or USB input.
MPEG noise reduction
Reduce MPEG image noise*.
* Block noise resembles pixelation and may affect either on JPEG images or in MPEG video.

This setting is not displayed for LAN or USB input.
Mosquito noise reduction
Reduce mosquito noise*.
* A type of noise affecting image edges or areas where colors change significantly, either on JPEG images or in MPEG video.

This setting is not displayed for HDMI, HDBaseT, DisplayPort, Digital PC, Analog PC-1, Analog PC-2, or Component input signals.
Dynamic gamma
You can adjust the gradation representation of light and dark portions of an image automatically.

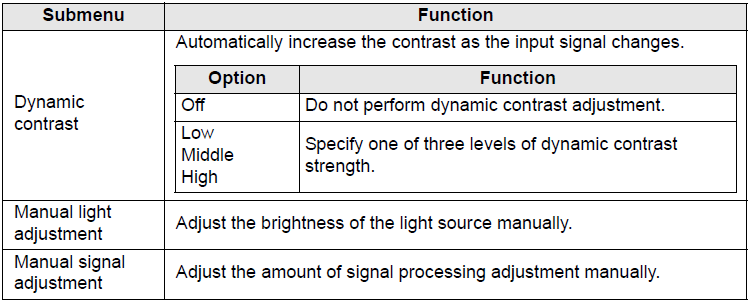
Contrast detail adjustment
When the projected image is dark, you can make the dark portions appear even darker by adjusting the luminance of the light source and the amount of signal adjustment.
Colorimetry
Select the input color space.

[Colorimetry] can only be set when the image mode is [Video].
HDR (High Dynamic Range)
HDR range adjustment projects an expanded range of image luminance, preserving detail in highlights and shadows.

[HDR] can only be set when the image mode is [Video].
Mem. color correct
Enhances skin tones, blue skies, and greens, so that these colors are more consistent with people’s remembered impressions.

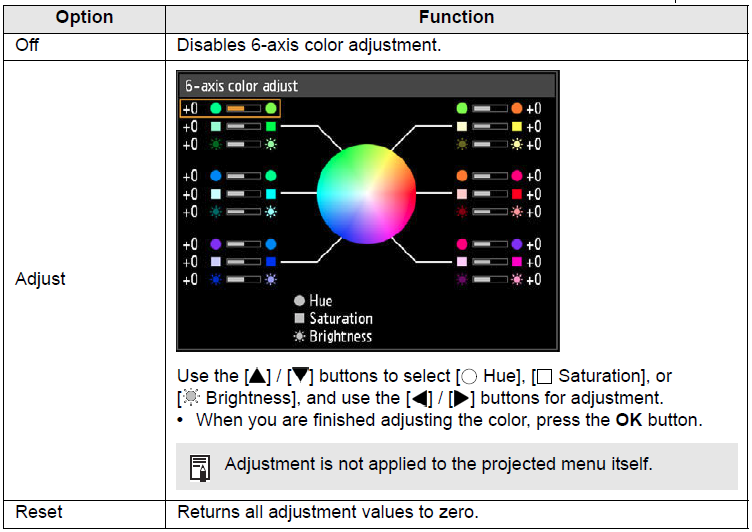
6-axis color adjust
Fine-tune RGB (red, green, blue) and CMY (cyan, magenta, yellow) hues in images.
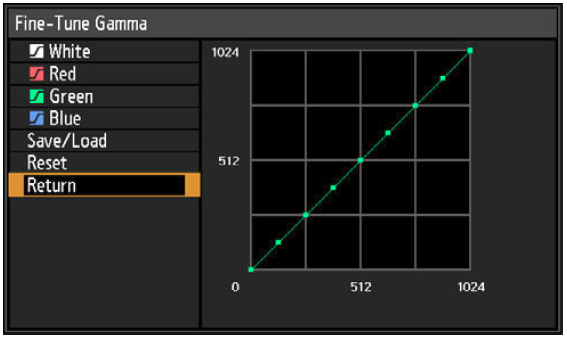
Fine-Tune Gamma
Adjust white, red, green, and blue gamma curves. Red, green, and blue can be adjusted separately. Adjustments to white are also applied to the three other colors. Note that adjusting any color will overwrite previous adjustments.
Adjustment values can also be saved or loaded by selecting [Save/Load].
Use the  buttons to select a color, and then press the OK button.
Next use the  buttons to select a point on the gamma curve, and then use the buttons to adjust the position of the point. When adjustment is finished, press the OK button to confirm the setting.
• [Fine-Tune Gamma] is available in image modes other than [DICOM SIM].
• For details on gamma correction, see “Gamma”
• Use input signals or a test pattern for adjustment.
• Adjustment is not applied to the projected menu itself.
• Up to five adjustment values can be saved.
