Loading Cards
Cards can be loaded in two ways: using the card retainer, and using the card feeding slot.
The Card Retainer can be loaded with a large quantity of cards, making it useful for mass printing. Use the Card Feeding Slot to manually load cards when you want to print only 1 particular card or to print many types of cards.
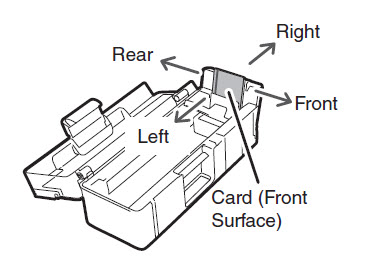
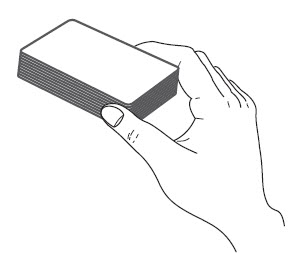
 The direction of the card case and of cards is as below.
 Do not use cards that do not conform to the CR-80 standard. Such cards may not be printed properly.
Do not use the following cards:
-
Cards previously printed with this or any other card printer
-
Wet cards
-
Cards mixed with glass, metallic or other foreign objects
-
Embossed cards
-
Cards coated with oil or other foreign matter
-
Cracked, chipped, bent or otherwise damaged cards
-
Transparent cards
-
Abnormally shaped cards
Loading Cards into the Card Case
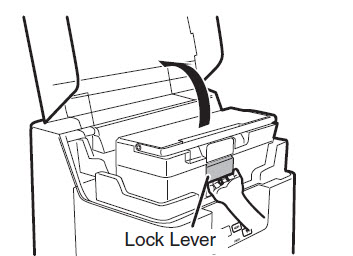
- Open the Top Cover, and the Card Case cover.
• Pull the lock lever, and open the Card Case lid.
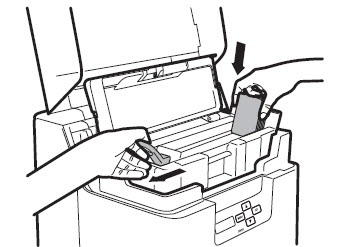
- Pull the card retainer, and load cards.
• Hold the card retainer lever with your fingers, and pull it right out.
• Load the card case with the printing side (front surface) to the left.
• When loading the cards, be sure to hold their edges, and never touch the front or rear printing sides.
-
Return the card retainer, and close the cover.
• When returning the card retainer, be sure not to get your fingers caught.
• Confirm that the card touches the upper roller of the feeder.

-
Close the Top Cover.
The Card Case can be removed from the printer. After loading the cards as in the diagram, return the card retainer to its original position, close the cover, and reattach to the printer.

In order to prevent unauthorized printing, we recommend storing loaded Card Cases separately from the printer.
Load cards in order starting from the right side of the card case. When printing begins the right-most card is pulled into the printer.
The printing side of the card (front surface) is on the left.
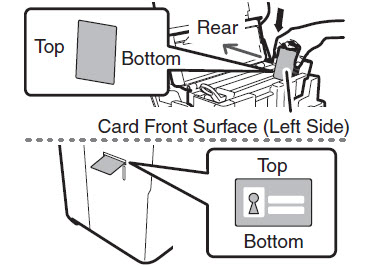
When using cards such as pre-printed cards that have a specified orientation, load the cards so that after printing, the printed upper surface is at the rear of the cassette.
If cards are stuck to each other and do not correctly feed, then lightly flex and separate the cards before printing.
Manually Loading Cards One by One
-
Open the Top Cover.

-
Open the Card Case, and insert cards into the Card Feeding Slot.
• Pull the lock, and open the Card Case lid.
• Insert cards with the printing side to the left into the Card Feeding Slot.

• If cards are loaded, remove them from the Card Case.
The printing side of the card (front surface) is the left surface.

When using cards such as pre-printed cards that have a specified orientation, load the cards so that after printing, the printed upper surface is at the rear of the cassette.
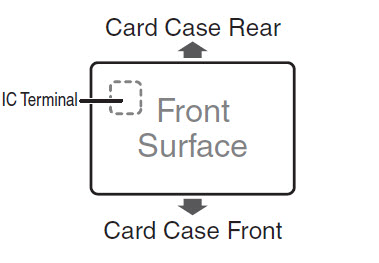
Loading Magnetic/IC Cards
The factory default for magnetic cards/IC cards is to be loaded as below.
If using cards with ISO magnetic strips
If using cards with IC terminals
For support and service options, sign into (or create) your Canon Account from the link below.
My Canon Account