Click Stitch in the IJ Scan Utility Lite main screen to display the Image Stitch window.
You can scan the left and right halves of an item larger than the platen and combine them back into one image. You can scan items up to approximately twice as large as the platen.
 The displayed items vary depending on the select source and view.
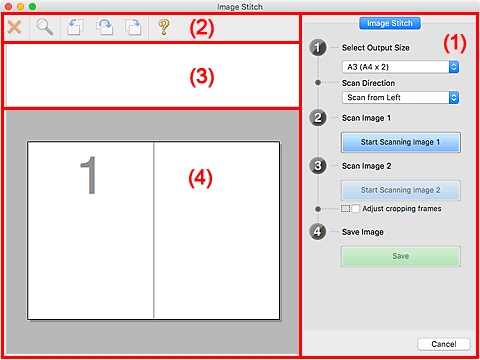
(1) Settings and Operation Buttons
-
Select Output Size
-
-
B4 (B5 x 2)
-
Scans the left and right halves of a B4 size item separately.
-
A3 (A4 x 2)
-
Scans the left and right halves of an A3 size item separately.
-
11 x 17 (Letter x 2)
-
Scans the left and right halves of an item twice as large as Letter size separately.
-
Full Platen x 2
-
Scans the left and right halves of an item twice as large as the platen separately.
-
Scan Direction
-
-
Scan from Left
-
Displays the first scanned image on the left side.
-
Scan from Right
-
Displays the first scanned image on the right side.
-
Scan Image 1
-
-
Start Scanning Image 1
-
Scans the first item.
-
Scan Image 2
-
-
Start Scanning Image 2
-
Scans the second item.

-
Adjust cropping frames
-
You can adjust the scan area in preview.
If no area is specified, the image of the size selected in Select Output Size will be saved. If an area is specified, only the image in the cropping frame will be scanned and saved
-
Save Image
-
-
Save
-
Saves the two scanned images as one image.
-
Cancel
-
Cancels Stitch scan.
(2) Toolbar
You can delete the scanned images or adjust the previewed images.
-
 (Delete)
-
Deletes the image selected in the Thumbnail View area.
-
 (Enlarge/Reduce)
-
Allows you to enlarge or reduce the preview image.
Clicking the Preview area enlarges the displayed image.
Control-clicking the Preview area reduces the displayed image.
-
 (Rotate Left)
-
Rotates the preview image 90 degrees counter-clockwise.
-
 (Rotate 180°)
-
Rotates the preview image 180 degrees.
-
 (Rotate Right)
-
Rotates the preview image 90 degrees clockwise.
-
 (Open Guide)
-
Opens this page.
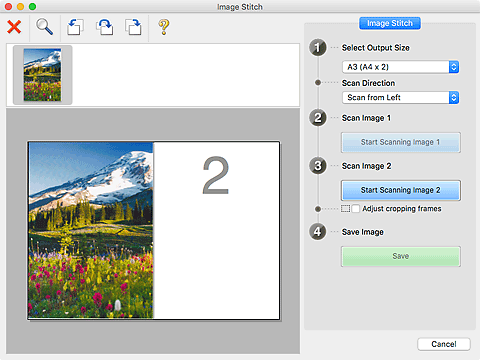
(3) Thumbnail View Area
Displays the thumbnails of the scanned images. Appears blank if none has been scanned.
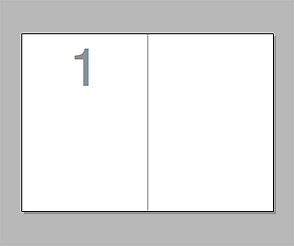
(4) Preview Area
When no image has been scanned:
After scanning the first item by clicking Start Scanning Image 1:
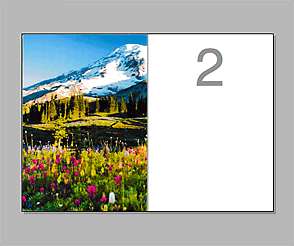
The image is scanned in the direction specified in Scan Direction, and 2 appears next to it.
After scanning the second item by clicking Start Scanning Image 2:
The two scanned images appear.
 Learn more about the Image Stitch function.
Printer Support Home
