Adding a Date Stamp when Shooting (PowerShot SX740 HS)
| Article ID: ART171250 |
| |
Date published: 08/01/2018 |
| |
Date last updated: 08/30/2018 |
Description
Adding a Date Stamp when Shooting (PowerShot SX740 HS)
Solution
| Solution |
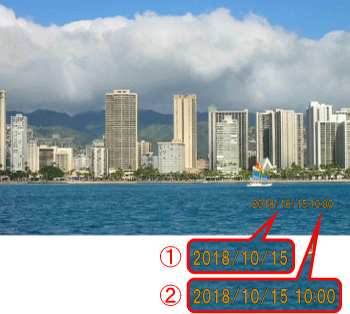
The camera can add the shooting date to images, in the lower-right corner.
However, note that date stamps cannot be edited or removed, so confirm beforehand that the date and time are correct.
IMPORTANT
For a list of shooting modes in which the [Date stamp] setting can be configured.
[  : Manual ] , [  : Aperture Value ] , [  : Time value ] , [  : Program AE] , [  : Hybrid Auto ] , [  : Auto ] , [  : Food ] , [  : Sports ] , [  : Portrait ] , [  : Fireworks ]
The procedure for adding a date stamp to images during shooting is explained below.
1. Turn the camera on.
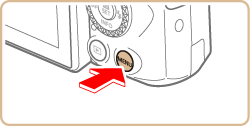
2. Press the  button.
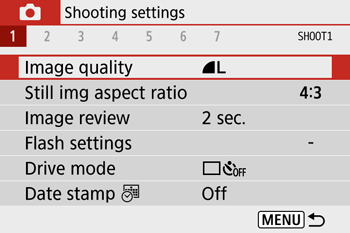
3. Press the  /  buttons to select [  ] , then press the  button.
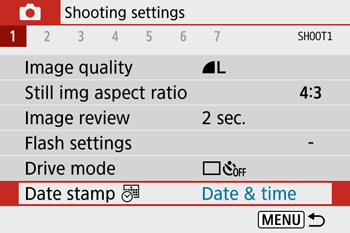
4. Press the / buttons to select [ 1 ] .
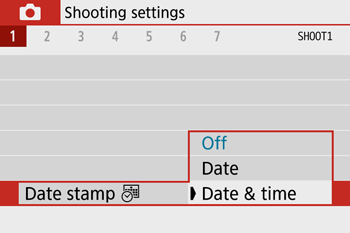
5. Press the  /  buttons to select [ Date stamp  ] , then press the button.

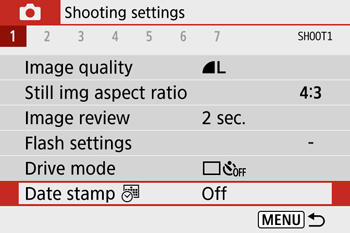
6. Press the / buttons to select [Date] or [Date & time] , then press the button.
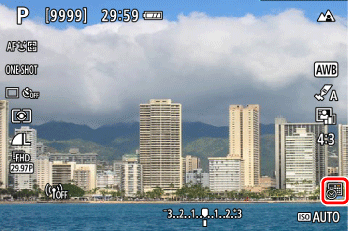
7. Press the button.
8. Press the button once again.
9. [  ] or [  ] is displayed.
NOTE
If the icon does not appear, press the  button several times.
10. The [Date stamp] will be added to the images as shown below:
 : [Date]
 : [Date & time]
NOTE
Shots taken without adding a date stamp can be printed with one. Please see the Camera User Guide for details.
|
|
ID: 8204038100_EN_3
|