| Solution |
Load the paper that you usually use in the drawer. When you want to print on paper that is not loaded in the drawer, load the paper in the multi-purpose tray.  Loading Paper in the Multi-Purpose Tray
NOTE
When loading A5 size paper
- When setting the paper size, make sure the current paper orientation. When loading paper in landscape orientation, you must configure this setting in the printer driver. For more information, refer to the printer driver Help.
Landscape orientation
Portrait orientation
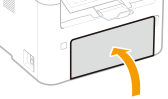
1. Open the front cover.
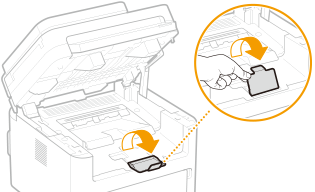
2. Spread the paper guides apart.
- Slide the paper guides outward.
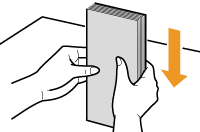
3. Load the paper and slide it all the way in, until it touches the back side.
- Load the paper in portrait orientation (with the short edge toward the machine) and the print side face up. Paper cannot be loaded in landscape orientation.
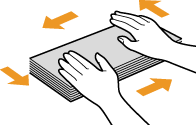
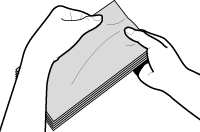
- Before loading it, fan the paper stack well, and tap it on a flat surface to align the edges.
- When you insert the paper with <Notify to Check Paper Settings> set to <On>, a confirmation screen is displayed.
IMPORTANT
Keep the paper stack within the load limit guides
- Make sure that the paper stack does not exceed the load limit guides (
 ). Loading too much paper may cause paper jams. ). Loading too much paper may cause paper jams.
4. Align the paper guides against the edges of the paper.
- Align the paper guides securely against the edges of the paper.
IMPORTANT
Align the paper guides securely against the paper
- Paper guides that are too loose or too tight may cause misfeeds or paper jams.
5. Close the front cover.
NOTE
- When performing printing, open the paper stopper in advance so that the output paper does not fall out of the output tray.
IMPORTANT
When changing the paper size or type
- The factory default settings for paper size and type are <LTR> and <Plain>, respectively. If you load a different size or type of paper into the machine, make sure to change the settings. If you do not change the settings, the machine cannot print properly.
REFERENCE
Printing on the Back Side of Printed Paper (Manual 2-Sided Printing)
- You can print on the back side of printed paper. Flatten any curls on the printed paper and insert it into the drawer or multi-purpose tray (
Loading Paper in the Multi-Purpose Tray), with the side to print face up (previously printed side face down).
- When using the multi-purpose tray, load one sheet of paper each time you print.
- You can use only the paper printed with this machine.
- You cannot print on the side that has previously been printed on.
- If you are using A5 size paper, the reverse side may not be printed correctly.
Loading Envelopes Make sure to flatten any curls on envelopes before loading them. Also pay attention to the orientation of envelopes and which side is face up.
 Before Loading Envelopes
Follow the procedure below to prepare the envelopes before loading.
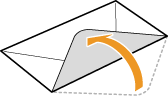
1. Close the flap of each envelope.
2. Flatten them to release any remaining air, and make sure that the edges are pressed tightly.
3. Loosen any stiff corners of the envelopes and flatten any curls.
4. Align the edges of the envelopes on a flat surface.
Loading Envelopes in the Drawer
Load the envelopes Monarch, No. 10 (COM10), DL, or C5 in portrait orientation (with the short edge toward the machine), with the non-glued side (front side) face up. You cannot print on the reverse side of envelopes.
NOTE
- Load the envelopes so that the edge with the flap is toward the left side as shown in the illustration.
|