The camcorder uses an electronic white balance process to calibrate the picture and produce accurate colors under different lighting conditions. There are 4 methods of setting the white balance.
You can also perform this function remotely using Browser Remote on a connected network device.
Auto white balance (AWB): The camcorder automatically adjusts the white balance to the optimal level.
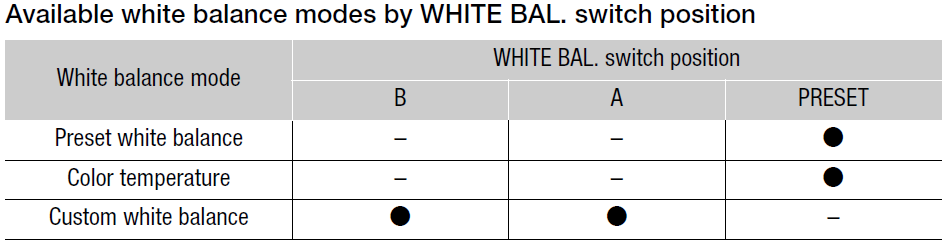
Preset white balance: Set the white balance to

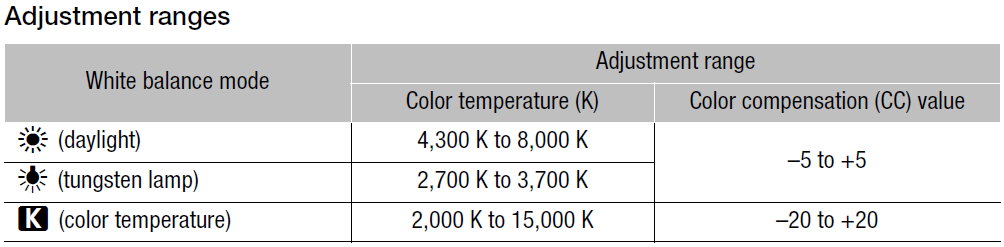
(tungsten lamp). You can further adjust the color temperature (K) value and the color compensation (CC) value, which adjusts the color along the green/magenta gradation.
Color temperature: Allows you to set the color temperature between 2,000 K and 15,000 K, and further adjust the color compensation (CC) value.
Custom white balance: You can use a gray card or white object with no pattern to establish the white balance and set it to one of two custom white balance positions,

When recording under fluorescent lights, we recommend using auto white balance or setting a custom white balance.
Operating modes:

 NOTES
NOTES
• When the camcorder is set to full auto mode, the white balance will be adjusted automatically (AWB). When infrared recording is activated, the white balance cannot be adjusted.
• The [White Balance] and [Color Matrix Tuning] settings in the custom picture file take precedence over the white balance set with these procedures.
• You can use the

setting to make the change in the image look smoother when you change white balance settings.
• When an optional RC-V100 Remote Controller is connected to the camcorder, you can adjust the white balance with the remote controller’s AWB button, A button, B button, PRESET button and

button.
• The color temperatures displayed on the screen are approximate. Use them only as a reference.
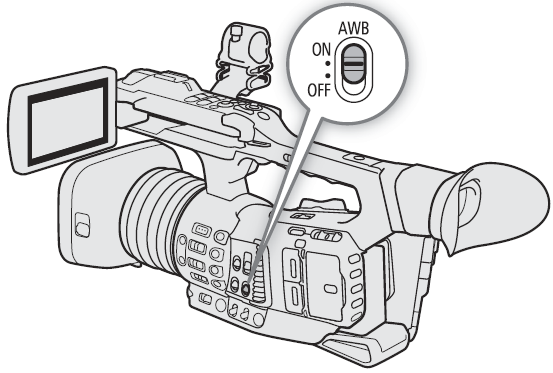
Auto White Balance (AWB)
The camcorder constantly adjusts the white balance automatically to achieve an appropriate level. The camcorder will adjust the white balance if the light source changes
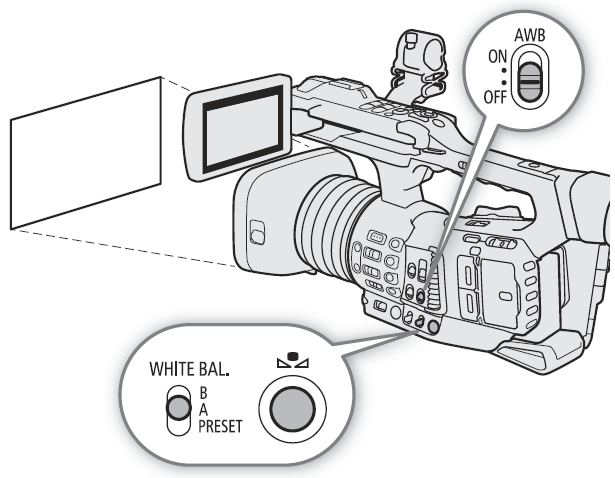
Set the AWB switch to ON.
• The camcorder will adjust the white balance automatically.
• The color temperature and CC value set automatically by the camcorder will appear at the bottom of the screen with an icon next to it. |
 |
NOTES
• Custom white balance may provide better results in the following cases:
- Changing lighting conditions
- Close-ups
- Subjects in a single color (sky, sea or forest)
- Under mercury lamps and certain types of fluorescent and LED lights
• You can use the

setting to change how quickly the white balance changes in auto white balance (AWB) mode.
• If you set an assignable button to [AWB Lock], you can press the button to lock the current white balance settings set automatically by the camcorder. To cancel the lock, press the button again (resume auto white balance mode) or select a different white balance setting.
Color Temperature/Preset White Balance
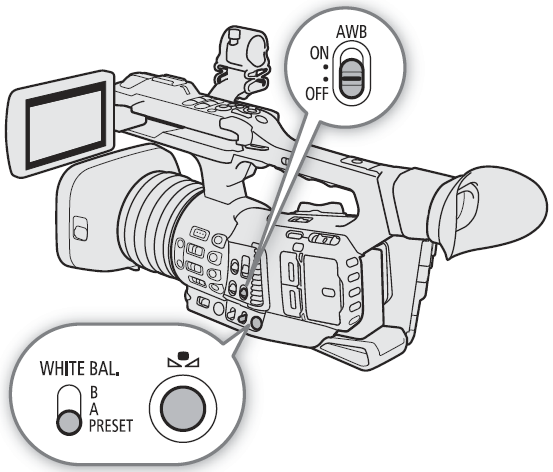
1 Set the AWB switch to OFF and the WHITE BAL. switch to PRESET.
2 Press the FUNC button to enter the direct setting mode and press again as necessary to highlight the white
balance mode.
3 Push the joystick up/down to select the 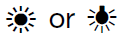 icon (preset white balance), or the icon (preset white balance), or the  icon (color temperature setting). icon (color temperature setting).
• Alternatively, you can also use the  setting to select in advance the white balance mode assigned to the WHITE BAL. switch's PRESET position. setting to select in advance the white balance mode assigned to the WHITE BAL. switch's PRESET position.
4 Press SET to apply the stored preset white balance/color temperature settings.
• The selected color temperature and CC value will appear at the bottom of the screen next to the white
balance mode icon.
• If necessary, you can adjust the color temperature and CC value with the following procedure. |
 |
Adjusting White Balance Settings
When the white balance mode is set to

(preset white balance) or
(color temperature), you can change
the color temperature and CC value (color compensation along the green/magenta gradation).
1 Select one of the white balance modes that can be adjusted.
2 Press the
button.
- The camera will enter direct setting mode with the color temperature highlighted in orange. To adjust the CC value, push the joystick right.
- Alternatively, you can press the FUNC button repeatedly to select the color temperature or CC value.
3 Push the joystick up/down to change the value and then press SET.
Custom White Balance
You can store two custom white balance settings in the camcorder for recording under more difficult lighting conditions.
1 Set the AWB switch to OFF and the WHITE BAL. switch to A or B.
• To apply the stored custom white balance setting as is, press SET. The rest of the procedure is not
necessary. To set a new custom white balance, continue the procedure with step 2.
2 Point the camcorder at a gray card or white object so that it fills the whole screen.
• Use the same lighting conditions you plan to use when recording.
3 Press the button.
• The icon will flash quickly.
• Make sure the gray card or white object fills the screen until the procedure is completed.
• Once the icon stops flashing, the procedure is completed. The setting is retained even if you turn off the
camcorder.
• The color temperature and CC value registered by the camcorder will appear at the bottom of the screen
next to the icon. |
 |
NOTES
• Readjust the custom white balance if the light source changes.
• Very rarely and depending on the light source, NOTES
• Readjust the custom white balance if the light source changes.
• Very rarely and depending on the light source,
may keep flashing (it will change to a slow flashing). The
result will still be better than with auto white balance.
• After the camcorder registers a custom white balance, the color temperature or CC value may appear in gray.
This indicates that the value registered exceeds the range of values that can be displayed but the white
balance is correctly calibrated and you can continue shooting.
