|
|
Professional Print & Layout - Printing Photos (Windows)
| Article ID: ART172658 |
| |
Date published: 12/18/2018 |
| |
Date last updated: 01/18/2019 |
Description
This article explains how to print Photos using Professional Print & Layout on a Windows PC.
Solution
To print photos in Professional Print & Layout, follow the steps below.
-
Start Professional Print & Layout.
-
Drag and drop the images you want to print to the Preview area.
You can also select photos from Open in the File menu.
 Important Important
- If started from Digital Photo Professional, Photoshop, Photoshop Elements, or Lightroom, images cannot be added.
 Note Note
- You can change the order to print by dragging the images in the Thumbnails area. You can also change the order of images from the Sort By menu.
-
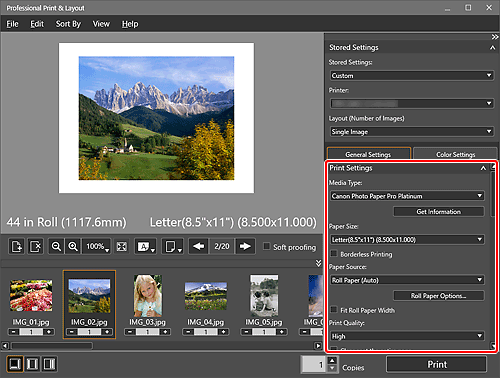
In the Stored Settings area, set the printer and Layout (Number of Images) you want to use, and other settings.
-
In Print Settings on the General Settings tab, set Media Type, Paper Source, Print Quality, and other settings.
Important
- When Plain Paper is selected for Media Type, the print result may become faint. In that case, change the Media Type and print.
Note
- The displayed paper sizes and media types vary depending on your printer.
- For the types of third party paper supported by PRO-1000 and PRO-500 series printers, refer to the Art Paper Printing Guide. This guide is included with the imagePROGRAF PRO-1000 series ICC Profile for Supporting the Other Companies’ Media (Windows), which is available for download on our website.
- Available paper sources and print quality vary depending on your printer and paper.
- For Print Settings on the General Settings tab, see General Settings Tab (Print Settings).
-
In Layout on the General Settings tab, set the layout you want to use.
Note
-
Load paper.
-
Click Print.
The Print dialog box appears.
-
Click OK.
Note
|