|
|
How to Set Up the Printer for Wireless LAN (Mac) - TS702
| Article ID: ART173313 |
| |
Date published: 01/09/2019 |
| |
Date last updated: 03/05/2019 |
Description
This article explains how to set up your PIXMA TS702 for wireless use with a Mac.
Solution
Follow the steps below to install the software for your printer on a Mac.
- Click here. Click the Download button to download the software installer for your printer. After the file has finished downloading, open it. Then, double click the Setup icon in the window to launch the installer.

- A prompt will appear asking you if you want to open the setup program. Click Open.

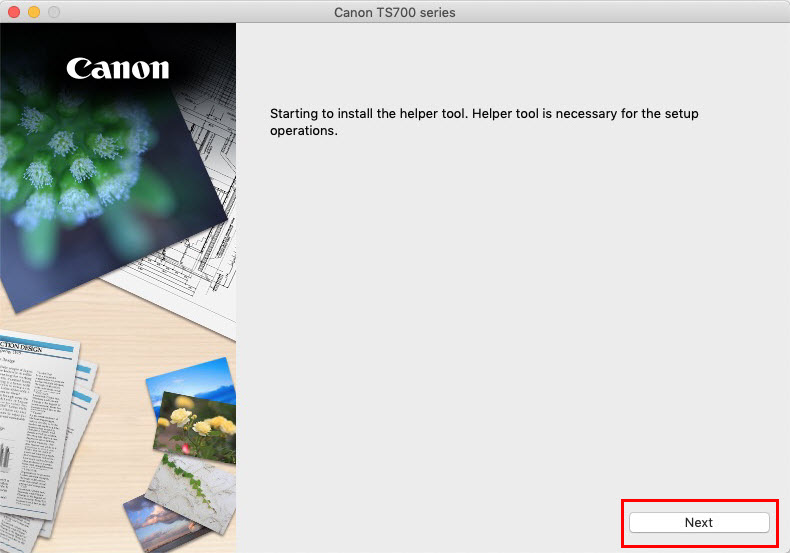
- When the installer begins, click Next.
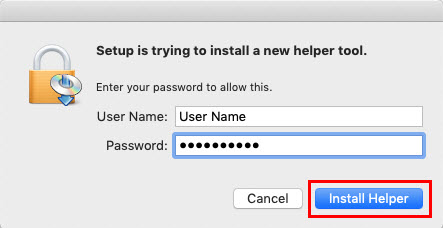
- You will be asked to enter in your computer's password so that a helper tool for the setup program can be installed. Enter your computer's password and click Install Helper.
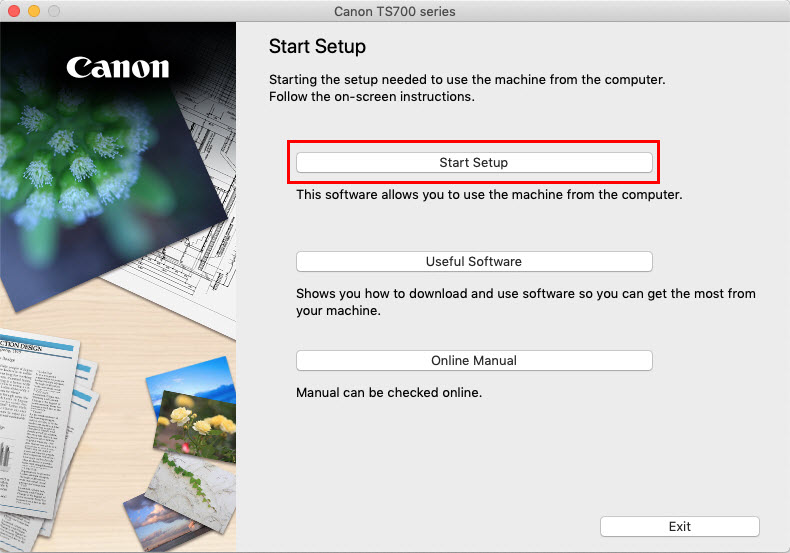
- At the main menu of the setup program, click Start Setup.
- On the Before You Continue screen, click Next to proceed.

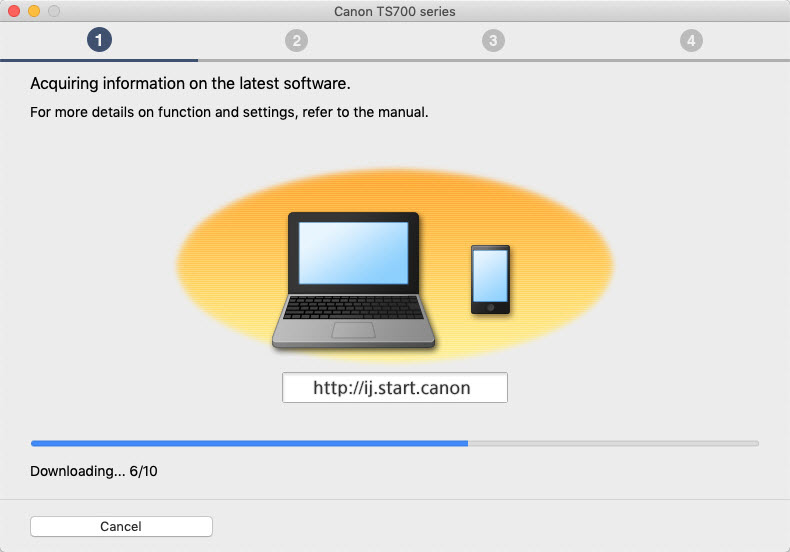
The setup program will acquire information on the latest drivers and software. This may take a few minutes.
- Select your place of residence, then click Next.
- Read through the License Agreement. Then, click Yes to proceed.

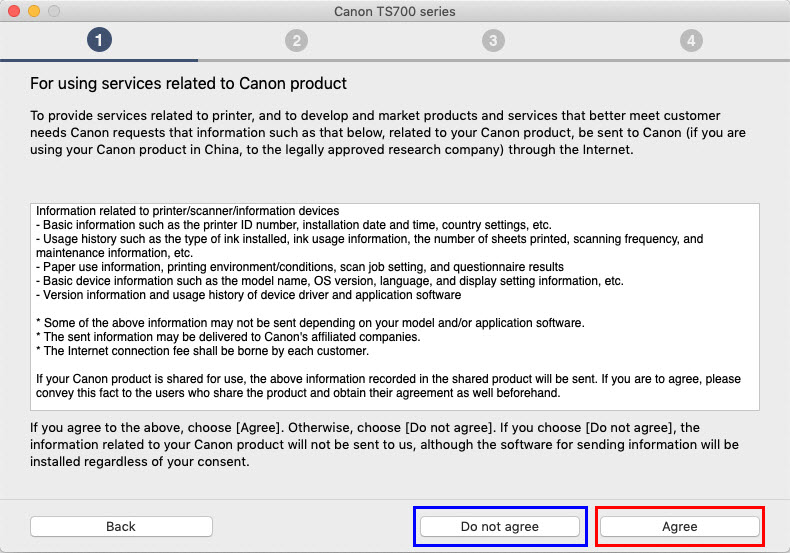
- Canon will request information regarding the usage of your product. Read the statement regarding the information that will be collected. If you agree to provide this information, click Agree. If you do not wish to provide this information, click Do not agree. Please note that if you do not agree to provide this information, it will not prevent you from installing the software for your printer.
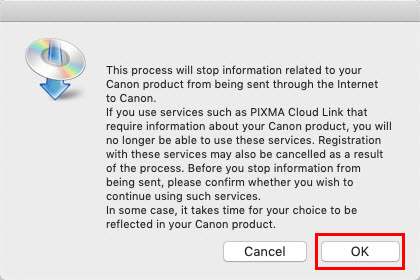
If you click Do not agree, the following message will appear. Click OK to continue.
- The setup program will process for a few moments.

The setup program will then check the printer's status.

The setup program will proceed in one of two ways. This is determined by whether or not your printer has already been connected to the network. If it has already been connected, proceed to the next step. If it has not been connected to the network, please click here.
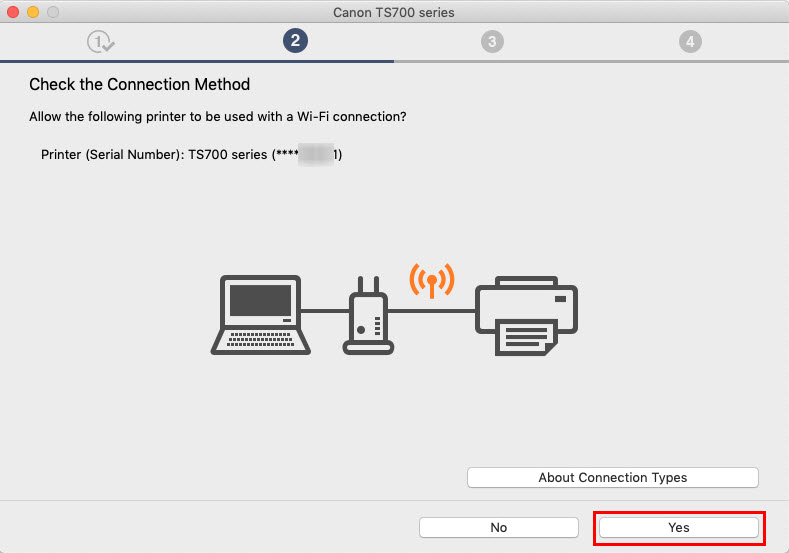
- On the Check the Connection Method screen, you will be asked to allow your printer to work with a Wi-Fi connection. Click Yes.
- The setup program will process for a few moments.

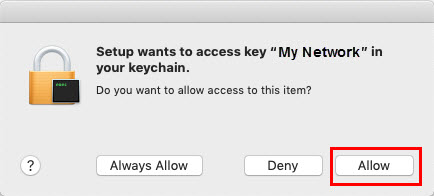
You will be prompted to allow the setup program to access the key for your network, which is stored in your keychain. Click Allow.
- The setup program will continue to process for a few moments. You will then be prompted to add the printer. Click the Add Printer button.

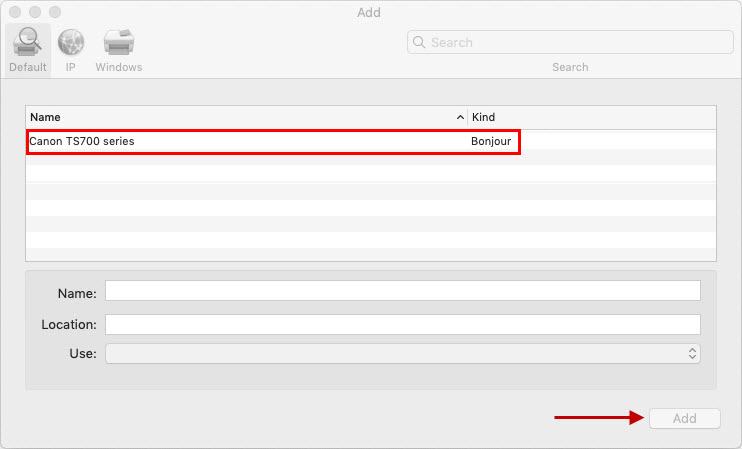
- In the Add window, click on the Bonjour listing for the Canon TS700 series. For Use, select Secure AirPrint or AirPrint, then click Add.
You will return to the Add Printer screen shown in the previous step. Click Next to proceed. The setup program will process for a few moments.

- On the Test Print screen, click Execute to perform a test print. Click Next to proceed.

- Click Next on the Setup Complete screen.

- The Software Installation List will appear. Place a check in the box for each item that you would like to download and install. Click Next to proceed.

- If you have chosen to install any software, it will be downloaded and installed. This may take several minutes.

- On the You Can Print from a Smartphone or Tablet screen, click Next to proceed. Clicking Instructions will take you here.

The setup program will process for a few moments.

- On the Printer Registration screen, you can register your printer if you wish to do so. Click Register Now to register your printer. Click Skip to move to the next step in the setup program.

- You will be asked if you want to create a shortcut that will open the online manual for your printer. If you wish to create a shortcut, click the radio button for Create shortcut. Click the radio button for Do not create shortcut if you do not want a shortcut to the online manual on your desktop. Then, click Next.

- Click Exit.
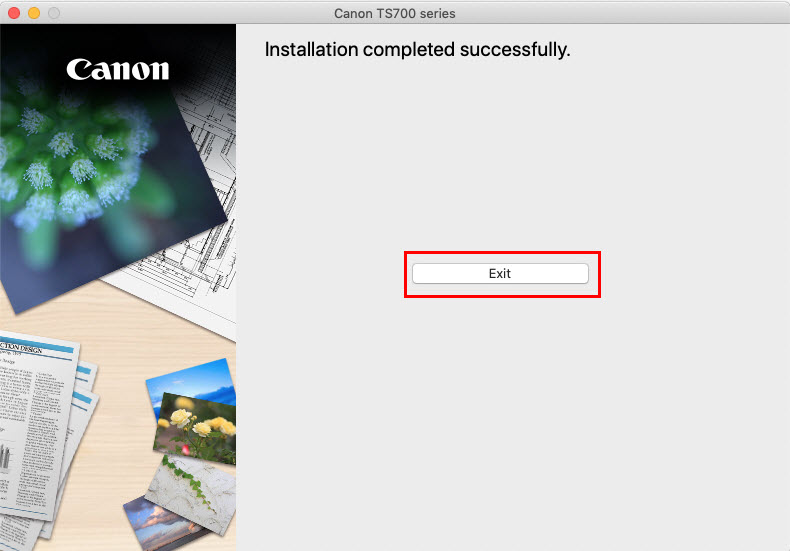
The installation is complete and your printer is now ready for use with your Mac.
If the printer was not detected on the network:
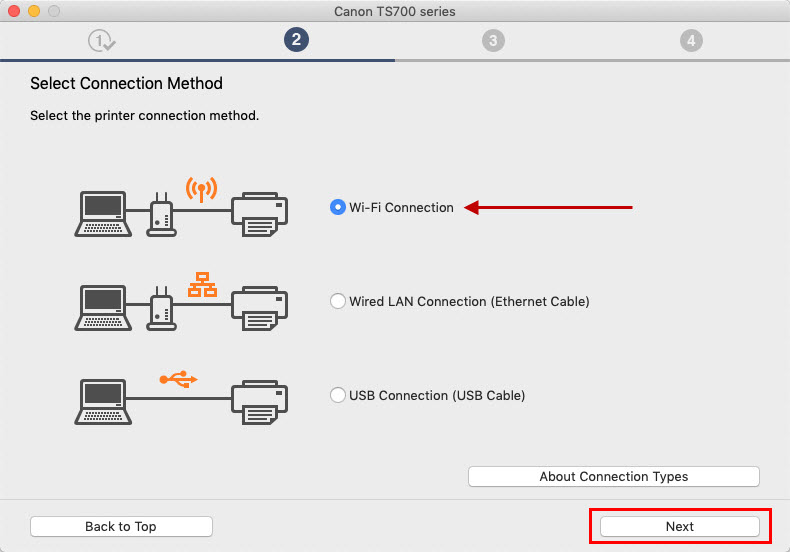
- On the Select Connection Method screen, click the radio button for Wi-Fi Connection and click Next.
Clicking About Connection Types will take you here.
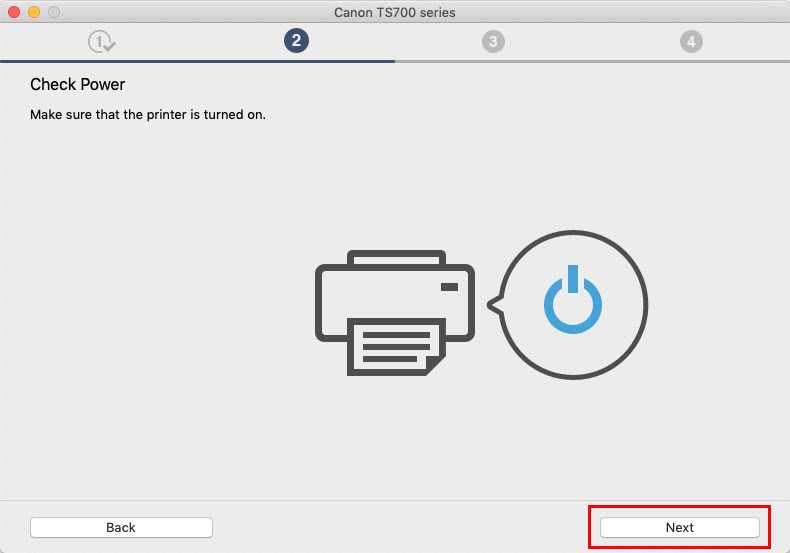
- Make sure that the printer is powered on. Then, click Next.
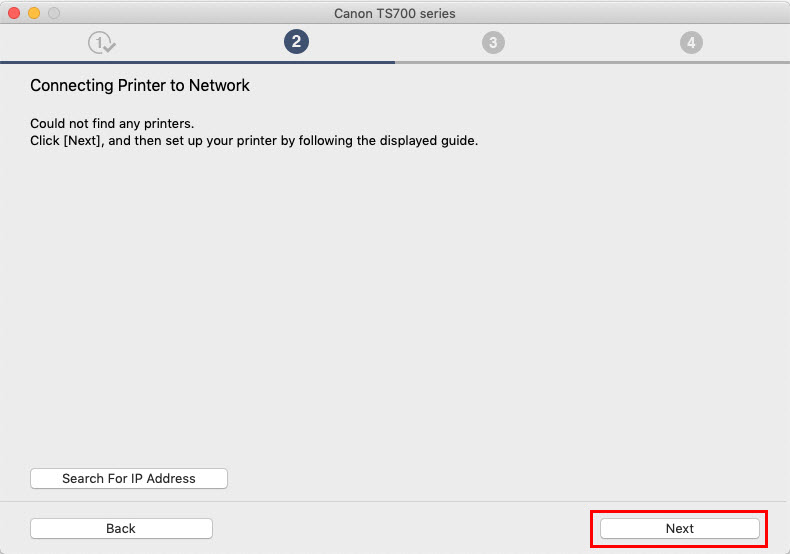
The setup program will search for the printer on the network. This may take a few moments.

- The setup program will indicate that no printers were detected. Click Next.
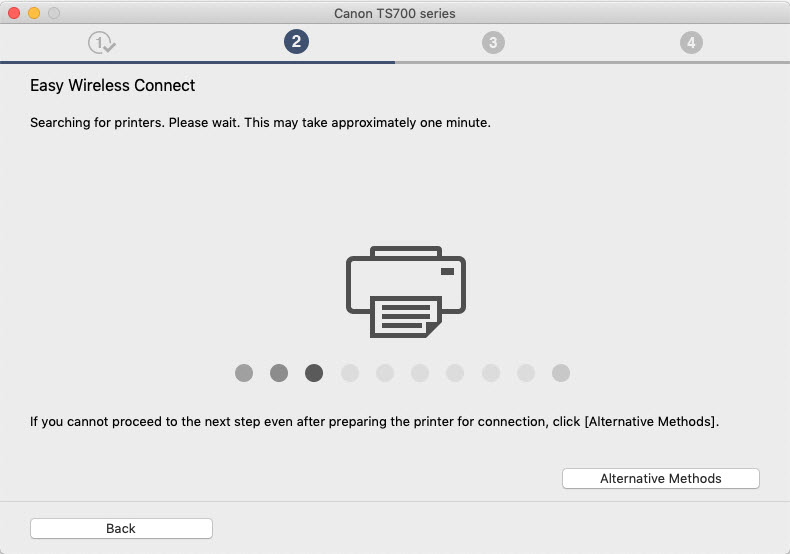
- The Preparing Printer screen will appear. This screen instructs you to press and hold the Wireless connect button
 for three seconds. Press and hold this button on the printer. This will activate the printer's Easy Wireless Connect mode. When the printer's screen displays Follow the instructions on the PC or smartphone, etc., click Next. for three seconds. Press and hold this button on the printer. This will activate the printer's Easy Wireless Connect mode. When the printer's screen displays Follow the instructions on the PC or smartphone, etc., click Next.

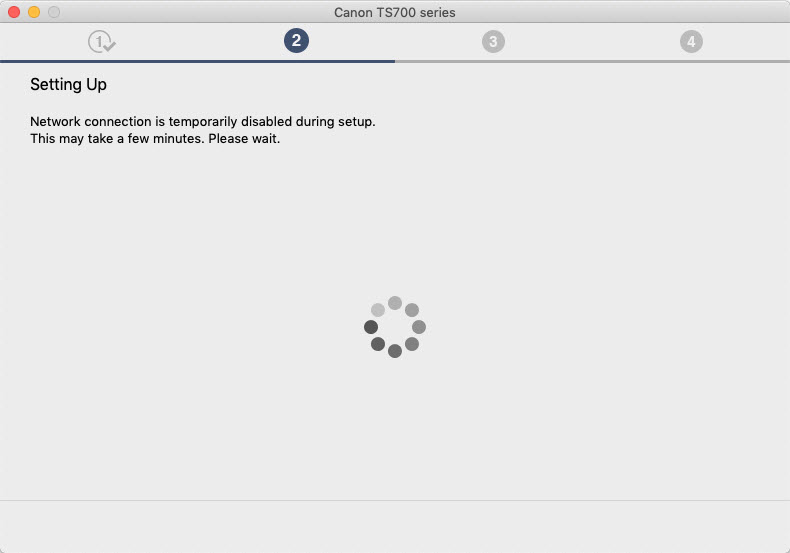
The setup program will then search for the printer. This may take a minute.
- On the Check the Connection Method screen, click Yes.

The Mac will communicate directly with the printer and transmit the wireless network information over. This may take a few minutes.
You will receive a prompt indicating that the setup program wants to access the network key for your network, which is stored in your keychain. Click Allow.

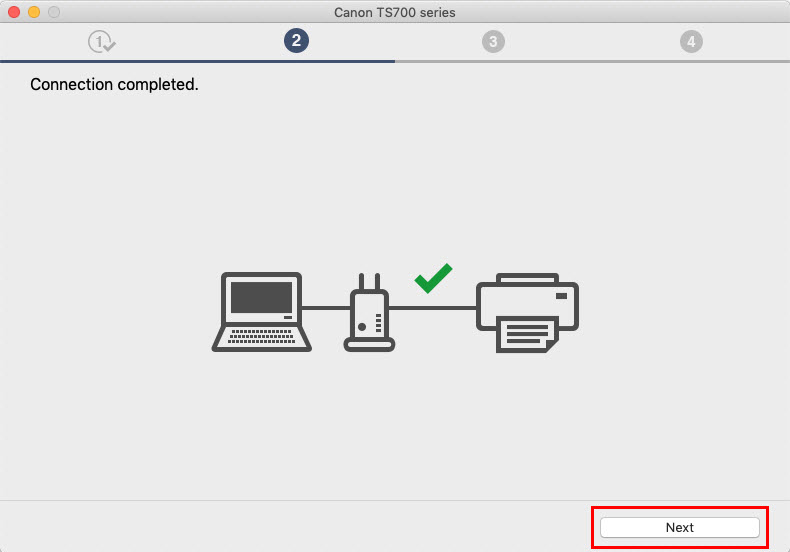
- On the Connection completed screen, click Next.
- The setup program will process for a few moments.
Click here to proceed with the remaining steps in the setup program.
TS702 Page
|
