Shooting with Ambience Selection
 |
Set the Mode Dial to any of the following modes:
 
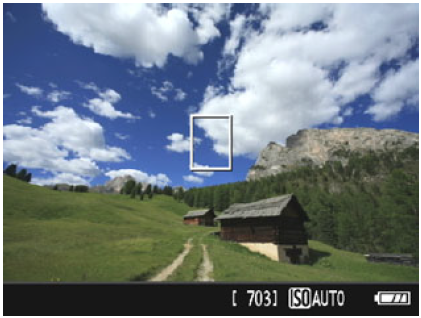
Display the Live View image.
- Press the
 button to display the Live View image. button to display the Live View image.
|
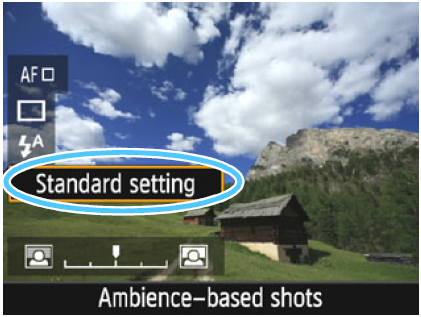 |
With Quick Control, select the desired ambience.
- Press the
 button button 
- Press the
 keys to select [Standard setting]. [Ambiencebased shots] will appear on the screen. keys to select [Standard setting]. [Ambiencebased shots] will appear on the screen.
- Press the
 keys or turn the keys or turn the  dial to select the ambience. dial to select the ambience.
- The LCD monitor will display how the image will look with the selected ambience.
|
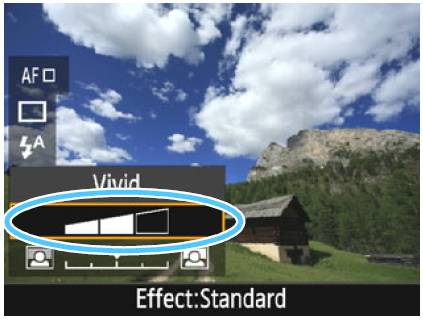 |
Set the ambience effect.
- Press the keys to select the effect so that [Effect] appears at the bottom.
- Press the keys or turn the dial to select the desired effect.
|
| |
Take the picture.
- Press the shutter button completely to take the picture.
- To return to viewfinder shooting, press the <
 > button to exit Live View shooting. Then press the shutter button completely to take the picture. > button to exit Live View shooting. Then press the shutter button completely to take the picture.
- If you change the shooting mode or set the power switch to <OFF>, the setting will revert back to [Standard setting].
|
- The Live View image shown with the ambience setting applied will not look exactly the same as the actual photo.
- Using flash may reduce the ambience effect.
- In bright outdoors, the Live View image you see on the LCD monitor may not have exactly the same brightness or ambience as with the actual captured image. Set
 to 4, and look at the Live View image, preventing the surrounding light from affecting the image viewing.
If you do not want the Live View image to be displayed when setting functions, press the <Q> button after step 1 and set
[Ambience-based shots] and
[Effect].
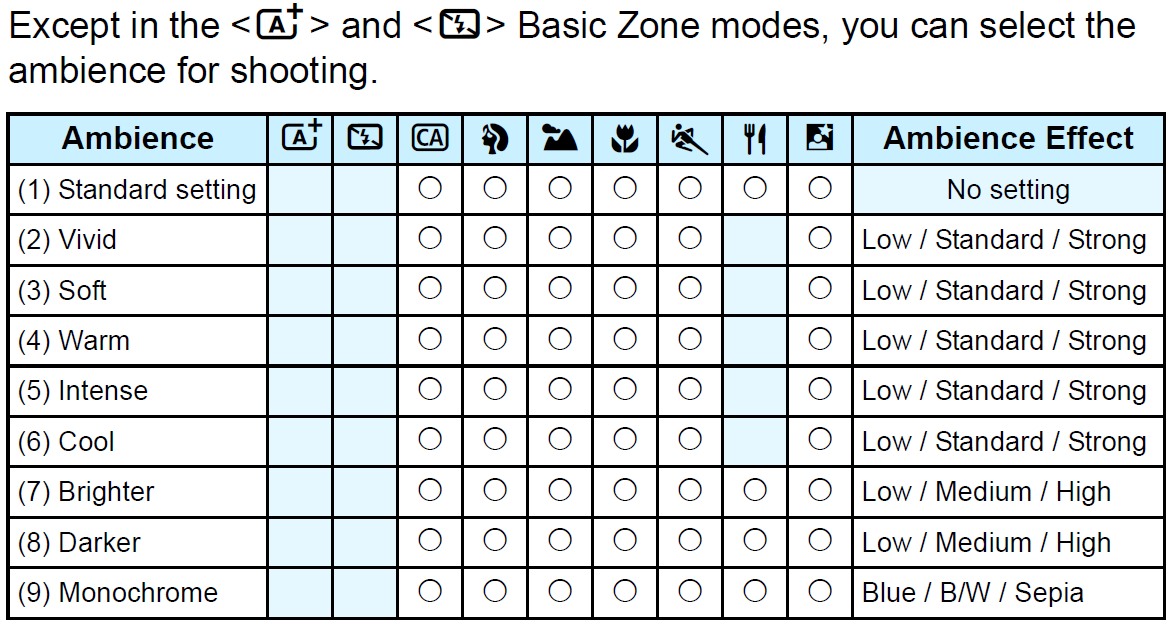
Ambience Settings
(1) Standard setting
Standard image characteristics for the respective shooting mode. Note that

has image characteristics geared for portraits and

is geared for landscapes. Each ambience is a modification of the respective shooting mode’s image characteristics.
(2) Vivid
The subject will look sharp and vivid. It makes the photo look more impressive than with [Standard setting].
(3) Soft
The subject will look softer and more dainty. Good for portraits, pets, flowers, etc.
(4) Warm
The subject will look softer with warmer colors. Good for portraits, pets, and other subjects to which you want to give a warm look.
(5) Intense
While the overall brightness is slightly lowered, the subject is emphasized for a more intense feeling. Makes the human or living subject stand out more.
(6) Cool
The overall brightness is slightly lowered with a cooler color cast. A subject in the shade will look more calm and impressive.
(7) Brighter
The picture will look brighter.
(8) Darker
The picture will look darker.
(9) Monochrome
The picture will be monochrome. You can select the monochrome color to be blue, black and white, or sepia. When
[Monochrome] is selected,
<B/W> will appear in the viewfinder.
