You can set both the shutter speed and aperture manually as desired.
While referring to the exposure level indicator in the viewfinder, you can set the exposure as desired. This method is called manual exposure.
* <M> stands for Manual.
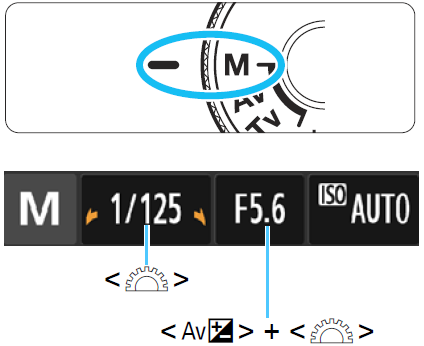 |
Set the Mode Dial to <M>.
Set the ISO speed
Set the shutter speed and aperture.
- To set the shutter speed, turn the
 dial. dial.
- To set the aperture, hold down the
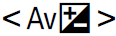 button and turn the dial button and turn the dial
|
 |
Focus on the subject.
- Press the shutter button halfway.
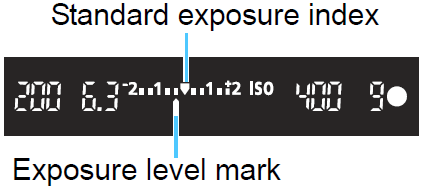
- The exposure setting will be displayed in the viewfinder.
- The exposure level mark
 indicates how far the current exposure level is from the standard exposure level. indicates how far the current exposure level is from the standard exposure level.
|
| |
Set the exposure and take the picture.
- Set the shutter speed and aperture as desired.
- If the exposure level exceeds ±2 stops from the standard exposure, the end of the exposure level indicator will display
 or or  in the viewfinder. (On the LCD monitor, if the exposure level exceeds ±3 stops, the in the viewfinder. (On the LCD monitor, if the exposure level exceeds ±3 stops, the  icon will blink at where <-3> or <+3> is displayed.) icon will blink at where <-3> or <+3> is displayed.)
|
| |
- If
 is set to any setting other than [Disable], the image may still look bright even if a darker exposure has been set. is set to any setting other than [Disable], the image may still look bright even if a darker exposure has been set.
- If ISO Auto is set, the ISO speed setting will change to suit the shutter speed and aperture in order to obtain the standard exposure. Therefore, you may not obtain the desired exposure effect.
|
 Using the Built-in Flash
To obtain the correct flash exposure on the main subject, the flash output will be set automatically (autoflash) to match the manually-set aperture. The shutter speed can be set from 1/200 sec. to 30 sec. or to bulb.
BULB: Bulb ExposuresBULB: Bulb Exposures
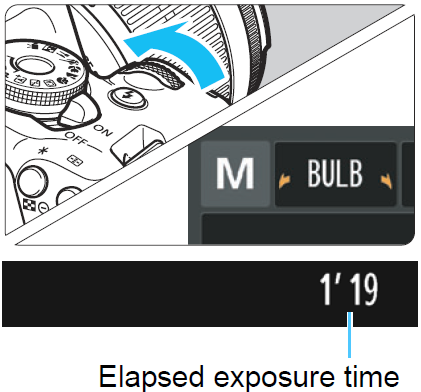 |
A bulb exposure keeps the shutter open for as long as you hold down the shutter button. It can be used to shoot fireworks and other subjects requiring long exposures.
In step 3 on the preceding page, turn the dial to the left to set <BULB>. The elapsed exposure time will be displayed on the LCD monitor. |
- Do not point the camera toward an intense light source, such as the sun or an intense artificial light source. Doing so may damage the image sensor or the camera’s internal components.
- Since long bulb exposures produce more noise than usual, the image may look slightly grainy.
- You can reduce the noise due to long exposures by setting [4: Long exp. noise reduction] under [
 3: Custom Functions (C.Fn)] to [1: Auto] or [2: On]
- If ISO Auto is set for a bulb exposure, the ISO speed will be fixed at ISO 800
For bulb exposures, using a tripod and a remote switch (sold separately are recommended.)
