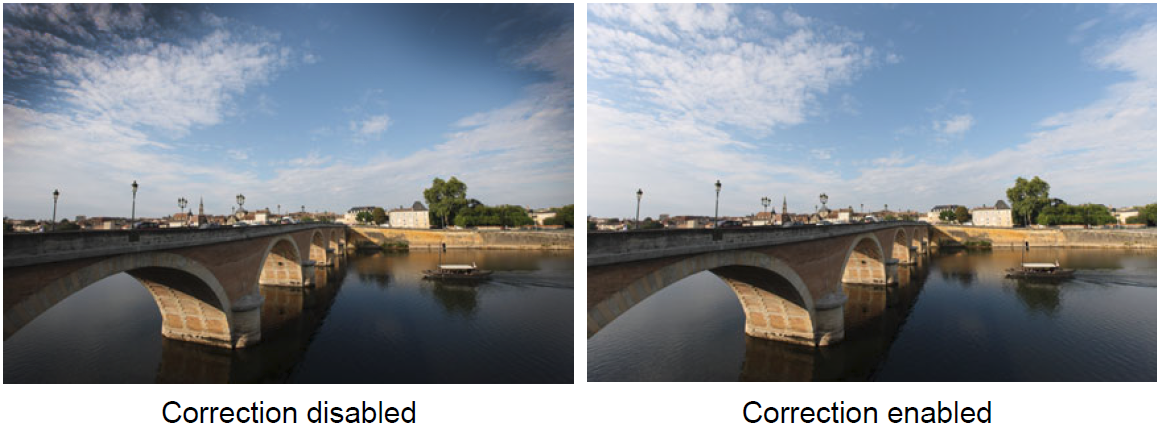
Correcting the Image’s Dark Corners (Vignetting)
Due to the lens characteristics, the four corners of the picture may look darker. This phenomenon is called lens light fall-off or drop in peripheral illumination and can be corrected. The default setting is [Enable]. With JPEG images, the correction is applied when the image is captured. For RAW images, it can be corrected with Digital Photo Professional (EOS software)
 |
Select [Peripheral illumin. correct.].
- Under the [
 1] tab, select [Peripheral illumin. correct.], then press 1] tab, select [Peripheral illumin. correct.], then press  . .
|
 |
Select the setting.
- Check that [Correction data available] is displayed for the attached lens.
- If [Correction data not available] is displayed, see “Lens Correction Data” on the next page.
- Select [Enable], then press .
|
| |
Take the picture.
- The image will be recorded with the peripheral illumination corrected.
|
 Lens Correction Data
The camera already contains lens peripheral illumination correction data for approx. 30 lenses. In step 2, if you select [Enable], the peripheral illumination correction will be applied automatically for any lens whose correction data has been registered in the camera.
With EOS Utility, you can check which lenses have their correction data registered in the camera. You can also register the correction data for unregistered lenses. For details, refer to the EOS Utility Instruction Manual.

Peripheral illumination correction cannot be applied to JPEG images already taken.
- Depending on shooting conditions, noise may appear on the image periphery.
- When using a non-Canon lens, setting the corrections to [Disable] is recommended even if [Correction data available] is displayed.
- If you use the magnified view during Live View shooting, the peripheral illumination correction will not be reflected in the image displayed on the screen.
- If the effect of the correction is not visible, magnify the image after shooting and check it again.
- Corrections can be applied even when an Extender or Life-size Converter is attached.
- If the correction data for the attached lens is not registered to the camera, the result will be the same as when the correction is set to [Disable].
- The correction amount applied will be slightly lower than the maximum correction amount settable with Digital Photo Professional (EOS software).
- The correction amount will be less if the lens used does not have distance information.
- The higher the ISO speed, the lower the correction amount will be.
