Print head alignment corrects the installation positions of the print head and improves deviated colors and lines.
This printer supports two head alignment methods: automatic head alignment and manual head alignment. Normally, the printer is set for automatic head alignment.
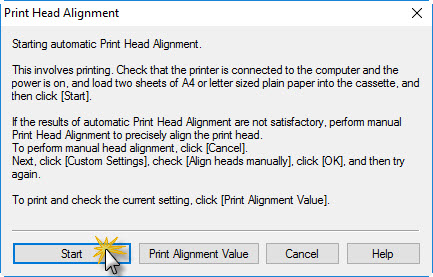
If the printing results of automatic print head alignment are not satisfactory, perform manual head alignment.
The procedure for performing automatic print head alignment is as follows:
 Note
Note
- If the multi-purpose tray guide is open, close it.
- The pattern is printed only in black and blue.
 Print Head Alignment
-
Open the Canon IJ Printer Assistant Tool.
-
Click Print Head Alignment.

-
Load paper in printer
In the cassette, load 2 sheets of plain A4-sized or Letter-sized paper.
Note
- The number of sheets to be used differs when you select the manual head alignment.
-
Make sure that the printer is on and click Start.
Follow the instruction in the message.
 Important
- Do not open the scanning unit / cover while printing is in progress; otherwise, printing will stop.
Note
- Wait until printing ends before performing other operations. Printing takes about 3 to 4 minutes to complete.
Note
- To print and check the current setting, open the Print Head Alignment dialog box, and click Print Alignment Value.
