If you have not already done so, please download and install CaptureOnTouch v4 (Pro or Standard depending on your scanner) first. You will also need to download and "unzip" the CaptureOnTouch Plugins.

Once CaptureOnTouch Pro has been installed and the CaptureOnTouch plugins have been "unzipped", you will need to install the plugin for printer for Windows. Go to the location where you unzipped the plugins and double-click on "PlugInPrinter_ForWindows_1.3......". Follow the on-screen prompts to install this plugin.
Once the plugin has been installed, open (start) CaptureOnTouch v4.
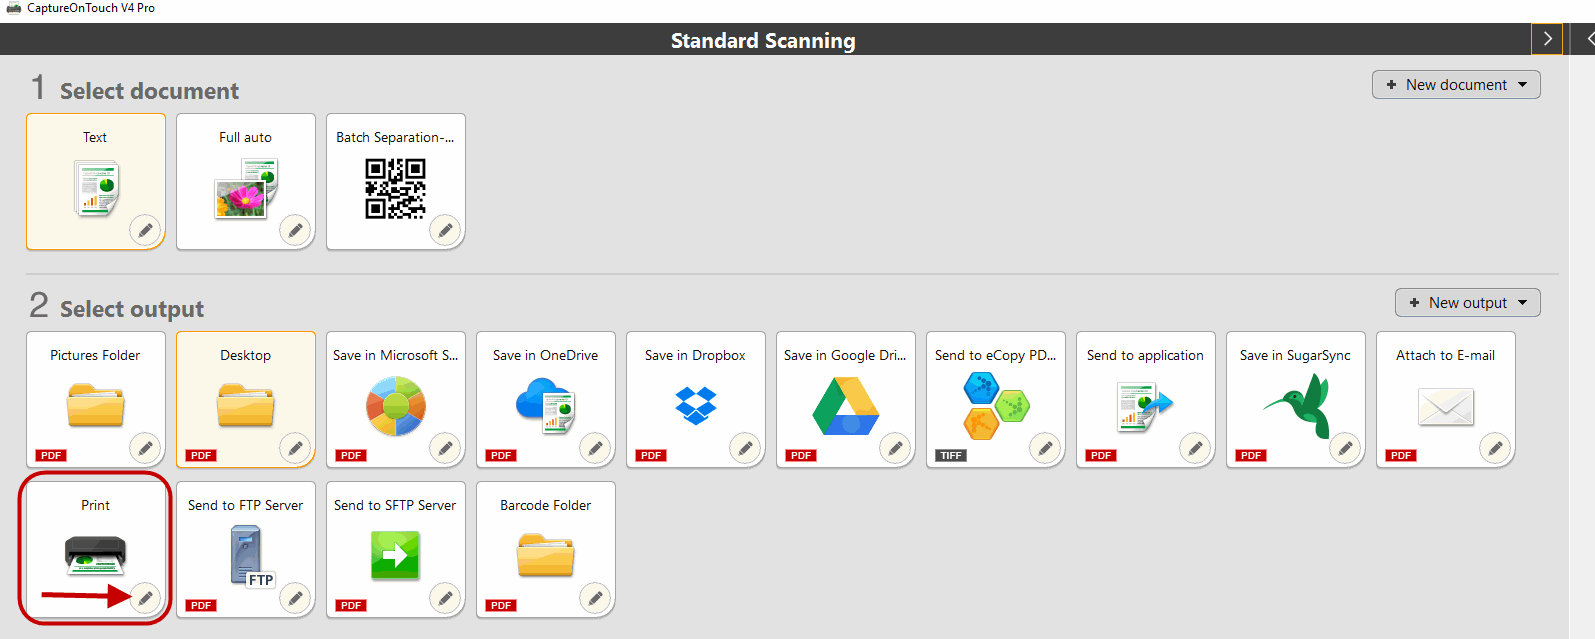
Locate the "Print" shortcut and click on the pencil icon to set the details.

1. Make sure "Print" is listed as the output method..
2. Click on "Detail Settings" to open the printer properties window (where you can select which printer you want to use and the specific print output requirements).

3. Click on the drop-down arrow next to the printer name to select the printer you want.
4. Click on the "Properties" button to set the print settings you need.
5. Once all of the settings have been selected, click on the "OK" button to close the printer properties window.
6. That's it. To scan to print, simply select the document type (section 1), and the "Print" shortcut. Once the document(s) is/are loaded in the scanner, click the green "Scan" button to initiate the scan process. Once all of the documents are scanned, and you click on the "Finish" button, the documents will be sent to the printer for printing.
