Installing and removing the card on the EOS Digital Rebel XT
Article ID: ART174108
|
Date published: 04/26/2019
|
Date last updated: 04/26/2019
Description
Installing and removing the card on the EOS Digital Rebel XT
Solution
The captured image will be recorded onto the CF card (optional). Although the thickness is different, a Type I or Type II CF card can be inserted into the camera. The camera is also compatible with Microdrive and CF cards with 2 GB or higher capacity.
Installing the card
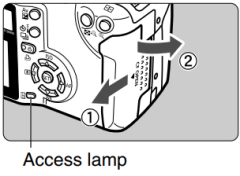
1. Open the cover.
Slide the cover as shown by the arrow to open it.
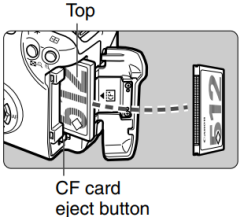
2. Insert the CF card.
Using Canon CF cards is recommended.
If the CF card is inserted in the wrong way, it may damage the camera. As shown in the illustration, face the label side toward you and insert the end with the small holes into the camera.
The CF card eject button pops up.
3. Close the cover.
Close the cover and slide it in the direction shown by the arrow until it snaps shut.
When you set the power switch to <ON>, the number of remaining shots will be displayed on the LCD monitor.
Removing the card
1. Open the cover.
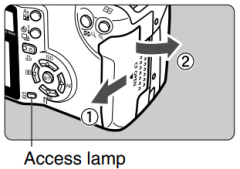
Set the power switch to <OFF>.
Check that the "buSY" message is not displayed on the LCD panel.
Make sure the access lamp is off, then open the cover.