WPS Connection
Follow the procedure below to set up the network connection using Wifi Protected Setup (WPS)
-
Press the OK button.
-
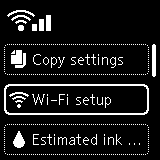
Use the  or
or  button (A) to select Wi-Fi setup and press the OK button.
-
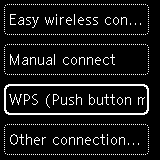
Select WPS (Push button method) and press the OK button.
-
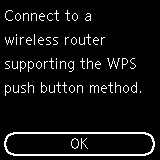
Press the OK button.
-
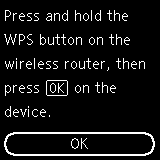
Press and hold the WPS button on the wireless router.
 Note
Note
- For more on pressing the WPS button, see the wireless router manual.
-
Press the OK button on the printer within 2 minutes.
If a different screen appears, see "Troubleshooting."
-
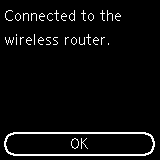
When the screen on the below appears, press the OK button.
If a different screen appears, see "Troubleshooting."
-
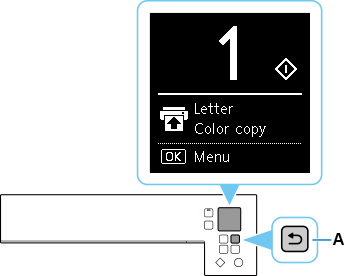
Press the Back button (A).
-
The network connection setup is now complete.
Return to the software and proceed with the installation.
Windows
Click  in the taskbar, follow the on-screen instructions to proceed with setup.
macOS
Click  in the Dock, follow the on-screen instructions to proceed with setup.

.gif)
.gif)