How to Connect the Printer to a Wireless LAN via the WPS Push Button Method - iB4120
Article ID: ART175497
|
Date published: 10/18/2019
|
Date last updated: 10/18/2019
Description
You can connect your MAXIFY iB4120 to a wireless LAN via the WPS push button method.
Solution
If your wireless router has a WPS push button on it, you can use this button to connect your MAXIFY iB4120 to the wireless network. Follow the steps below to perform this connection.
With the printer powered on, press the Setup button.
In the Setup menu, Wireless LAN setup will be the first option shown. Press the OK button.
Press the right arrow button until WPS (Push button) appears. Press the OK button.
The message Press WPS button of the wireless router about 5 sec. and press [OK] of this printer will scroll across the screen.
When this message appears, press and hold the WPS button on your wireless router for about 5 seconds and then release it.
NOTE: The WPS button on your router may look like either of the following:
The button itself may be labelled simply as WPS or Wi-Fi Protected Setup.
Refer to your router's documentation for more information.
After pressing and holding the WPS button on the router for 5 seconds, press the OK button on the printer. The printer will attempt to connect to the wireless router.
The printer will display a message indicating that it has connected to the network.
Press the OK button.
The printer is now connected to the wireless network.
After the printer has been connected to the network, you will need to install the software for the printer on your Windows PC or Mac.
If you are unable to connect your printer to the wireless network using this setup method, you can also use the Cableless setup method to establish a wireless connection.
Click here for instructions if you have a Windows PC.

 button.
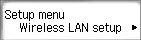


 Important