EOS-1D X Mark III: Live View Shooting

Article ID: ART176248 | Date published: 02/03/2020 | Date last updated: 09/15/2023
 

Description

Live View Shooting

Solution

Live View Shooting

Live View Shooting

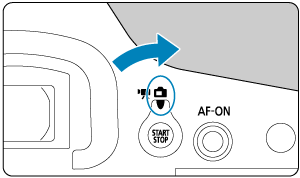
  1. Set the Live View shooting/Movie shooting switch to Live View shooting.

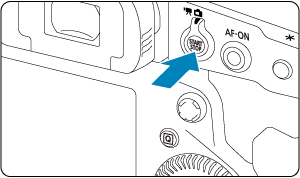
  2. Display the Live View image.

    • Press the Start/Stop button.
    • Live View images are displayed nearly as bright as your shots.
  3. Select a shooting mode.

    • Press the MODE button and turn the Main Dial or Quick Control Dial dial to select the shooting mode.
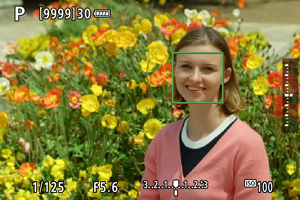
  4. Focus on the subject.

    • When you press the shutter button halfway, the camera will focus with the current AF method ().
    • You can also tap the screen to select the face or subject.
  5. Take the picture.

    • Press the shutter button completely.
    • Press the Start/Stop button to exit Live View shooting.

Caution

  • Live View images viewed outdoors on a sunny day may look different from the actual brightness and mood of your shots. For image display unaffected by ambient light, set the brightness in [Set-up: Disp. brightness] to level 4.

Note

  • The field of view is approx. 100% (with image size set to JPEG/Large).
  • The camera will turn off automatically if left idle for the time set in [Set-up: Auto power off] (). When the setting is set to [Disable], the camera exits Live View shooting automatically in approx. 30 min. and remains on.
  • With HDMI Cable HTC-100, you can display Live View images on a television (). Note that no sound will be output.
  • You can view a histogram when [Shooting: Expo. simulation] is set to [Enable] () by pressing the INFO button repeatedly.
  • White display of the [Exposure simulation (enable)] icon indicates that brightness of Live View images will closely match the brightness of your shots.
  • If the [Exposure simulation (enable)] icon is blinking, it indicates that the image is displayed at a brightness that differs from the actual shooting result because of low- or bright-light conditions. However, the actual image recorded will reflect the exposure setting. Note that the noise may be more noticeable than the actual image recorded.
  • Exposure simulation may not be performed under some shooting settings. The [Exposure simulation (enable)] icon and histogram will be displayed in gray. The image will be displayed on the screen at the standard brightness. The histogram may not be properly displayed in low- or bright-light conditions.


SIMS Doc Id

1579295422

Rate this Article
Was this article helpful?
Yes, This document is helpful
No, This document needs a clearer explanation
 
Please provide your comments