Adjusting Intensity
You can dilute (brighten) or intensify (darken) the colors of the overall image data during printing.
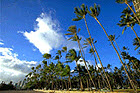
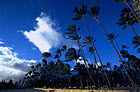
The following sample shows the case when the intensity is increased so that all colors become more intense when the image data is printed.
|
|
|
|
No adjustment
|
Higher intensity
|
You can also set intensity on the Quick Setup tab by choosing Photo Printing under Commonly Used Settings, and then choosing Color / Intensity Manual Adjustment under Additional Features.
-
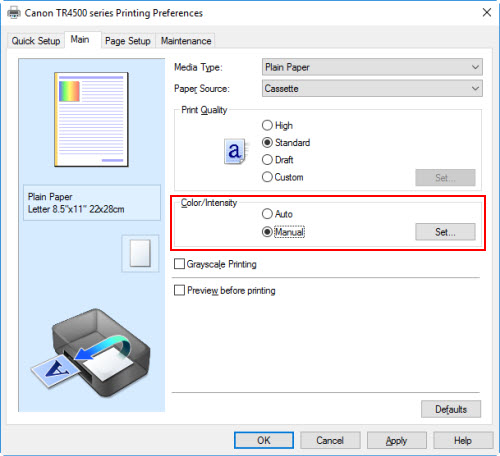
Open the printer driver setup window.
-
On the Main tab, select Manual for Color / Intensity, and click Set....
The Manual Color Adjustment dialog box opens.
-
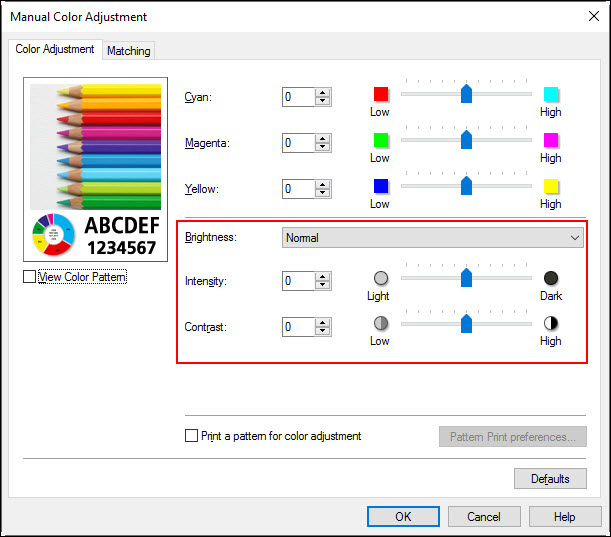
Moving the Intensity slider to the right intensifies (darkens) the colors, and moving the slider to the left dilutes (brightens) the colors.
You can also directly enter a value linked to the slider. Enter a value in the range from -50 to 50. The current settings are displayed in the settings preview on the left side of the printer driver.
After adjusting each color, click OK.
-
Click OK on the Main tab.
When you print, the document or image will be printed with the adjusted intensity.
You can also adjust color balancing from the printer driver.