|
|
Fully Automatic Shooting (Scene Intelligent Auto) on the EOS Rebel T100
| Article ID: ART176501 |
| |
Date published: 02/06/2020 |
| |
Date last updated: 02/06/2020 |
Description
< > is a fully automatic mode. The camera analyzes the scene and sets the optimum settings automatically. > is a fully automatic mode. The camera analyzes the scene and sets the optimum settings automatically. It also adjusts focus automatically by detecting whether the subject is still or moving.
Solution
Fully Automatic Shooting (Scene Intelligent Auto)
 |
 |
Set the Mode Dial to <>. |
 |
 |
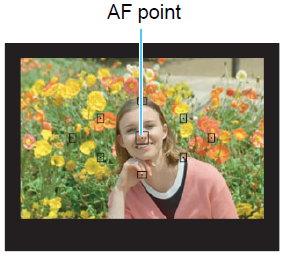
Aim any AF point over the subject. |
 |
All the AF points will be used to focus, and the camera will normally focus on the closest object. |
|
Aiming the center AF point over the subject will make focusing easier. |
 |
 |
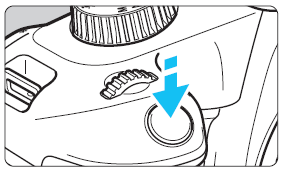
Focus on the subject. |
|
Press the shutter button halfway. The lens focusing ring will rotate to focus. |
 |
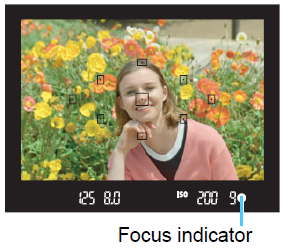
The dot inside the AF point achieving focus flashes briefly in red. At the same time, the beeper will sound and the focus indicator < > in the viewfinder will light up. > in the viewfinder will light up. |
|
If the < > icon blinks in the viewfinder, raise the built-in flash with your fingers. > icon blinks in the viewfinder, raise the built-in flash with your fingers. |
 |
 |
Take the picture. |
|
Press the shutter button completely to take the picture. |
|
The captured image will be displayed for approx. 2 sec. on the LCD monitor. |
|
To retract the built-in flash, push it down with your fingers. |
 |
The < > mode makes the colors look more impressive in nature, outdoor, and sunset scenes. If you did not obtain the desired color tones, change the mode to a Creative Zone mode and select a Picture Style other than < > mode makes the colors look more impressive in nature, outdoor, and sunset scenes. If you did not obtain the desired color tones, change the mode to a Creative Zone mode and select a Picture Style other than < >, then shoot again. >, then shoot again. |
 FAQ FAQ
|
|
The focus indicator <> blinks and focus is not achieved.
Aim the AF point over an area with good contrast, then press the shutter button halfway. If you are too close to the subject, move away and try again.
In low-light conditions, when you raise the built-in flash, the AF-assist beam will be emitted to make focusing easier. |
|
Multiple AF points flash simultaneously.
This indicates that focus is achieved at all those AF points. When the AF point covering the desired subject also flashes, take the picture. |
|
The beeper continues to beep softly. (The focus indicator <> does not light up.)
It indicates that the camera is focusing continuously on a moving subject. (The focus indicator <> does not light up.) You can take sharp pictures of a moving subject.
Note that the focus lock wil not work in this case. |
|
Pressing the shutter button halfway does not focus on the subject.
If the focus mode switch on the lens is set to <MF> (manual focus), set it to <AF> (autofocus). |
|
The picture came out extremely dark.
If you raise the built-in flash beforehand, the flash will fire automatically in backlit conditions in daylight or in low-light conditions. |
|
When shooting in low light with the built-in flash raised, it fired a series of flashes.
Pressing the shutter button halfway may trigger the built-in flash to fire a series of flashes to assist autofocusing. This is called the AF-assist beam. Its effective range is approx. 4 meters / 13.1 feet. |
|
The flash fired and the picture came out extremely bright.
Move further away from the subject and shoot. When shooting flash photography, if the subject is too close to the camera, the picture may come out extremely bright (overexposure). |
|
When flash was used, the bottom part of the picture came out unnaturally dark.
The shadow of the lens barrel was captured in the picture because the subject was too close to the camera. Move further away from the subject and shoot. If a hood is attached to the lens, remove it before taking the flash picture. |
|
When not using the built-in flash, refer to the following notes to take the pictures. |
 |
Prevent camera shake if the numeric display (shutter speed) in the viewfinder blinks.
Under low light when camera shake is proone to occur, the viewfinder's shutter speed display will blink. Hold the camera steady or use a tripod.
When using a zoom lens, use a wide angle to reduce blur caused by camera shake even with handheld shooting. |
|
When shooting portraits
In low-light conditions, tell the subject to keep still until the picture is taken. Any movement by the subject during shooting may result in the subject being blurred in the picture. |
Fully Auto Techniques (Scene Intelligent Auto)
Recomposing the Shot
 Depending on the scene, position the subject toward the left or right to create a balanced background and good perspective.
In the < > mode, pressing the shutter button halfway to focus on a still subject will lock the focus on that subject. Recompose the shot while keeping the shutter button pressed halfway, and then press the shutter button completely to take the picture. This is called "focus lock".
Focus lock is also possible in other Basic Zone modes (except <  >.
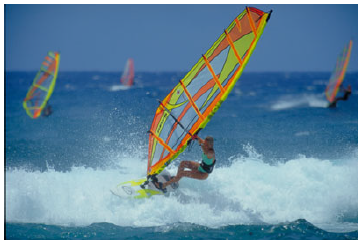
Shooting a Moving Subject
In the < > mode, if the subject moves (distance to camera changes) while or after you focus, AI Servo AF will take effect to focus on the subject continuously. (The beeper wil continue beeping softly.) As long as you keep aiming the AF point on the subject while pressing the shutter button halfway, the focusing will be continuous. When you want to take the pictuere, press the shutter button completely.  Live View Shooting Live View Shooting
You can shoot while viewing the image on the LCD monitor. This is called "Live View shooting".
 |
|
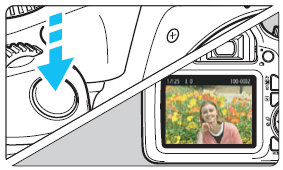
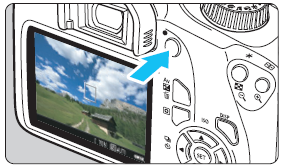
Display the Live View image on the LCD monitor. |
|
Press the < > button. > button. |
|
The Live View image will appear on the LCD monitor. |
 |
|
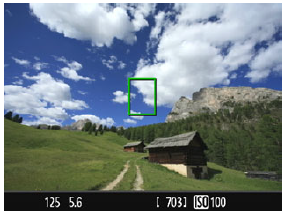
Focus on the subject. |
|
Aim the center AF point < > on the subject. > on the subject. |
|
Press the shutter button halfway to focus. |
|
When focus is achieved, the AF point will turn green and the beeper will sound. |
|
If the <> icon blinks, raise the built-in flash with your fingers. |
 |
|
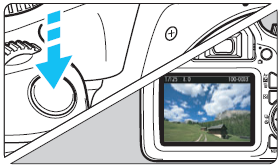
Take the picture. |
|
Press the shutter button completely. |
|
The picture is taken and the captured image is displayed on the LCD monitor. |
|
When the playback display ends, the camera will return to Live View shooting automatically. |
|
Press the <> button to exit the Live View shooting. |
|