|
|
Shooting multiple exposures on the EOS-1D X Mark III.
| Article ID: ART176573 |
| |
Date published: 03/11/2020 |
| |
Date last updated: 03/11/2020 |
Description
You can shoot multiple (2-9) exposures to merge into a single image. In Live View shooting, you can see in real time how the exposures are merged when you shoot multiple-exposure images.
Solution
Multiple Exposures
1.
|
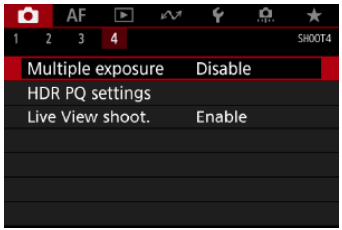
Select [ : Multiple exposure]. : Multiple exposure].
 |
2.
|
Set [Multiple exposure].
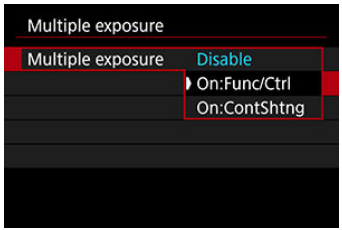
- Select an option, then press <
 >. >.
- To exit shooting multiple exposures, select [Disable].
- On:Func/Ctrl
Convenient when shooting multiple exposures gradually as you check the results. During continuous shooting, the continuous shooting speed will decrease greatly.
- On:ContShtng
Used for continuous multiple exposures of moving subjects.
Continous shooting is possible, but the following operations are disabled during shooting: menu screen viewing, image review after capturew, image playback, and undo last image.
Note that the single exposures used for merging are discarded, and only the multiple-exposure image is saved.
|
3.
|
Set [Mult-expos ctrl].

- Select a merging option, then press <>.
- Additive
The exposure of each single image captured is added cumulatively.
Based on [No. of exposures], set negative exposure compensation.
Follow these basic guidelines to set the exposure compensation amount.
Exposure compensation setting guidelines, by number of exposures
Two exposures: -1 stop, three exposures: -1.5 stops, four exposures: -2 stops
- Average
Based on the [No. of exposures], negative exposure compensation is set automatically as you shoot multiple exposures. If you shoot multiple exposures of the same scene, the exposure of the subject's background will be automatically controlled to obtain the standard exposure.
- Bright/Dark
Brightness (or darkness) of the base image and added images is compared at the same position, and bright (or dark) portions are retained. Some overlapping colors may be mixed, depending on the relative brightness (or darkness) of the images.
|
4.
|
Set [No. of exposures].
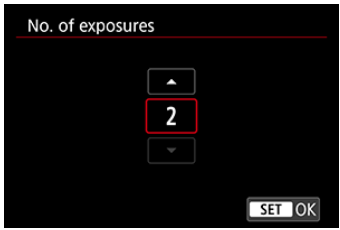
- Select the number of exposures, then press <>.
|
5.
|
Specify the images to save.
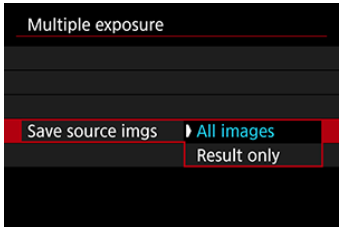
- To save all single exposures and the multiple-exposure image, select [All images] and press <>.
- To save only the multiple-exposure image, select [Result only] and press <>.
|
6.
|
Set [Continue Mult-exp].
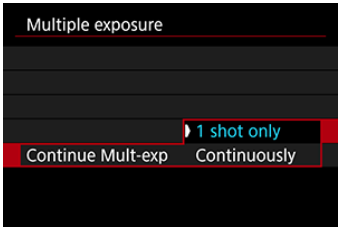
- Select an option, then press <>.
- With [1 shot only], multiple-exposure shooting will be canceled automatically after the shooting ends.
- With [Continously], multiple-exposure shooting continues until the setting in step 2 is set to [Disable].
|
7.
|
Shoot the first exposure.
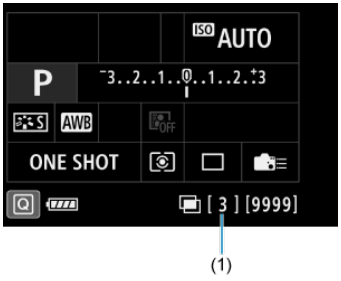
- When [On:Func/Ctrl] is set, the captured image will be displayed.
- The <
 > icon blinks. > icon blinks.
- You can check the number of remaining exposures, as displayed at right in the viewfinder or on the screen (1).
- Pressing the <
 > button enables you to view the captured image. > button enables you to view the captured image.
|
8.
|
Shoot the next exposures.
- Images captured so far are displayed merged in Live View shooting.
For only Live View image display, press the < > button repeatedly. > button repeatedly.
- To view the multiple-exposure image so far, check exposure, and see how the images will be merged, hold down the depth-of-field preview button (or the button assigned to [Depth-of-field preview] in [
 : Custom Controls]) in Live View shooting. : Custom Controls]) in Live View shooting.
- Multiple-exposure shooting will end when the set number of exposures are taken.
|
 Note Note |
- With [On:Func/Ctrl], you can press the <> button to view the multiple-exposure image so far or delete the previous single exposure.
- As shooting information, the multiple-exposure image has information captured for the last shot.
|
 Caution Caution |
- The image quality, ISO speed, Picture Style, high ISO speed noise reduction, color space, etc. set for the single exposure will also be set for the subsequent exposures.
- If [: Picture Style] is set to [Auto], {Standard] will be applied for shooting.
- With [On:Func/Ctrl] and [Additive] set, any noise, irregular colors, banding, or similar issues affecting images displayed as you shoot may look different in the final multiple-exposure iimage.
- With multiple exposures, the more exposures there are, the more noticeable the noise, irregular colors, and banding will be.
- Image processing after you finish shooting multiple exposures takes longer when [Additive] is set (which causes the access lamp to be illuminated longer).
- Brightness and noise of the multiple-exposure image captured in step 8 will be different in the resulting multiple-exposure image.
- Multiple-exposure shooting is cancelled if you set the power switch to <
 >, replace batteries or cards, or switch to movie recording. >, replace batteries or cards, or switch to movie recording.
- Switching to <
 >, < >, < >, or < >, or < > shooting mode ends multiple-exposure shooting in progress. > shooting mode ends multiple-exposure shooting in progress.
- If you connect the camera to a computer, multiple-exposure shooting will not be possible. If you connect the camera to a computer during shooting, multiple-exposure shooting will end.
|
|
