Automatic Print Head Alignment From the Operation Panel - PIXMA TR150

Article ID: ART176598 | Date published: 03/20/2020 | Date last updated: 07/08/2021
 

Description

Learn how to perform an automatic print head alignment from the operation panel of your PIXMA TR150.

Solution

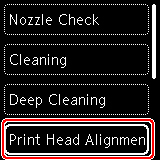
If printed ruled lines are misaligned or print results are unsatisfactory, print head alignment may improve the print results. The video and written instructions below will walk you through the process.


Print head alignment.

Note If the printer is low on ink, the print head alignment sheet will not be printed correctly. Learn how to replace an ink tank.

  1. Make sure that the printer is powered on.

  2. Load a sheet of A4 or Letter-sized plain paper in the rear tray.

  3. Select the Setup icon Setup icon on the HOME screen.

  4. Select Maintenance.

  5. Select Print Head Alignment - Auto. The confirmation screen will appear.

    Figure: Print head alignment - auto selected

    Note To print and check the current head position alignment values, select Print the head alignment value.

  6. Select Yes.

  7. Press the OK button. The print head alignment sheet is printed, and the print head is aligned automatically. This takes about 4 minutes.

  8. When the completion message appears, select OK.

Note If the print results are still not satisfactory after the automatic print head alignment, you can align the print head manually.

If your product issue was not resolved after following the steps above, or if you require additional help, please create or log in to your Canon Account to see your technical support options.

Or if you still need help, visit our Canon Community by clicking the button below to get answers:

Link to Canon Community Forum


____________________________________________________________________________________________


Rate this Article
Was this article helpful?
Yes, This document is helpful
No, This document needs a clearer explanation
 
Please provide your comments