If an automatic print head alignment does not resolve misaligned prints, you may be able to resolve the issue with a manual print head alignment. The instructions below will walk you through the process.
Manual print head alignment
-
Make sure that the printer is powered on.
-
Load three sheets of A4 or Letter-sized plain paper in the rear tray.
-
Select the Setup icon  on the HOME screen.
-
Select Maintenance.
-
Select Print Head Alignment - Manual. The confirmation screen will appear.

 To print and check the current head position alignment values, select Print the head alignment value.
-
Select Yes.
-
Press the OK button. The print head alignment pattern will be printed.
-
When Did the patterns print correctly? appears, make sure pattern was printed correctly. If the printout is fine, select Yes.
-
Review the message and select OK. The input screen for head position alignment values is displayed.
-
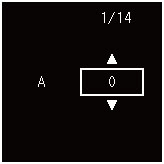
Examine the patterns. In column (A), find the pattern where the streaks are least noticeable, select the number of that pattern, and then press the OK button.
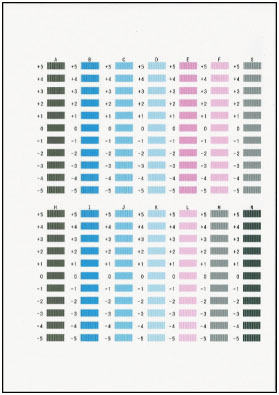
If all patterns look different, choose the pattern where the vertical streaks are least noticeable.
-
Repeat these steps for columns (B) to (N).
-
Review the message and press the OK button. The second set of patterns is printed.
-
Examine the second set of patterns. In column (O), find pattern where the streaks are least noticeable, select the number of that pattern, and then press the OK button.
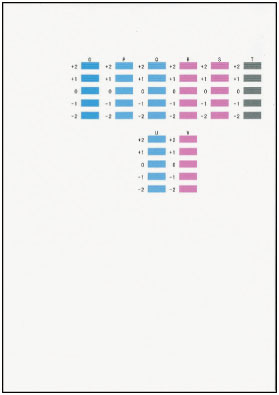
If all patterns look different, choose the pattern where the horizontal stripes are least noticeable.
-
Repeat these steps for columns (P) to (V).
-
Review the message and press the OK button. The third set of patterns is printed.
-
Examine the third set of patterns. In column (W), find pattern where the stripes are least noticeable, select the number of that pattern, and then press the OK button.
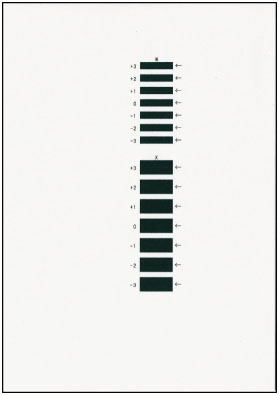
If all patterns look different, choose the pattern where the horizontal streaks are least noticeable.
-
Repeat these steps until you enter all the pattern numbers for column (X).
-
When the completion message appears, select OK.
If your product issue was not resolved after following the steps above, or if you require additional help, please create or log in to your Canon Account to see your technical support options.
Or if you still need help, visit our Canon Community by clicking the button below to get answers:

____________________________________________________________________________________________


