If your router has a WPS button, it can connect to the printer to your wireless network without the use of any software. Please follow the steps below.
WPS Push Button connection method
 If printer is the middle of a process, like cleaning or print head alignment, wait for the process to finish before you begin the setup.
-
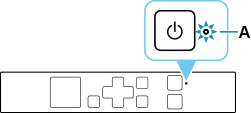
Make sure the printer is powered on. The ON lamp (A) will be lit.
-
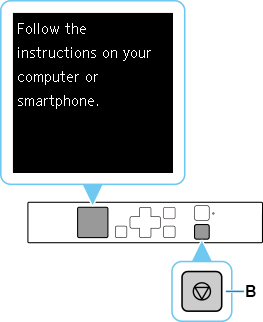
If the screen shown below appears, press the Stop button (B). If not, proceed to the next step.
-
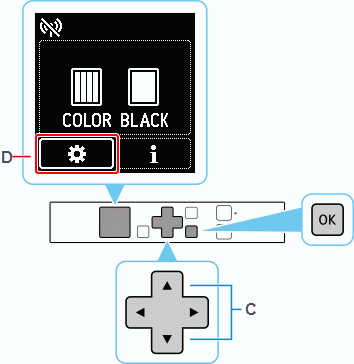
Use the up or down arrown buttons 
 (C) to select the Settings icon
  (D), and then press the OK button.
-
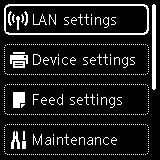
Select LAN settings, and press the OK button.
-
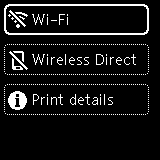
Select Wi-Fi, and press the OK button.
-
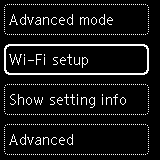
Select Wi-Fi setup, and press the OK button.

-
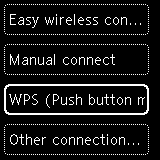
Select WPS (Push button method), and press the OK button.
-
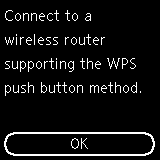
Press the OK button.
-
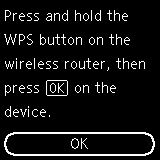
Press and hold the WPS button on the wireless router.
Review the wireless router manual if you have any questions about the WPS button.
-
Press the OK button on the printer within 2 minutes.
-
When the screen below appears, press the OK button.
-
Press the Back button (E) until the Home screen appears.

-
The network connection setup is now complete. The Wi-Fi® icon  appears at the upper left of the screen.
-
After the printer has been connected to your wireless network, you'll need to download and install the drivers or software.
Driver and software download
If your product issue was not resolved after following the steps above, or if you require additional help, please create or log in to your Canon Account to see your technical support options.
Or if you still need help, visit our Canon Community by clicking the button below to get answers:

____________________________________________________________________________________________