Canon SELPHY Photo Layout is an app for Android™ or iOS® that lets you create and store layouts of images on your mobile device. Then you can easily retrieve and print the images on your SELPHY printer.
Introduction
-
The Photo Layout app is compatible with the SELPHY Square QX10.
-
This can be downloaded from Google Play™ or the App Store.
-
Saved image layouts can be easily accessed at a later time from History in the app Menu.
Connect the printer
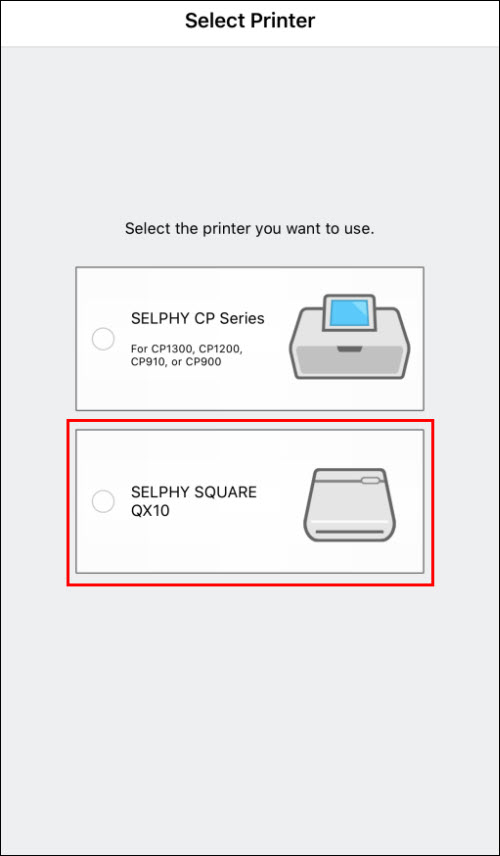
Your mobile device must connect to the SELPHY Square QX10. Follow these steps to connect your mobile device to the SELPHY Square QX10.
-
After launching the app and choosing to agree or disagree to the Extended Survey, tap SELPHY SQUARE QX10.
-
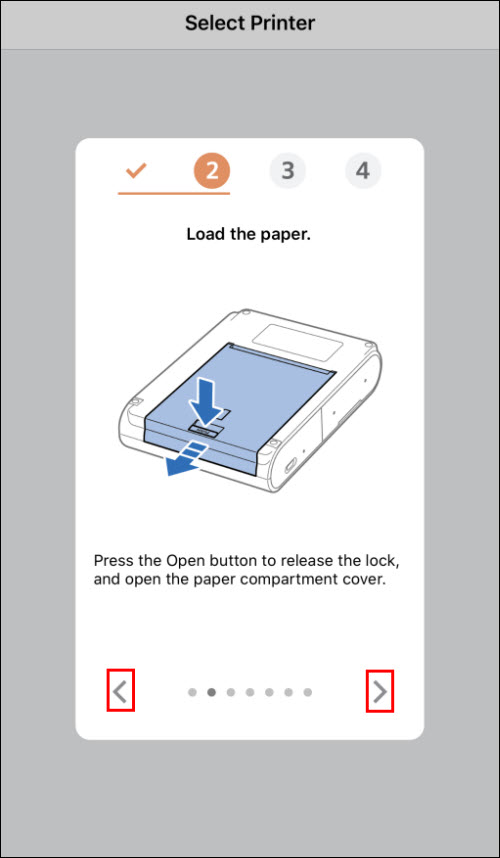
Follow the instructions that are displayed on the screen. Tap the right arrow to proceed to the next set of instructions. Tap the left arrow to go back to the previous set of instructions.
-
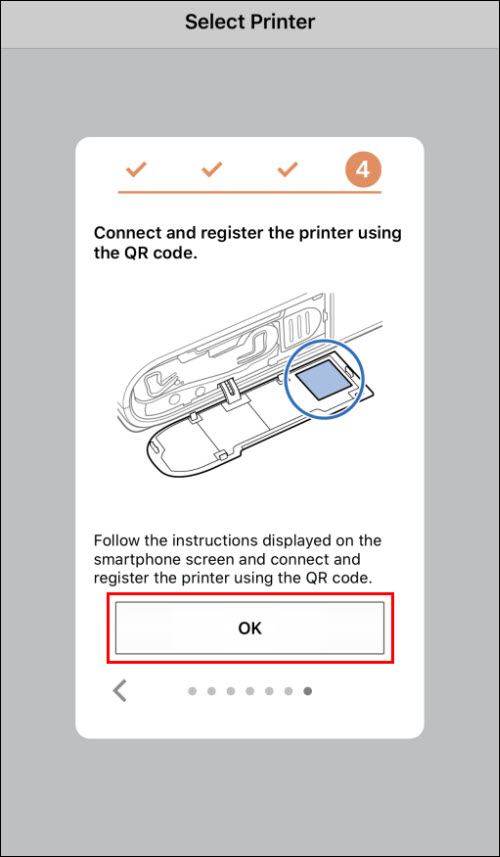
On the last set of instructions, tap OK.
 You may be prompted to allow the app to access your camera. Tap OK or the appropriate affirmative option.
-
Align the frame with the QR code on the back of the printer's ink cover.
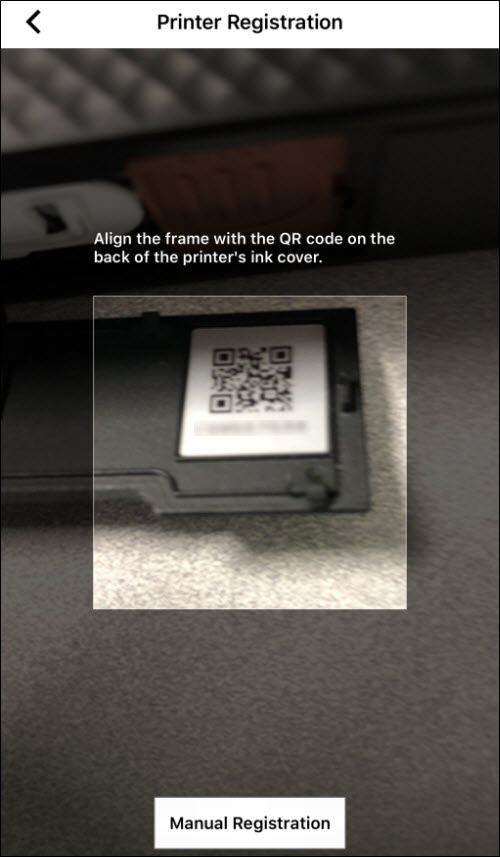
 If you are unable to align the frame with the QR code, you can tap Manual Registration to manually enter in the password needed to connect to the printer (by default, it's the 9-digit alphanumeric code printed below the QR code on the inside of the ink cover).
-
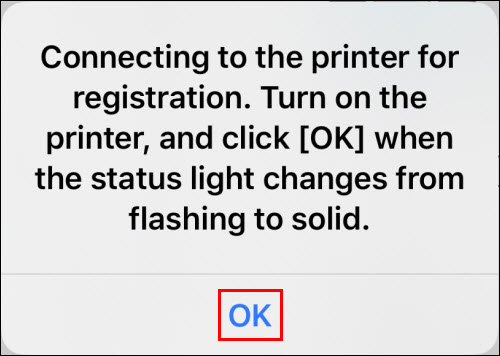
Follow the instructions and tap OK.
-
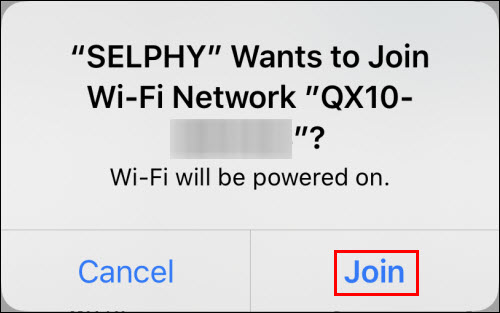
You may be prompted to connect to the printer's Wi-Fi network. Tap Join.
-
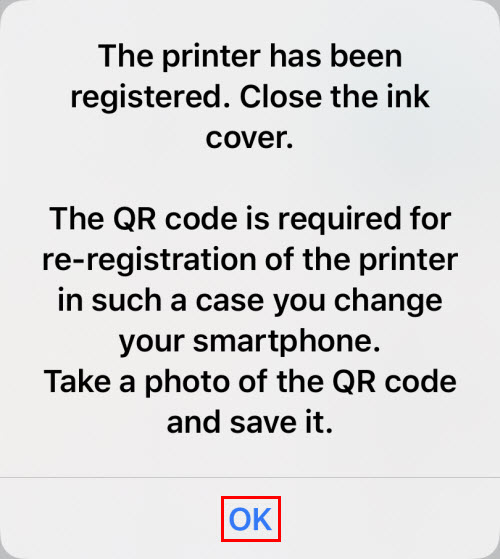
After the printer has been registered with the app, tap OK.
Manually registering the printer
If you were unable to register the printer by aligning the QR code in the frame as shown in step 4 above, tap Manual Registration. When prompted, enter the 9-digit alphanumeric code printed below the QR code on the inside of the ink cover.
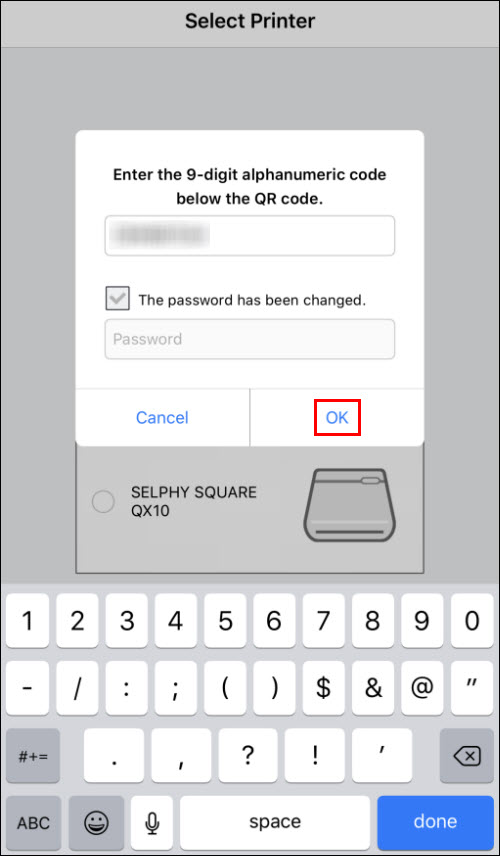
Tap OK after entering the code. Follow the on-screen instructions to finish the registration process.
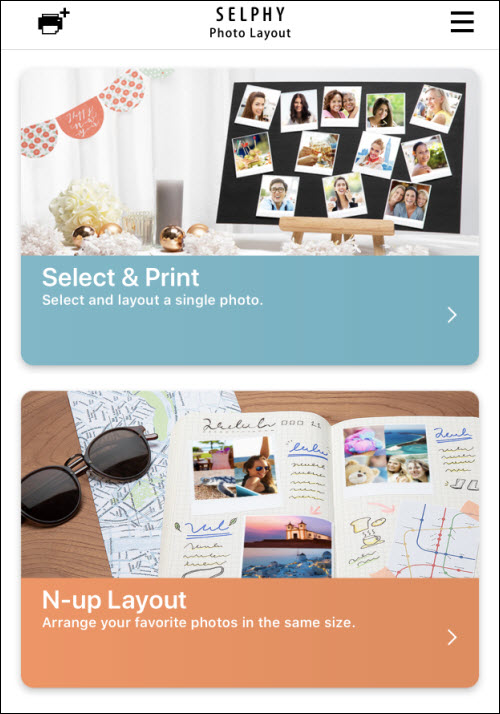
Available layouts
Select & Print - select and print a single photo.
Options:
-
Border (Narrow / Normal / Wide)
-
Position (Up / Down / Right / Left)
-
Frame
-
Stamp
-
Text
-
Paint
-
Filter
-
Overcoat
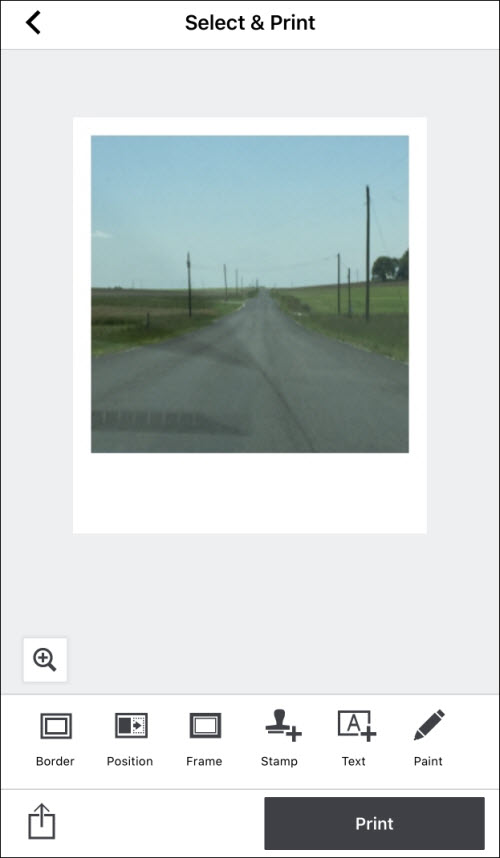
You can also choose a different photo if desired. However, any changes made to the currently selected photo will be lost.
N-up - arrange photos in the same size.
Options:
-
2-up, 3-up, or 4-up
-
Border (Narrow / Normal / Wide)
-
Position (Up / Down / Right / Left)
-
Frame
-
Stamp
-
Text
-
Paint
-
Filter
-
Overcoat
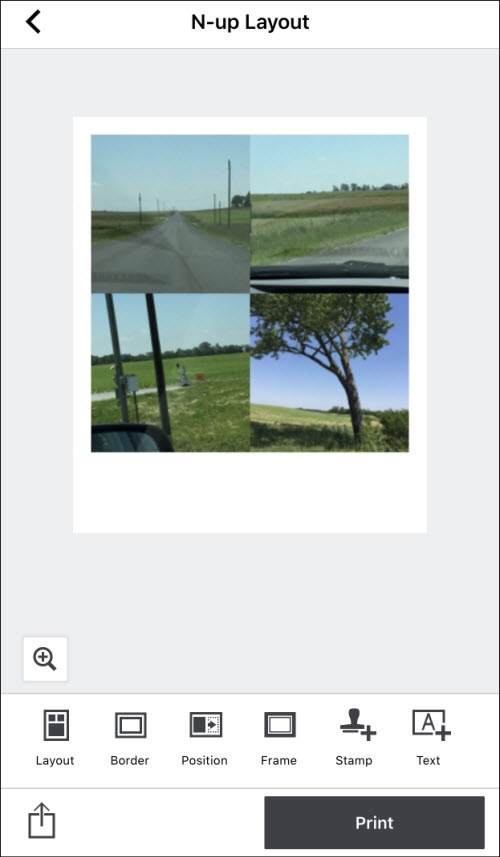
You can also choose a different photo if desired. However, any changes made to the currently selected photo will be lost.
If your product issue was not resolved after following the steps above, or if you require additional help, please create or log in to your Canon Account to see your technical support options.
Or if you still need help, visit our Canon Community by clicking the button below to get answers:

____________________________________________________________________________________________
