Network Requirements
Before connecting the machine to the network, make sure that configuration of the computer and router is complete, and that the computer is connected to the network.
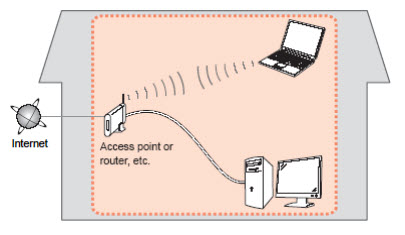
Wireless Connection
Before connecting the printer to the network, the computer needs to be connected to the network. Make sure that configuration of the computer and router is complete.
Notes on Network Connection
-
The configuration, router functions, setup procedures and security settings of the network device vary depending on your system environment. For details, refer to your device's instruction manual or contact its manufacturer.
-
In an office setup, consult your network administrator.
-
If you connect to a network that is not protected with security measures, there is a risk of disclosing data such as your personal information to a third party.
-
Place the machine and computer on the same network segment.
Software Installation
To use the printer by connecting it to a computer, software including the drivers needs to be installed to the computer's hard disk. Installation time varies depending on the computer environment or the number of applications to be installed.
IMPORTANT
-
Log on as the administrator (or a member of the Administrators group).
-
Quit all running applications before installation.
-
Do not switch users during the installation process.
-
It may be necessary to restart your computer during the installation process. Follow the on-screen instructions.
-
If the firewall function of your security software is turned on, a warning message may appear that Canon software is attempting to access the network. If such a warning message appears, set the security software to always allow access.
-
Download the setup file for your printer. If you are asked to run or save the file, save it to your computer. Open the file after it has finished downloading.
 If you are prompted to allow permission for the installer to continue, select Allow or the appropriate affirmative option.
-
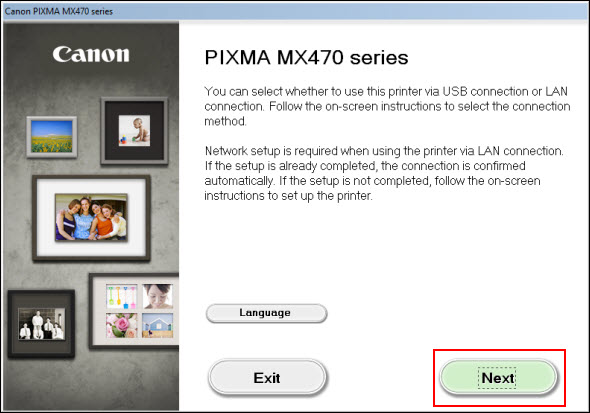
On the initial screen, select Next.
-
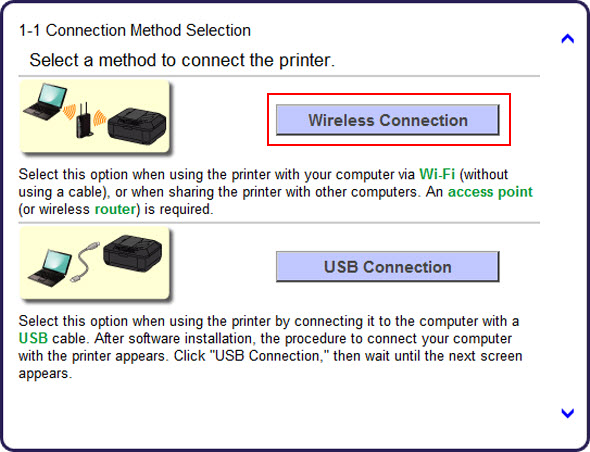
On the Connection Method Selection screen (1-1) select Wireless Connection.
-
Continue to follow on-screen instructions. Select Connect to the network when the Printer Setup (2-1) screen appears.

-
Continue to follow on-screen instructions.
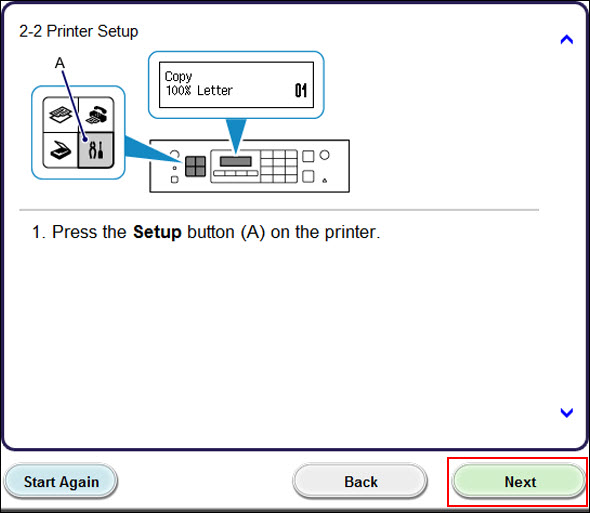
Press the Setup button on the printer, then click Next on the Printer Setup (2-2) screen.
-
Carefully follow the instructions to select Wireless LAN setup on the printer. Press the OK button on the printer. Then, click Next on the Printer Setup (2-3) screen.

-
Continue to follow the on-screen instructions until the Setup Procedure Selection screen (3-1) appears. If your printer’s LCD screen is the same as that shown above Push Button Method on the Setup Procedure Selection screen (3-1), press the printer’s Stop button.
Once your printer’s screen is the same as that shown above Other Methods, select Other Methods on the Setup Procedure Selection screen (3-1).
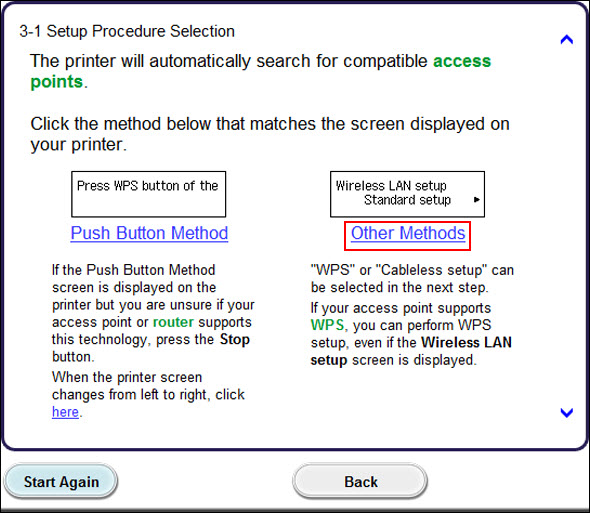
- Select Cableless setup on the Setup Procedure Selection screen (3-2).

-
Select Other setup on your printer and press the OK button. Click Next on the Connection via Cableless setup screen (4-1).

-
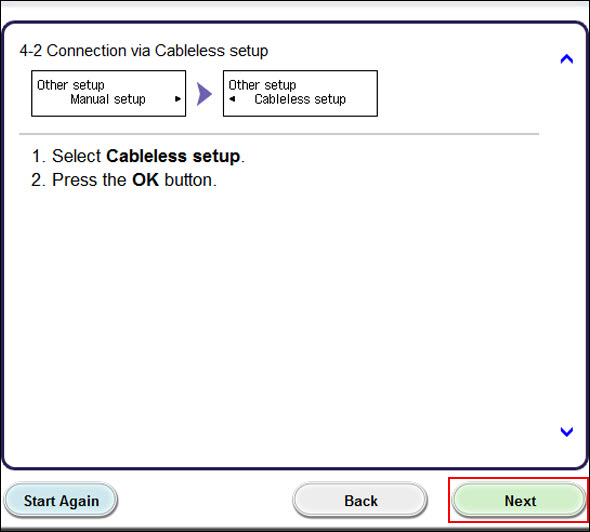
Select Cableless setup on your printer and press the OK button. Click Next on the Connection via Cableless setup screen (4-2).
-
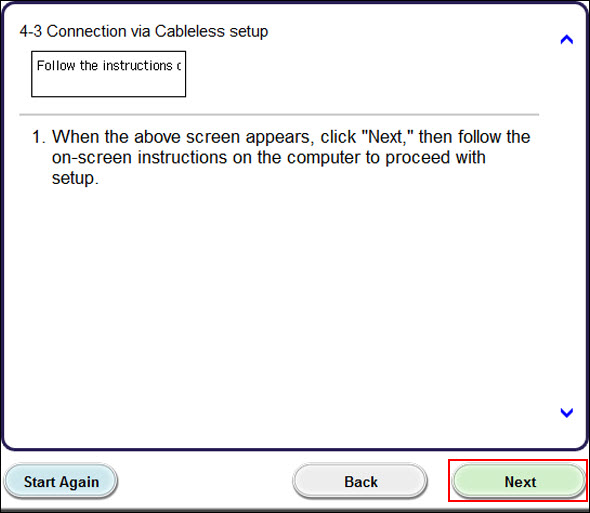
When the “Follow the instructions…” message appears on the printer’s display, click Next on the Connection via Cableless setup screen (4-3)
-
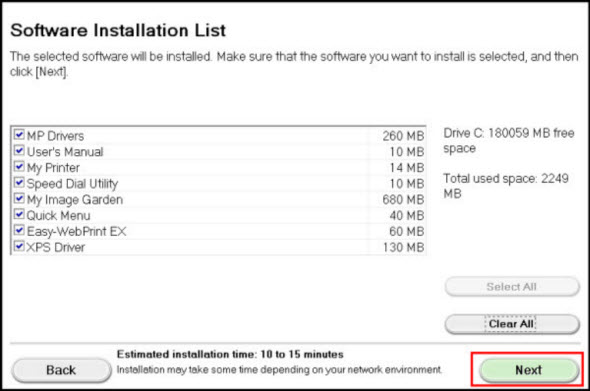
Continue following on-screen instructions. On the Software Installation List, select *software to install and click Next.
*MP Drivers is required and cannot be deselected. We recommend installing My Image Garden and Quick Menu to take full advantage of the printer’s features.
-
Continue following on-screen instructions. When the Setup Completion dialog box appears, click Complete.
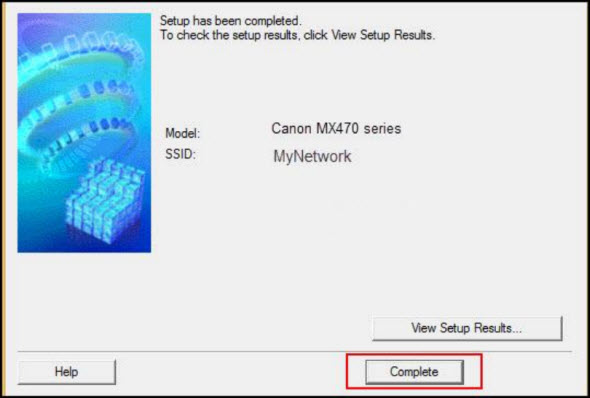
At this point, setup of the printer and network is complete. Continue to follow any remaining on-screen instructions to finish and exit the setup program.
If your product issue was not resolved after following the steps above, or if you require additional help, please create or log in to your Canon Account to see your technical support options.
Or if you still need help, visit our Canon Community by clicking the button below to get answers:

____________________________________________________________________________________________
