Setting Paper Dimensions (Custom Size)
You can specify a custom paper size by following the instructions below.
 You can also set a custom size in Printer Paper Size on the Quick Setup tab.
-
Open the printer driver setup window.
-
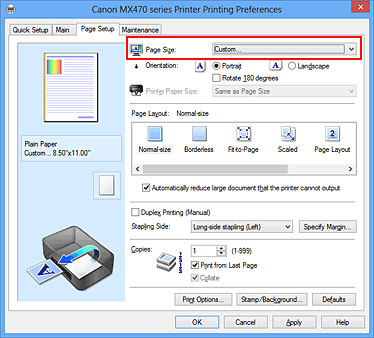
Select Custom... for Page Size on the Page Setup tab.
The Custom Paper Size dialog box opens.
-
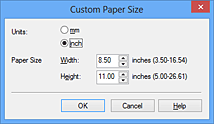
Specify Units, and enter the Width and Height of the paper to be used. Then click OK.
-
Click OK on the Page Setup tab.
When you print, the data is printed with the specified paper size.
 When the application software that created the document has a function for specifying the height and width values, use the application software to set the values. When the application software does not have such a function or if the document does not print correctly, use the printer driver to set the values.
Learn about the sizes and types of media you can print on with this printer.