Removing a Printable Disc
-
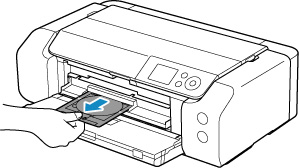
Pull out the multi-purpose tray.
-
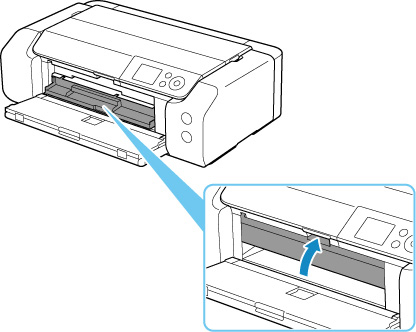
Close the multi-purpose tray guide.
 If the multi-purpose tray guide is opened, you cannot print on paper as it will not feed properly. Make sure that the multi-purpose tray guide is closed.
-
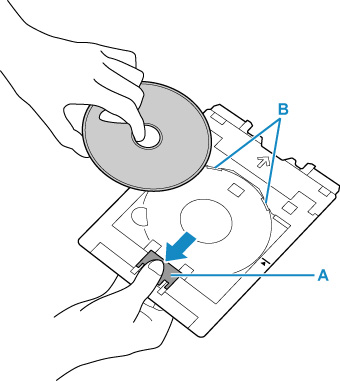
While pressing down the lock (A), take out the printable disc from the slits (B) on the multi-purpose tray, and remove it.
Do not touch the printing surface when removing the disc from the multi-purpose tray.
 Allow the printing surface to dry before removing the disc. If you see printing on the multi-purpose tray or on the transparent parts of the inner or outer diameters of the printable disc, wipe them clean after the printing surface has dried.
-
Insert the multi-purpose tray straight into the multi-purpose tray storage compartment.
When you aren't using the multi-purpose tray, store it in the multi-purpose tray storage compartment.
If your product issue was not resolved after following the steps above, or if you require additional help, please create or log in to your Canon Account to see your technical support options.
Or if you still need help, visit our Canon Community by clicking the button below to get answers:

____________________________________________________________________________________________