Settings (Photo Scan) Dialog Box
Click Photo Scan on the  (Scanning from a Computer) tab to display the Settings (Photo Scan) dialog box.
In the Settings (Photo Scan) dialog box, you can make advanced scan settings to scan items as photos.
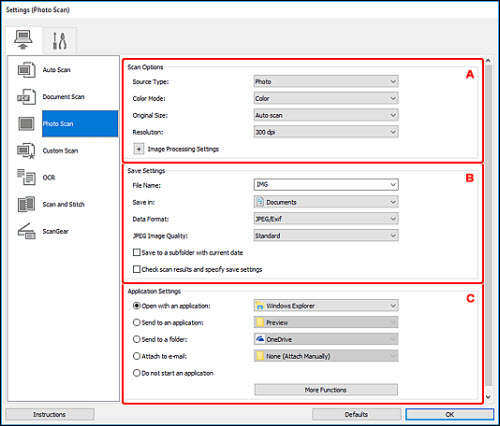
A: Scan Options Area
-
Source Type
-
Photo is selected.
-
Color Mode
-
Select the color mode in which to scan the item.
-
Original Size
-
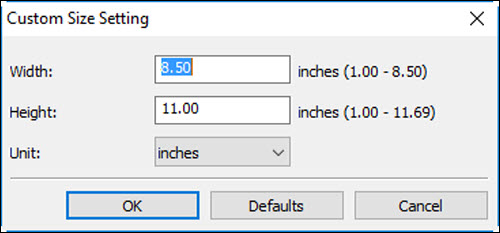
Select the size of the item to be scanned.
When you select Custom, a screen in which you can specify the paper size appears. Select a Unit, then enter the Width and Height, and then click OK.
 Click Defaults to restore the specified settings to the default settings.
-
Resolution
-
Select the resolution of the item to be scanned.
The higher the resolution (value), the more detail in your image.
-
Image Processing Settings
-
Click  (Plus) to set the following.
 When Color Mode is Black and White, Image Processing Settings is not available.
-
Sharpen outline
-
Emphasizes the outline of the subjects to sharpen the image.
B: Save Settings Area
-
File Name
-
Enter the file name of the image to be saved. When you save a file, the date and four digits are appended to the set file name in the "_20XX0101_0001" format.
When you select the Save to a subfolder with current date checkbox, the date and four digits are appended to the set file name.
-
Save in
-
Displays the folder in which to save the scanned images. To add a folder, select Add... from the pull-down menu, then click Add in the displayed Select Destination Folder dialog box and specify the destination folder.
The default save folders are as follows.
-
Windows 10/Windows 8.1:
Documents folder
-
Windows 7:
My Documents folder
-
Data Format
-
Select the data format in which to save the scanned images.
You can select JPEG/Exif, TIFF, or PNG.
You cannot select JPEG/Exif when Color Mode is Black and White.
With network connection, scanning may take longer than usual when you set TIFF or PNG in Data Format.
-
JPEG Image Quality
-
You can specify the image quality of JPEG files.
This appears only when JPEG/Exif is selected in Data Format.
-
Save to a subfolder with current date
-
Select this checkbox to create a current date folder in the folder specified in Save in and save scanned images in it. The folder will be created with a name such as "20XX_01_01" (Year_Month_Date).
If this checkbox is not selected, files are saved directly in the folder specified in Save in.
-
Check scan results and specify save settings
-
Displays the Save Settings dialog box after scanning.
C: Application Settings Area
-
Open with an application
-
Select this when you want to enhance or correct the scanned images.
You can specify the application from the pull-down menu.
-
Send to an application
-
Select this when you want to use the scanned images as they are in an application that allows you to browse or organize images.
You can specify the application from the pull-down menu.
-
Send to a folder
-
Select this when you also want to save the scanned images to a folder other than the one specified in Save in.
You can specify the folder from the pull-down menu.
-
Attach to e-mail
-
Select this when you want to send e-mails with the scanned images attached.
You can specify the e-mail client you want to start from the pull-down menu.
-
Do not start an application
-
Saves to the folder specified in Save in.
To add an application or folder to the pull-down menu, select Add... from the pull-down menu, then click Add in the displayed Select Application or Select Destination Folder dialog box and specify the application or folder.
-
Instructions
-
Opens this guide.
-
Defaults
-
You can restore the settings in the displayed screen to the default settings.
