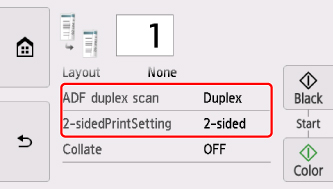
From the operation panel on the printer, you can select either ADF duplex scan, or the 2-sidedPrintSetting.
Follow the steps below to create the type of document you want.
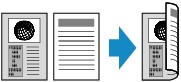
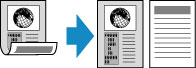
Combine two single pages into one double-sided page
Follow these steps when you want to combine the contents of two single pages to create one double-sided document.
-
Place the original onto the scanner glass, or into the ADF (Automatic Document Feeder).
-
Adjust the settings on the printer panel for either a copy or scan:
-
If you want to set the orientation or staple / bind side of the pages, continue to the next section. If not, press the Black or Color button to start the copy / scan task.
Choose the paper orientation and stapling side of the paper
 When you select Advanced after you select 2-sided for 2-sidedPrintSetting, you can choose how to orient the pages and set them up for stapling.
After you select the staple side, you can select whether to use the preview screen. If you select ON, the preview screen displays so you can check the orientation.
-
If you want the pages to be oriented in portrait mode, and you want to staple / bind the left edge of the pages:
Select Orientation: Portrait and Output: Long side bind:
-
If you want the pages to be oriented in portrait mode and you want to staple / bind the top of the pages:
Select Orientation: Portrait and Output: Short side bind:
- If you want the pages to be oriented in landscape mode and you want to staple / bind the left side of the pages:
Select Orientation: Landscape and Output: Short side bind:

- If you want the pages to be oriented in landscape mode and you want to staple / bind the top of the pages:
Select Orientation: Landscape and Output: Long side bind:

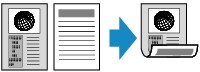
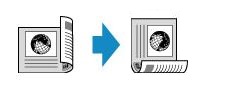
Separate one double-sided page into two single pages
Follow these steps when you want to
separate the contents of one double-sided document to create two single pages.
-
Place the original onto the scanner glass, or into the ADF (Automatic Document Feeder).
-
Adjust the settings on the printer panel for either a copy or scan:
-
If you want to set the orientation or staple / bind side of the pages, continue to the next section. If not, press the Black or Color button to start the copy / scan task.
Choose the paper orientation and stapling side of the paper
When you select Advanced after selecting Duplex for ADF duplex scan, you can choose how to orient that pages and set them up for stapling.
After you select the staple side, you can select whether to use the preview screen. If you select ON, the preview screen displays so you can check the orientation.
-
If you want the pages to be oriented in portrait mode, and you want to staple / bind the left edge of the pages:
Select Orientation: Portrait and Original: Long side bind:
-
If you want the pages to be oriented in portrait mode and you want to staple / bind the top of the pages:
Select Orientation: Portrait and Original: Short side bind:
- If you want the pages to be oriented in landscape mode and you want to staple / bind the left side of the pages:
Select Orientation: Landscape and Original: Short side bind:

-
If you want the pages to be oriented in landscape mode and you want to staple / bind the top of the pages:
Select Orientation: Landscape and Original: Long side bind:

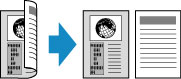
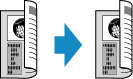
Copy / scan a two-sided page to two-sided page
Follow these steps when you want to
duplicate the contents of one double-sided document to create another double-sided document.
-
Place the original onto the scanner glass, or into the ADF (Automatic Document Feeder).
-
Adjust the settings on the printer panel for either a copy or scan:
-
For a scan: ADF duplex scan: Duplex
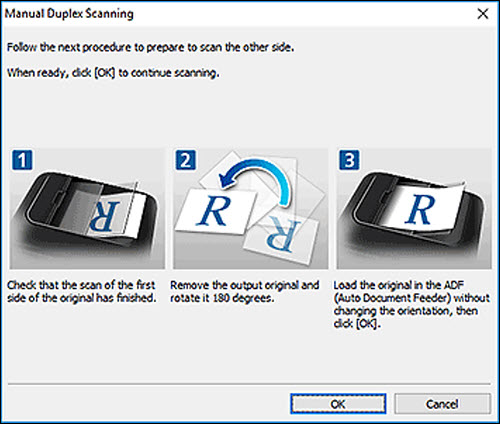
 When scanning from the ADF, the printer will not automatically scan both sides of a document. You'll need to reinsert the page after the first side of the document has been scanned through the ADF.
-
For a copy: 2-sidedPrintSetting: 2-sided
-
If you want to set the orientation or staple / bind side of the pages, continue to the next section. If not, press the Black or Color button to start the copy / scan task.
Choose the paper orientation and stapling side of the paper
When you select 2-sided for 2-sidedPrintSetting and select Advanced, you can select the orientation and the stapling side of the paper.
After you select the staple side, you can select whether to use the preview screen. If you select ON, the preview screen displays so you can check the orientation.
-
If you want the pages to be oriented in portrait mode, and you want to staple / bind the left edge of the pages:
Select Orientation: Portrait and Original: Long side bind and Output: Long side bind for the stapling side:
-
If you want the pages to be oriented in portrait mode and you want to staple / bind the top of the pages:
Select Orientation: Portrait for the orientation and Original: Short side bind and Output: Short side bind for the stapling side:

- If you want the pages to be oriented in landscape mode and you want to staple / bind the left side of the pages:
Select Orientation: Landscape for the orientation and Original: Short side bind and Output: Short side bind for the stapling side:

When the stapling sides specified for Duplex and 2-sided are different, the originals are copied so that the page is flipped vertically.
For example: When you select Orientation: Landscape, Original: Long side bind, and Output: Short side bind:
When Loading the original on the scanner surface
-
Before scanning:
When you select 2-sided for 2-sidedPrintSetting and the preview function is activated, the printer starts pre-scanning before scanning the original.
When pre-scanning finishes, the preview screen appears on the touch screen.
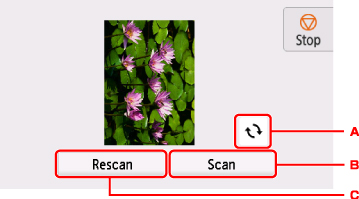
From this screen, you can do the following:
-
After scanning:
The screen below appears after each original sheet of paper scans.
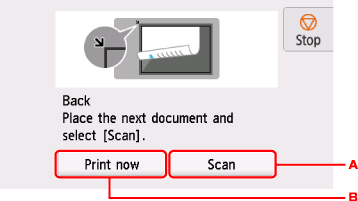
From this screen, you can do the following:
-
(A) Scan the original.
Remove the original from the platen glass after you scan, then load the next sheet and select Scan.
-
(B) Copy the original already scanned.
Good to know
-
The two-sided copy setting can be used in combination with 2-on-1 copy or 4-on-1 copy. For directions, see:
-
If you copy in black & white, print intensity of a two-sided copy may differ from that of a single-sided copy.
-
You can add a copy job while printing.