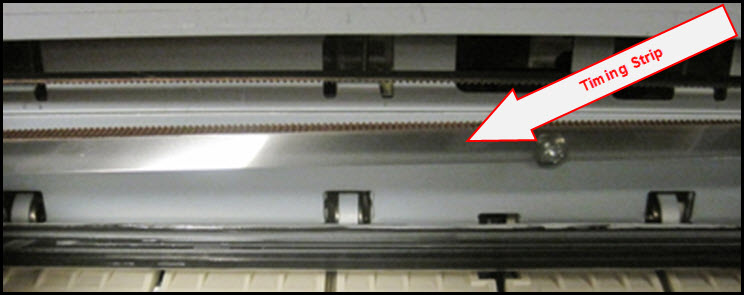
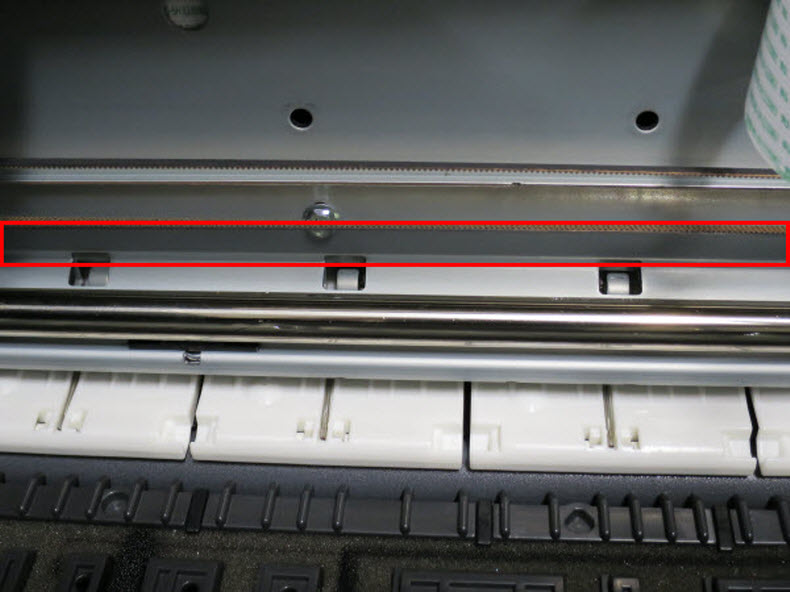
About the timing strip
The timing strip is a clear, plastic strip approximately 1/4" in height positioned horizontally across the center of the unit, just in front of the carriage drive belt. The timing strip contains many thin black vertical lines that help determine the carriage position during operation.
How it can get dirty
During certain uncommon tasks such as the removal of a paper jam, it is possible to inadvertently touch a lubricated area on the printer's chassis causing a small amount of grease to be deposited onto the timing strip.
Symptoms of a dirty timing strip
Grease on the timing strip may result in poor print quality including; mis-aligned or distorted characters, vertical lines or, in some cases, an inoperable error condition (such as 5100) or knocking / grinding noise.
Clean the timing strip
In most cases, it is easy to remove the grease from the timing strip using common household items. If you wish, you may follow the steps below to remove the grease from the timing strip.
Items needed:
- Clean, unused cotton swab
- Small amount of Isopropyl Alcohol or window cleaner
- Flashlight or other light source
Steps
-
Unplug the printer's power cord (don't press the power button to turn off the printer).
- Open the top cover.

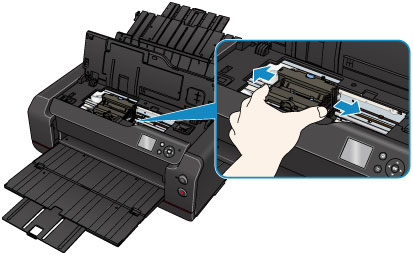
- Hold the top of the print head holder and slide it slowly to the right edge or the left edge.
-
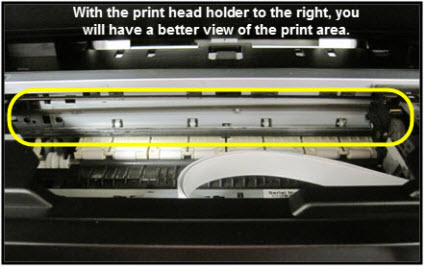
When the carriage is to the far edge, you will be able to see the timing strip.
-
Using a flashlight, carefully inspect the timing strip for grease and dirt. It is helpful to view the timing strip from several angles as even a small amount of grease can impact print quality.
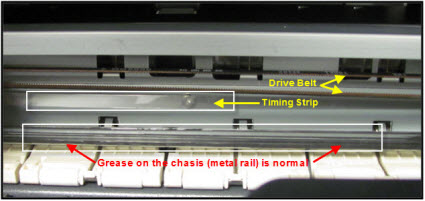
The timing strip is a clear strip located in front of the drive belt.
-
Moisten the cotton swab with Isopropyl alcohol (or window cleaner), and carefully remove the grease from the timing strip.
Note: do not touch or remove grease from the chassis (metal rail).
-
Once you have confirmed that the left (or right) and center portions of the timing strip are clean, gently slide the carriage all the way to the opposite side.
-
Repeat steps 4 & 5 for inspecting the right side of the timing strip until is completely free of grease and dirt.
-
Gently close the top cover.
-
Reconnect the power cord and power on the printer.
(The indicator light blinks steadily while the printer initializes.)
-
After the printer is powered back on, the printer's LCD displays a message that the printer was not properly turned off. Press the OK button to clear the message and return the printer to standby mode.
-
Print a test document and photograph. If print quality is still poor, repeat the above steps.
-
If repeated encoder strip cleanings don't resolve the problem, servicing is required.
There are two options currently available to you.
- Warranty Service – If you are within the 1-year manufacturer’s warranty and have your proof of purchase you are entitled to service or replacement. If you have purchased a CarePak Canon extended warranty, you may be entitled to additional options. Please create or log into your Canon Account to obtain service.
- Out of Warranty – If you are outside of your warranty period, you may qualify for purchasing a replacement through the Canon Upgrade Program. Please contact our Sales group to inquire about your upgrade options at 866-443-8002.
To verify your support options please create or log into your
Canon Account.