POWER ON / OFF
-
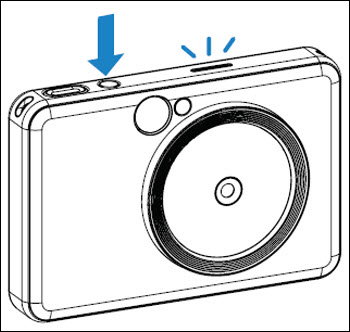
Press and hold the Power  button until the LED indicator light turns on. button until the LED indicator light turns on.
-
When the LED indicator turns to a steady white, the device is ready to use.
-
Press and hold the Power button to turn off the device.
AUTO POWER OFF
When the device is off for about 5 minutes, it will automatically power off. Press the Power button again to resume using the device. |
|
TAKING AND PRINTING A PHOTO
-
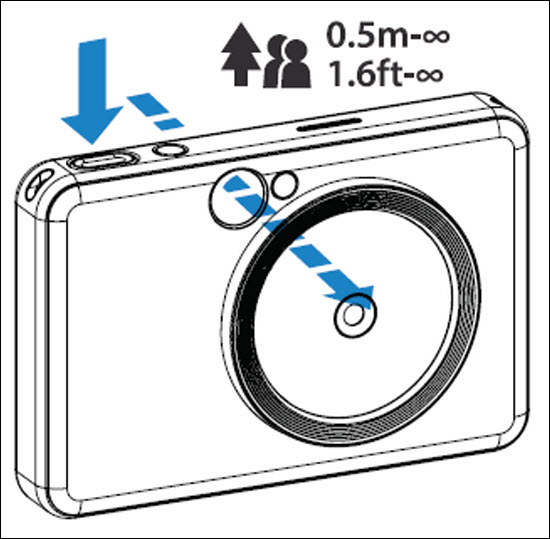
Hold the device and confirm the desire composition of the image.
-
Press the Shutter  button to take a photo. The camera will automatically trigger the flash if it is necessary for the lighting conditions. button to take a photo. The camera will automatically trigger the flash if it is necessary for the lighting conditions.
-
The photo will be printed out immediately after taking the photo if paper is inserted. The device can hold up to around 10 images at a time to print, depending on the SD card capacity.
-
Print queue will be cleared once the device is powered off. It can't be resumed.
-
If no SD card is inserted, the device can hold up to 3 images at a time to print.
-
User can take photos with the device even with no paper if an SD card is inserted. Photos will be saved on the SD card.
|
|
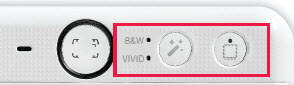
SELFIE MIRROR
Compose an image with the frame mark in the Selfie Mirror.
BUILT-IN FILTER AND BORDER BUTTONS
FILTER
You can add either a black and white or a vivid filter to a photo by pressing the filter  button before taking a photo. button before taking a photo.
|
Easily add a filter or border to your photos right on the camera.
|
|

No Filter without Border
|

Black & White FIlter without Border
|

Vivid Filter without Border
|
|
BORDER
You can also add a white border to a photo by pressing the border  button before taking a photo. button before taking a photo.
|
|
|

No Filter with border
|

Black & White Filter with Border
|

Vivid Filter with Border
|
|
|
Both the original photo and the photo with effect will be saved on the SD card, while only the photo with the effect added will be printed out.
|
If your product issue was not resolved after following the steps above, or if you require additional help, please create or log in to your Canon Account to see your technical support options.
Or if you still need help, visit our Canon Community by clicking the button below to get answers:

____________________________________________________________________________________________