Aligning the Print Head
If printed ruled lines are misaligned or print results are otherwise unsatisfactory, adjust the print head position.
 If the remaining ink level is low, the print head alignment sheet will not be printed correctly. Replace the ink cartridges that are low.
You will need two sheets of A4 or Letter-sized plain paper.
-
Make sure that the printer is powered on.
-
Load two sheets of A4 or Letter-sized plain paper in the cassette.
-
Press the OK button.
-
Select Maintenance.
-
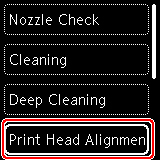
Select Print Head Alignment - Auto.
The confirmation screen will appear.
To print and check the current head position alignment values, select Print the head alignment value.
-
Select Yes.
-
Press the OK button.
The print head alignment sheet is printed, and the print head is aligned automatically.
This takes about 3 to 4 minutes.
-
When the completion message appears, select OK.
If the print results are still not satisfactory after adjusting the print head position as described above, adjust the print head position manually.
 You can also also align the print head manually from a Windows PC.
If your product issue was not resolved after following the steps above, or if you require additional help, please create or log in to your Canon Account to see your technical support options.
Or if you still need help, visit our Canon Community by clicking the button below to get answers:

____________________________________________________________________________________________
