Making Copies
This article describes the basic procedure to perform standard copying.
-
Make sure that the printer is powered on.
-
Load paper in the rear tray or the cassette.
-
Load the original document on the platen (scanner glass) or in the ADF (Auto Document Feeder).
-
Confirm the page size and color mode.
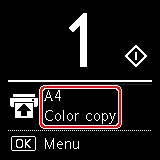
 To change the paper position, color mode and other settings, press the OK button. Select Copy settings to display the desired setting item.
-
Use the 
 buttons to specify the number of copies.
You can specify the number of copies even if you select Copies from Copy settings.
-
Press the Start button.
The printer starts copying.
Remove the original on the platen after copying is complete.
 Do not open the document cover or remove the original while Copying... is displayed on the screen.
If you load the original in the ADF, do not move the original until copying is complete.
To cancel copying, press the Stop button.
If your product issue was not resolved after following the steps above, or if you require additional help, please create or log in to your Canon Account to see your technical support options.
Or if you still need help, visit our Canon Community by clicking the button below to get answers:

____________________________________________________________________________________________
