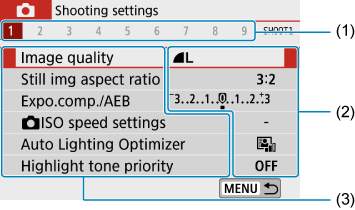
Menu Screen
The menu tabs and items displayed vary depending on the shooting mode.
Basic Zone
Movie recording
Creative Zone
- (1) Secondary tabs
- (2) Menu settings
- (3) Menu items
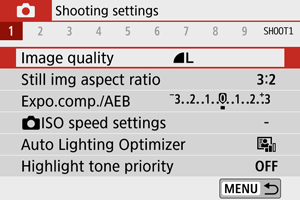
Dimmed Menu Items
Example: When set to []
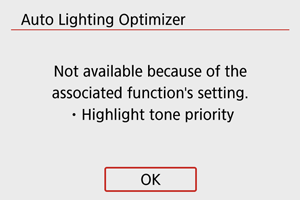
Dimmed menu items cannot be set. The menu item is dimmed if another function setting is overriding it.
You can see the overriding function by selecting the dimmed menu item and pressing  .
.
If you cancel the overriding function’s setting, the dimmed menu item will become settable.
Caution
- You may not be able to see the overriding function for certain dimmed menu items.
Note
- You can reset menu functions to default settings in [Basic settings], in [
 : ] ().