To print onto Printable Nail Stickers, place them on the multi-purpose tray supplied with the printer, and then insert them into the printer.
 Do not mount the multi-purpose tray until the message prompting you to load Printable Nail Stickers appears. Doing so can damage the printer.
-
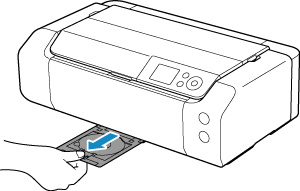
Take out the multi-purpose tray from the multi-purpose tray storage compartment.
-
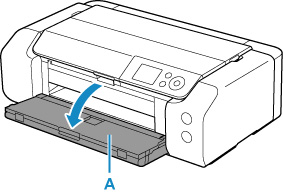
Gently open the paper output tray (A).
-
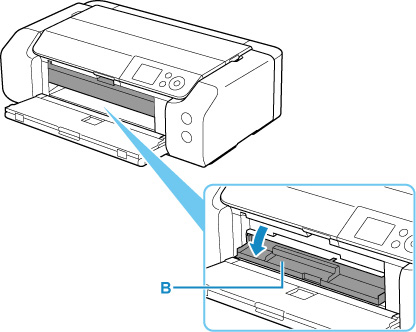
When a message prompting you to load Printable Nail Stickers appears, open the multi-purpose tray guide (B).
-
Place Printable Nail Stickers on multi-purpose tray.
Check that there is no dirt on the multi-purpose tray before placing Printable Nail Stickers on it.
To prevent getting dirt or fingerprints on Printable Nail Stickers, hold the stickers by their edges. If the print side gets any dirt or is damaged, it may cause poor print quality.
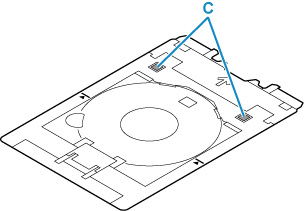
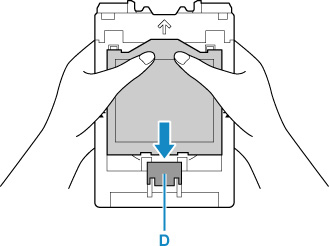
When placing Printable Nail Stickers on the multi-purpose tray, don't touch the reflectors (C).
-
WITH THE PRINT SIDE FACING UP, place Printable Nail Stickers and press them against the lock (D) at the bottom.
-
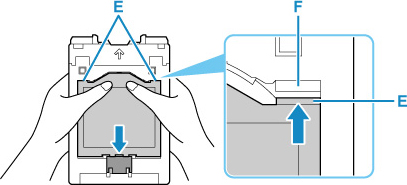
While pressing down the lock with the Printable Nail Stickers, insert the two tabs (E) on top into the slits (F) on the multi-purpose tray.
-
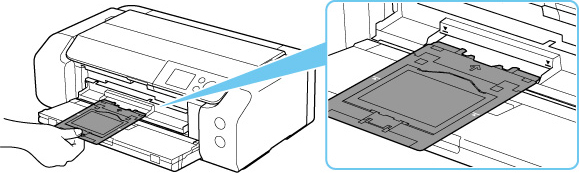
Place the multi-purpose tray on the multi-purpose tray guide.
-
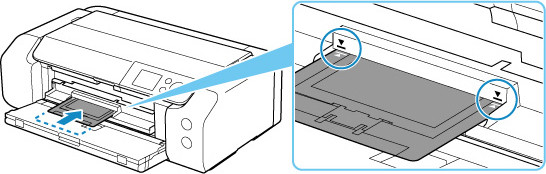
Insert the multi-purpose tray straight in the horizontal direction until the arrow ( ) on the multi-purpose tray guide is approximately aligned with the arrow (
 ) on the multi-purpose tray.
Don't insert the multi-purpose tray beyond the arrow () on the multi-purpose tray guide.
 The multi-purpose tray may be ejected after a certain amount of time passes. If this happens, follow the on-screen instructions to place the multi-purpose tray again.
If your product issue was not resolved after following the steps above, or if you require additional help, please create or log in to your Canon Account to see your technical support options.
Or if you still need help, visit our Canon Community by clicking the button below to get answers:

____________________________________________________________________________________________
