Try aligning the print head manually after automatic print head alignment if printing results are not as expected, as when printed ruled lines are misaligned.
 Before adjusting the print head position manually, try adjusting the print head position automatically.
We recommend using the same type of paper for print head alignment as for printing.
You will need a sheet of A4 or Letter-sized paper.
-
Make sure that the printer is powered on.
-
Select Maintenance on the HOME screen.
-
Select Print Head Alignment.
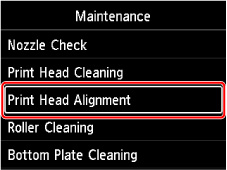
The Print Head Alignment screen will appear.
-
Select Manual.
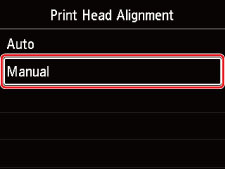
The confirmation screen will appear.
-
Select Yes.
When the automatic print head alignment has not been performed, a message will appear. In this case, select Yes, press the OK button, then perform the automatic print head alignment.
The media type selection screen appears.
-
Select the paper to use.
-
Load the prepared paper in either the top feed or the manual feed tray, depending on the displayed message.
-
Select OK.
The print head alignment pattern will be printed.
-
When Did the patterns print correctly? appears, make sure pattern was printed correctly, and if so, select Yes.
-
Check the displayed message and select Next.
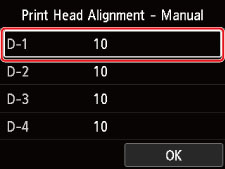
The input screen for head position alignment values is displayed.
-
Look at the pattern and select the number of the pattern in each column that has straight lines.
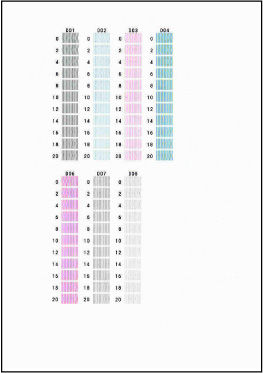
Look at the pattern and pick the setting that produces the least warped vertical straight lines.
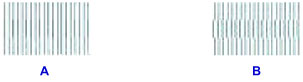
A: Vertical straight lines
B: Warped vertical straight lines
-
Repeat this procedure until you finish inputting a pattern number in all columns, select OK.
-
When the completion message appears, select OK.
If your product issue was not resolved after following the steps above, or if you require additional help, please create or log in to your Canon Account to see your technical support options.
Or if you still need help, visit our Canon Community by clicking the button below to get answers:

____________________________________________________________________________________________
