Creating/Editing PDF Files
You can create PDF files by scanning items placed on the platen. Add, delete, rearrange pages or make other edits in the created PDF files.
 You can create or edit up to 100 pages of a PDF file at one time.
Only PDF files created or edited in IJ Scan Utility or IJ PDF Editor are supported. PDF files created or edited in other applications are not supported.
 You can also create PDF files from images saved on a computer.
Selectable file formats are PDF, JPEG, TIFF, and PNG.'
Images whose number of pixels in the vertical or horizontal direction is 10501 or more cannot be used.
When you select a password-protected PDF file, you must enter the password.
-
Place items on the glass.
-
Start IJ Scan Utility.
-
Click PDF Editor.
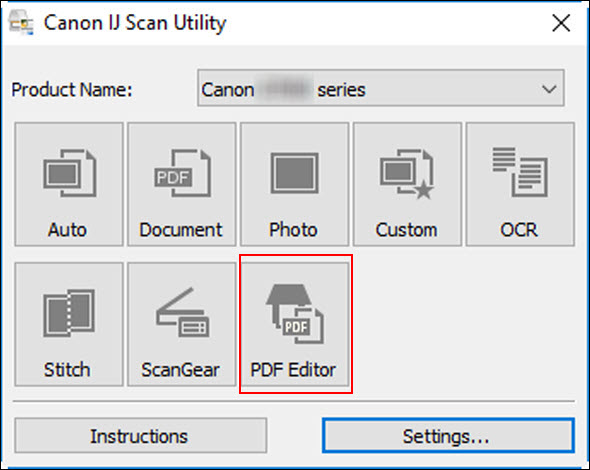
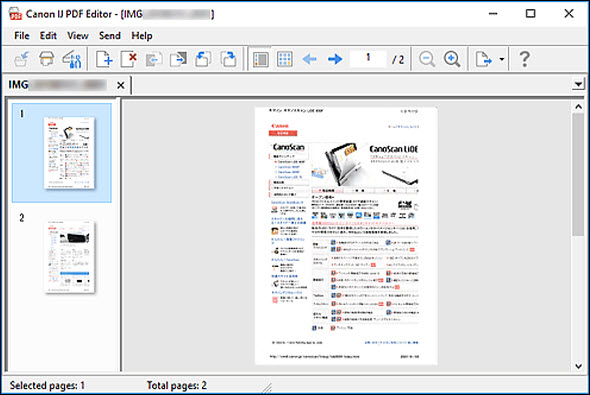
IJ PDF Editor starts.
-
To specify paper size, resolution, and other settings, click Settings... from the File menu, and then set each item in the Settings (Document Scan) dialog box.
Once settings are specified in the Settings dialog box, the same settings can be used for scanning from the next time.
In the Settings dialog box, specify image processing settings such as slant correction and outline emphasis.
After adjusting the settings as desired, click OK.
-
Click  (Scan) on Toolbar.
Scanning starts.
To open a file saved on the computer, click Open... from the File menu, and then select the file you want to edit.
 Learn about switching the view with the Toolbar buttons in the PDF Edit screen.
-
Add pages as needed.
When scanning and adding more items:
Place items, and then click (Scan) on the Toolbar.
When adding existing images or PDF files:
Click  (Add Page) on the Toolbar. After the Open dialog box appears, select the image(s) or PDF file(s) you want to add, and then click Open.
You can also add images or PDF files from Add Page from Saved Data... in the File menu.
-
Edit pages as needed.
When changing the page order:
Click the page you want to move, and then click  (Page Up) or
  (Page Down) on the Toolbar to change the page order. You can also change the page order by dragging and dropping a page to the target location.
When deleting pages:
Click the page you want to delete, and then click  (Delete Page) on the Toolbar.
These buttons appear when two or more pages have been created.
-
Select Save As... in File menu.
The Save dialog box appears.
-
Specify the save settings as desired.
-
Click Save.
The PDF file is saved.
When a password-protected PDF file is edited, the passwords will be deleted. Reset the passwords in the Save dialog box.
To overwrite a saved file, click  (Save) on the Toolbar.
If your product issue was not resolved after following the steps above, or if you require additional help, please create or log in to your Canon Account to see your technical support options.
Or if you still need help, visit our Canon Community by clicking the button below to get answers:

____________________________________________________________________________________________
