Receiving Faxes
This article describes the preparation necessary for receiving a fax and how to receive a fax.
Preparing for Receiving Fax
Prepare for receiving a fax according to the following procedure.
-
Make sure that the printer is powered on.
-
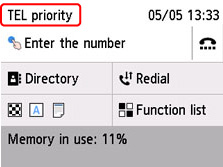
Select  FAX on the HOME screen.
The Fax standby screen is displayed.
-
Check the receive mode setting displayed on the Fax standby screen.
 You can find details on changing the receive mode here.
-
Load plain paper into the cassette or the rear tray.
-
Specify paper settings as necessary.
This completes the preparation for receiving faxes.
When a fax is received, it is printed on the loaded paper automatically.
Receiving Fax
Depending on the selected receive mode, the receive operation varies.
You can find details on changing the receive mode here.
Learn about the advanced settings of the receive modes.
 If the printer was not able to print a received fax, the printer stores the unprinted fax temporarily in its memory (memory receiving).
When receiving a fax, you can save received faxes on a USB flash drive as PDF files automatically or forward received faxes to a shared folder on a computer as PDF files automatically.
When TEL priority mode is selected:
-
When the call is a fax:
The telephone will ring when a call comes in.
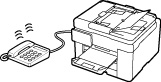
Pick up the handset. If you hear the fax tone, wait for at least 5 seconds after it stops, and then hang up the handset.
The printer will receive the fax.

If the printer won't switch to fax reception, select FAX again on the HOME screen, and then press Black button or the Color button to receive the fax.
To receive a fax without picking up the handset, select Manual / auto switch: ON in Advanced. RX start time allows you to specify the number of seconds until the printer switches to fax reception.
Set the printer to enable you to initiate fax reception from a connected telephone (remote reception).
-
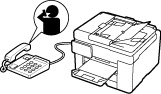
When the call is a voice call:
The telephone will ring when a call comes in.
Pick up the handset, and talk on the telephone.

If the printer unexpectedly switches to fax reception during telephone calls, select User-friendly RX: OFF in Advanced.
If Manual / auto switch: ON is selected in Advanced, you must answer an incoming call by picking up the handset within the time specified in RX start time. Otherwise the printer will switch to fax reception.
When FAX only mode is selected:
-
When the call is a fax:
The printer will receive the fax automatically.

If a telephone is connected to the printer, the telephone will ring when a call comes in.
You can change the number of times to ring the telephone with Ring count in Advanced.
When DRPD is selected:
-
When the call is a fax:
The telephone will ring when a call comes in.
The printer will receive the fax automatically when the fax ring pattern is detected.
You can change the number of times to ring the telephone.
-
When the call is a voice call:
The telephone will ring when a call comes in.
When the printer does not detect the fax ring pattern, the telephone will continue ringing.
Pick up the handset, and talk on the telephone.
To use this feature, you need to subscribe to a compatible service provided by your telephone company.
For DRPD, you need to select the appropriate ring pattern on the printer.

