Removing Jammed Paper from Rear Side
 The printer can't be turned off while it is sending or receiving a fax, or when the received fax or the unsent fax is stored in the printer's memory.
Turn off the printer after making sure it has completed sending or receiving all the faxes. Don't unplug when turning off the printer.
If you unplug the power cord, all the faxes stored in the printer's memory are deleted.
 If paper becomes jammed during printing and you need to turn off the printer to remove it, press the printer's Stop button to stop the printing before you turn off the printer.
-
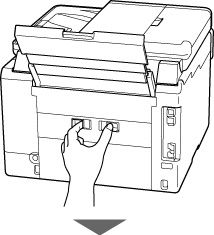
Make sure you have unplugged the power cord.
-
Rotate the printer so that its rear side faces toward you.
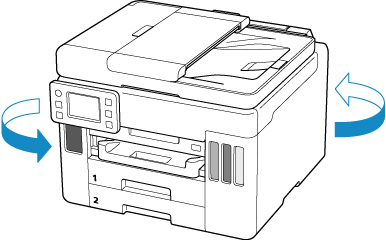
When changing the orientation of the printer, don't turn the printer upside down or tilt it. The ink may leak out.
-
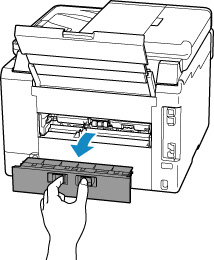
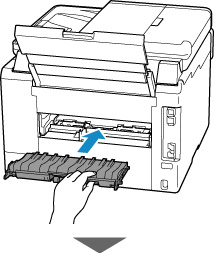
Pull out the rear cover.
-
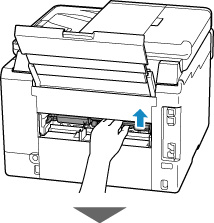
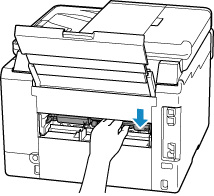
Slowly pull out the paper.
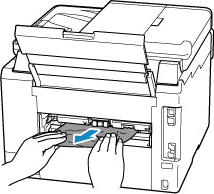
Don't touch the inner parts of the printer.
If you weren't able to remove the paper in this step, detach the transport unit cover and remove the paper by following these steps.
-
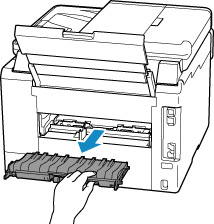
Lift up the transport unit cover and pull it out.
-
Slowly pull out the paper.
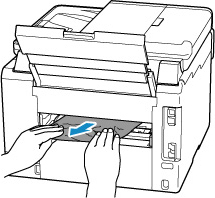
Don't touch the inner parts of the printer.
-
Make sure all jammed paper is removed.
-
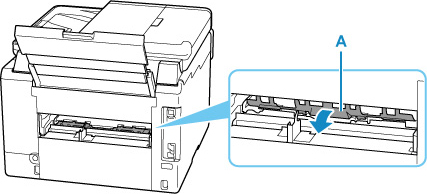
If parts (A) are raised, lower them toward you.
-
Insert the transport unit cover slowly all the way into printer and take down the transport unit cover.
-
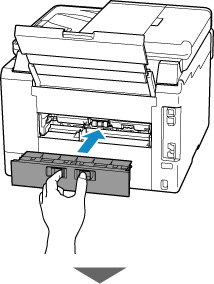
Push in the rear cover until it is closed completely.
-
Plug in the printer again and turn it back on.
All jobs in the print queue are canceled. You'll need to print again.
When reloading the paper, make sure you are using suitable paper and loading it correctly.
Before printing, pull out the paper output tray.
If the measures above don't solve the problem, the printer will require servicing.
If your product issue was not resolved after following the steps above, or if you require additional help, please create or log in to your Canon Account to see your technical support options.
Or if you still need help, visit our Canon Community by clicking the button below to get answers:

____________________________________________________________________________________________
Don't tilt the printer when moving it since the ink may leak out.
 Learn how to prepare the printer for transportation if servicing is required.
