1431 / 1432
Cause
The print head can't be recognized.
What to Do
A print head may not be installed properly or may not be compatible with this printer.
If you're printing, press the printer's Stop button to cancel printing.
Remove the print heads and reinstall them properly following the steps below. This may resolve the error.
-
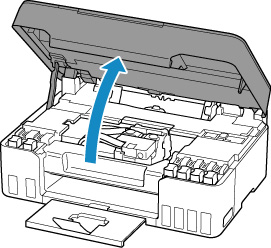
Open the scanning unit / cover.
-
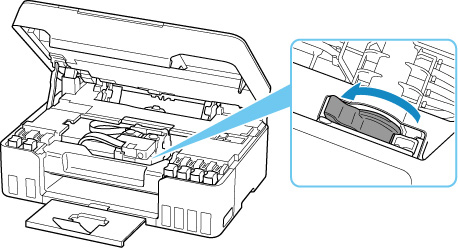
Close the ink valve by tilting the ink valve lever tightly to the left.
-
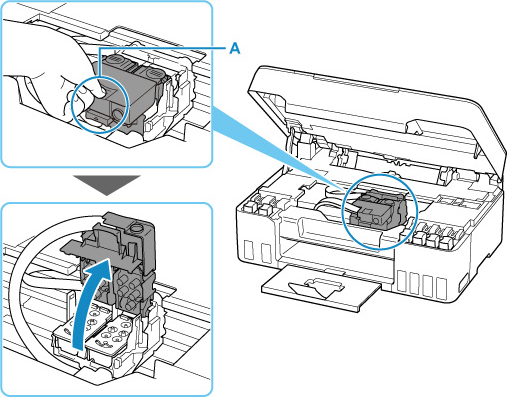
Grab the knob (A) on the print head locking cover to open it.
-
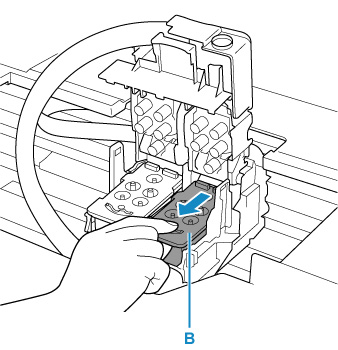
Pull the print head (B) and shift it slightly toward you.
-
Remove the left and right print heads.
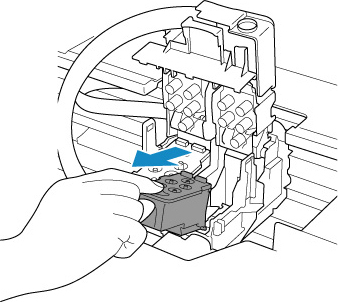
 When removing the print heads, handle them carefully so that ink does not spatter.
Don't touch the tube or other parts inside the printer. Touching these parts may cause the printer to malfunction.
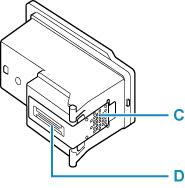
Don't touch the gold terminal (C) or print head nozzles (D) on a print head. The printer may not print properly if you touch them.
-
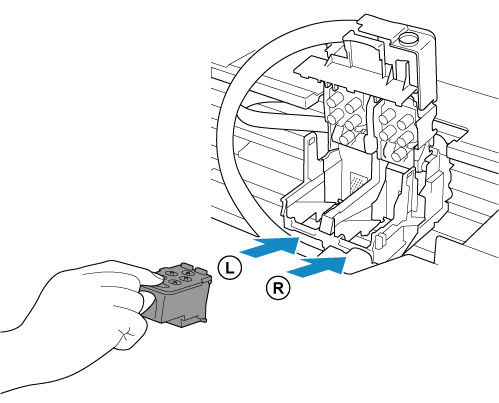
Install the print head labeled "L" in the left holder and the print head labeled "R" in the right holder.
-
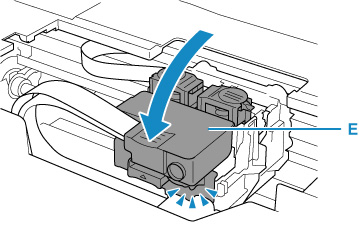
Close the print head locking cover (E) and push it down.
Firmly press the print head locking cover until it clicks into place.
-
Press down both joint buttons (F).
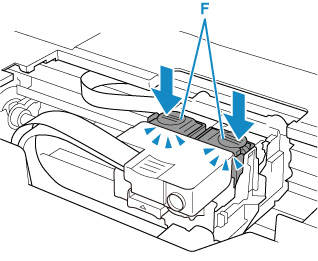
Push the joint buttons firmly until they click into place; otherwise, printing may become impossible.
Make sure the left and right buttons are pushed in.
-
Open the ink valve by tilting the ink valve lever tightly to the right.

-
Gently close scanning unit / cover by holding it up once, then taking gently it down.
If reinstalling the print heads does not solve the problem, the print heads may require replacement.
If your product issue was not resolved after following the steps above, or if you require additional help, please create or log in to your Canon Account to see your technical support options.
Or if you still need help, visit our Canon Community by clicking the button below to get answers:

____________________________________________________________________________________________
