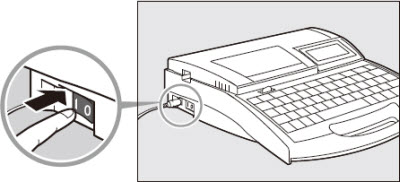
Turn the power switch on
Before turning the power switch on, make sure that the cassettes have been inserted properly, that the cover is closed, and that the AC adapter is connected.
-
Press the "|" side of the power switch.
|
|
|
|

Startup display
|
|
 The character entry display appears immediately if no ribbon cassette is installed. The character entry display appears immediately if no ribbon cassette is installed.
|
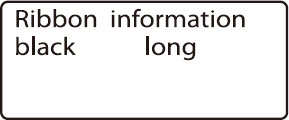
Ribbon cassette information display
|
 Do not turn the power switch on and off rapidly
Turning the power switch on and off rapidly and repeatedly can cause misoperation and the loss of stored data.
Enter characters
ex. create three pieces of wrap-around tape of the following types.
-
Enter A-1.
|

|
Print
Once the characters have been entered, begin printing.
-
Press [Print].
No ribbon cassette is displayed if the ribbon cassette is not installed. Install the cassette.
No ribbon information. No ribbon amount displayed. Press enter is displayed if the information cannot be read due to the ribbon cassette failure and so forth. If this message is displayed, follow the instructions on the screen.
Print media is the material that you are printing on, such as a tube, heat shrink tube, label tape, wrap around tape, 4mm I.D. strip, plate, or clear tube.
|

A check mark is displayed next to the currently selected print media.
|
-
Press  or or  to select Wrap around, and press [Enter]. to select Wrap around, and press [Enter].
If Range: all is not selected, press or to select Range, then press  or or  to select All. to select All.
Rough amount of the remaining ink ribbon is displayed as shown. When the information of the cassette is not properly retrieved, the amount of the ribbon does not appear.
|
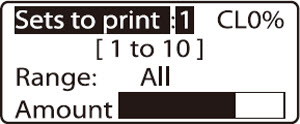
Make sure that Range: All is displayed.
|
-
Press [3] and then [Enter].
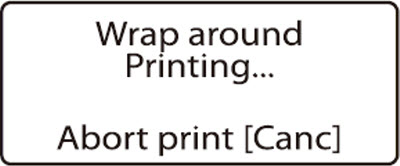
Canceling printing
If you press [Canc], the message Aborting print appears and printing is aborted. In this case, the tape that is currently being printed is cut and then ejected.
|
|
-
Take out the wrap around tape.
If tape jams
Hold down [Cancel] until the printer beeps. The printer stops all operations immediately. In this case, the tape is not cut and it is not ejected.
|
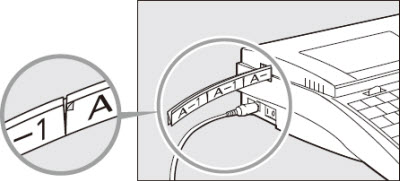
The tape is half-cut so that it can be easily separated by hand.
|
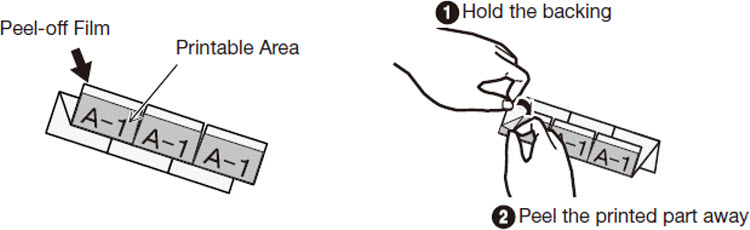
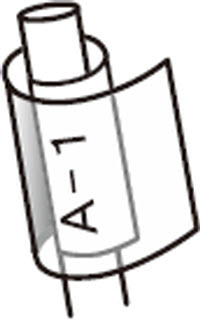
Attaching the wrap-around tape
-
Peel the printed film from the wrap around tape backing.
When wrapping, the laminating cover should sufficiently overlap the printed part. We recommend using with cable of  3 to 7.6 mm. 3 to 7.6 mm.
|

|
-
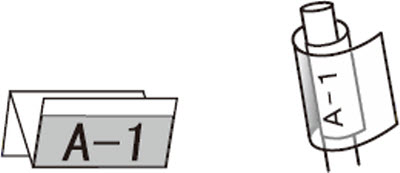
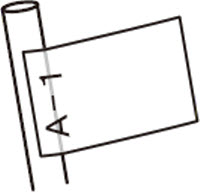
Attach the tape to the cable as shown in the diagram, starting from the printed end.
|
|
-
Wrap the transparent laminating portion so that it covers the printed part.
|
|
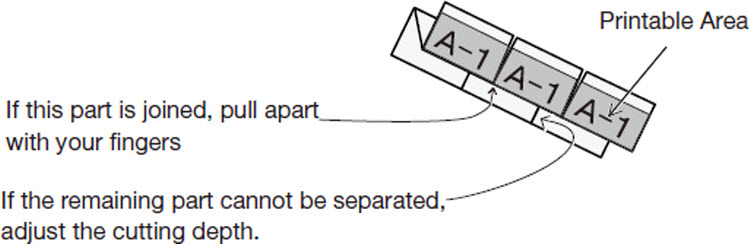
If the film does not peel away from the backing
Because wrap around tape has a strong adhesive, it may be hard to peel the film off the backing. Refer to the following diagram for the peeling method.
If the cut is too shallow
Wrap around tape is thicker than typical label tape, so the half-cut may be shallower.
|
If the half-cut is too shallow, the film may not properly peel from the backing.
|
|
|
CANON FINETECH NISCA INC. shall not be responsible for damages that might result from the tape peeling off, or from fading of the printing on the tape.
If your product issue was not resolved after following the steps above, or if you require additional help, please create or log in to your Canon Account to see your technical support options.
Or if you still need help, visit our Canon Community by clicking the button below to get answers:

____________________________________________________________________________________________