Adjusting the printing start position and vertical position
When printing, environmental factors or characteristics of the print media may cause printing to start slightly out of position or to be shifted slightly in the vertical direction so that character data is not printed correctly, even though the correct print media type and size are selected. In such case, you can shift the printing position slightly up / down or left / right.
 The printing start position can be set independently for each print media.
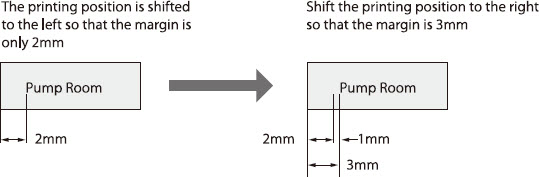
Case 1
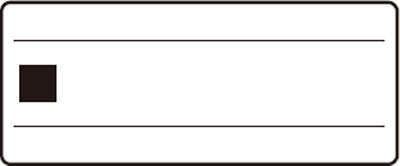
The character alignment is set to Left and the margin was set to 3mm. However, when actually printed, the margin is only 2mm.
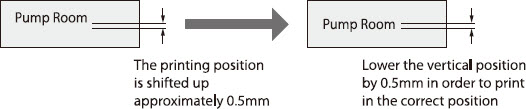
Case 2
Printing is shifted up about 0.5mm.
-
Press [Adjust].
|

|
-
Press  or or  to select Label, then press [Enter]. to select Label, then press [Enter].
-
This selects the print media for which the adjustment is to be made.
-
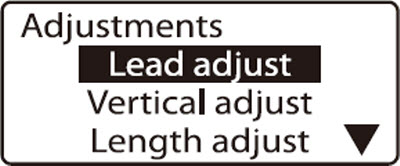
When [Enter] is pressed, the Adjustments display appears.
|
|
-
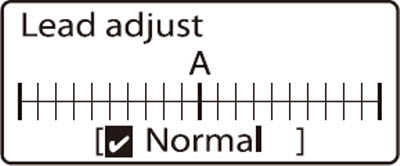
Press or to select Lead adjust, then press [Enter].
|
|
-
Press  four times; Right 1.0mm is displayed. four times; Right 1.0mm is displayed.
Press  to move the printing start position to the left. The printing start position can be adjusted up to 2.5 mm to the left or right. to move the printing start position to the left. The printing start position can be adjusted up to 2.5 mm to the left or right.
|
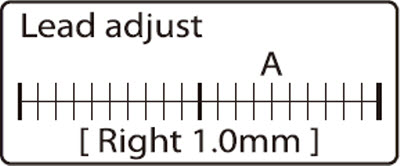
Confirm that the printing start position is now Right 1.0mm.
|
-
Press [Enter].
|
|
-
Press [Adjust].
|
|
-
Press or to select Label, then press [Enter].
The vertical position can also be set separately for each print media.
|
|
-
Press or to select Vertical adjust, then press [Enter].
|
|
-
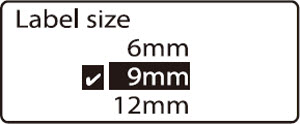
Press or to select 12mm, then press [Enter].
-
This selects the print media size for which the adjustment is to be made.
-
When [Enter] is pressed, the vertical adjustment selection display appears.
When the print media is 4mm I.D. strip or wrap around tape, size selection is skipped.
|

Indicates that the vertical position is at the standard setting (with no adjustment).
|
-
Press two times; Down 0.5mm is displayed.
Press to move the vertical position up. Height can be adjusted up to 0.5 mm upwards or downwards.
|
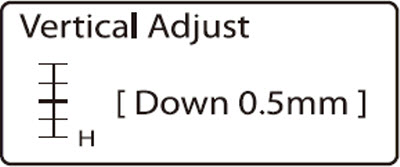
Confirm that the vertical position is now Down 0.5mm.
|
-
Press [Enter].
|
If your product issue was not resolved after following the steps above, or if you require additional help, please create or log in to your Canon Account to see your technical support options.
Or if you still need help, visit our Canon Community by clicking the button below to get answers:

____________________________________________________________________________________________
