You can create custom presets within SmartWorks 5.5 using one of two methods:
1) From the Preview Window
2) Default Preset with Specific File Format
Follow the steps below to create your own custom SmartWorks 5.5 presets.
Solution
From the Preview Window
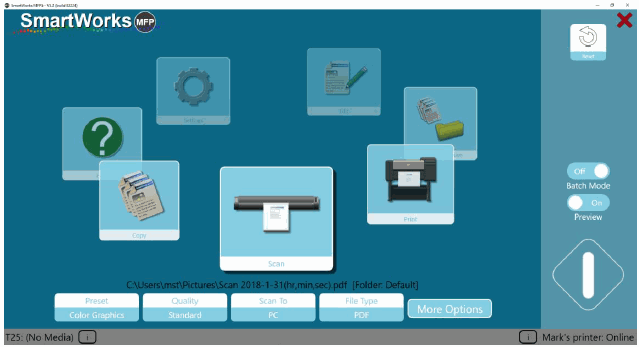
From the home screen, choose "Scan".
Define the scanning parameters, then press the green GO button.
With the scan showing in the Preview Window, make your edits to the scan.
Before choosing the green Save button, select "Save New Preset". Name the preset.
Default Preset with Specific FIle Format
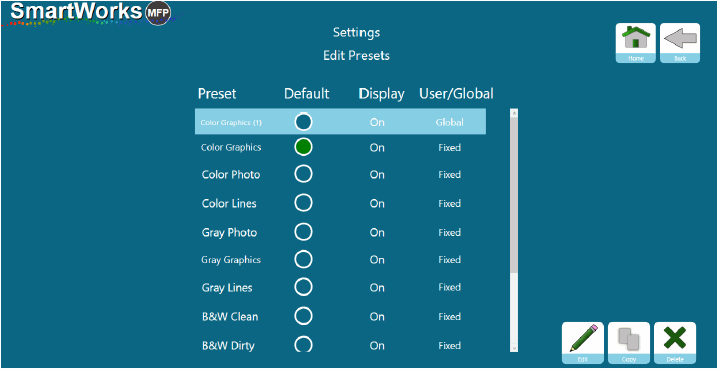
Click "Settings".
Choose "Presets".
Choose "Scan".
Pick the Preset that fits your workflow.
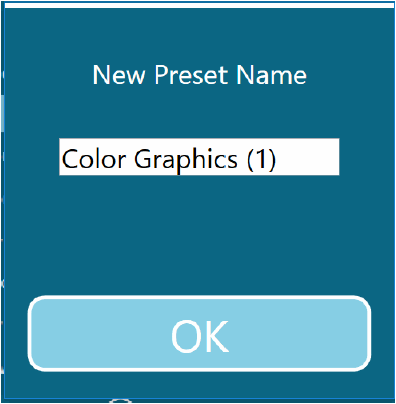
Choose "Copy" (in the lower right corner) and then give your new preset a name.
Choose "Edit" (in the lower right corner).
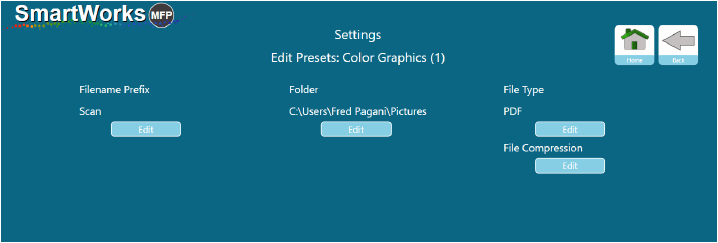
Choose "FIle Settings".
Under File Type, choose your preferred file format, and then choose the "Home" button.
You can now "lock-in" this Preset as the default by:
Choose Settings -> then Presets -> then Scan. Select your default, click the circle under default (the dot should turn Green indicating it is now the default).